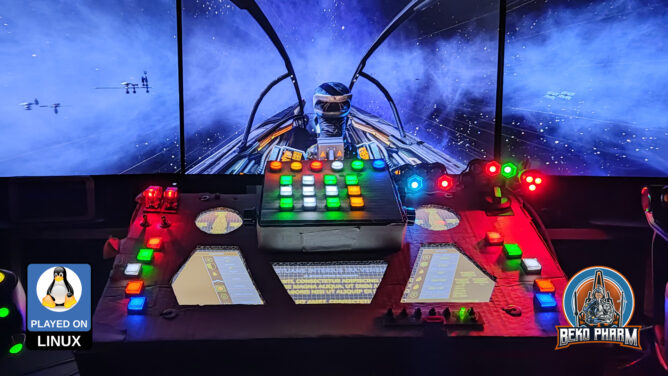
I hacked a mod for X4: Foundations to get ship telemetry and targeting data to my “Primary Buffer Panel” via a socket. This is a demonstration of my simulated cockpit made from cardboard on a budget usually used to play Elite Dangerous now also used for X4: Foundations. This is work in progress.
My DIY cockpit for X4: Foundations (on Linux PC)
In use:
A Linux PC
A DIY Headtracker
A DIY Joystick (My Primary Buffer Panel)
A X52 Pro HOTAS
An AMD RX6700XT
…a lot of plumbing in Node-Red xD
This is loosely based on the Python Pipe Server mod for X4 that is sadly Windows only using Named Pipes. I fixed that for Linux PC by side-loading the library LuaSocket and starting a socket server directly in X4. That’s right, the Python Server is simply not needed now and companion tools may directly connect to the socket. It’s a nice bonus that LuaSocket also allows a UDP or TCP server depending on how it is started. That was some piece of work though and I’m still wrapping things up to publish my code changes. I’m also still looking for testers so if you’re interested get in touch!
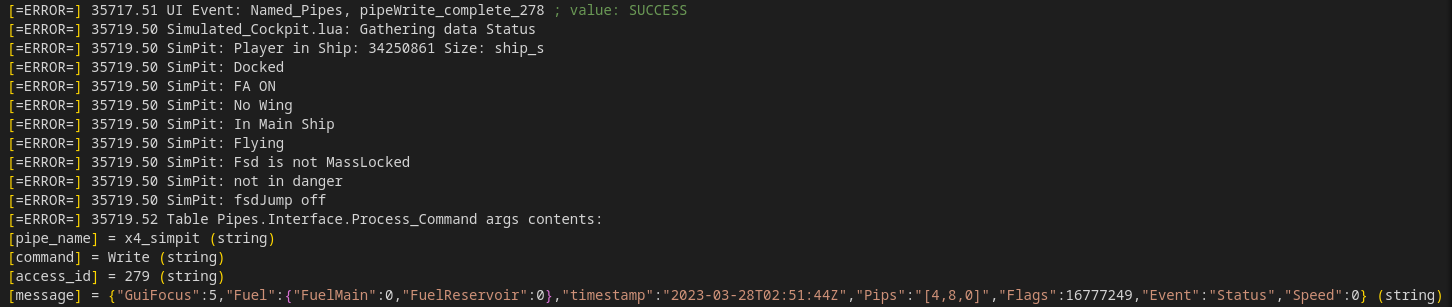
Here are the humble beginnings[1] of a working example to read the ship status of #x4foundations in a format very similar to the Status File of #EliteDangerous
Both games are quite similar and by using a “well established” format it should be possible to use this with existing companion apps – like my own #SimPit
It uses the “Named Pipe API” of “sn_mod_support_apis” – on #Linux PC 😁 This was not supported by this MOD so far but I made it work.
Well, at least on my machine 🤓
And yes, the pipe server works with some minor adjustments for other _existing_ apps as well. Here is a demo of #X4ExternalApp with a data feed directly from X4: Foundations – it does not use the #X4PythonPipeServer though, since that is not really needed, so I had to make some small adjustments in it’s connection routine but that was like 2 lines of code 🤷
This is heavily distilled early gameplay of X4: Foundations, where I started another play-through slowly expanding my little empire with trade, side missions, station building, border patrol (loosing the the “Misfit”, my good old starter-ship), a surprise Xenon attack on a station where I was just for shopping and eventually good old fashioned piracy with unexpected guest appearance of some Kha’ak trying to crash the party.
01:11 Setting up trade routes aboard The Law Abiding Windrunner 02:20 Switching over to the Misfit 03:05 Witnessing the death of a trading station (while escorting my own ships to safety) 03:50 Patrolling for money (and looting stuff) 05:48 Repairing satellites (in EVA suit) 07:32 Docking at the impressive Teladi ring station for shopping 08:45 Surprise attack on the ring station by a Xenon K (and it’s demise) 14:32 Extending my own station and buying more mining ships 11:26 Switching over to my frigate for border patrol (lots of pew pew) 14:30 Loosing the Misfit to Kha’ak (and avenging it) 16:07 Going for resupplies and preparing for piracy 16:39 Ambushing the prey, a fat water freighter looking for a new owner 17:59 Starting the boarding operation 18:40 Realizing I need more support to deal with surprises 18:58 Stumbling over mentioned surprises, Kha’ak trying to crash the party 19:51 Sending more boarders as the first group fails 20:22 Finally going home with the price, a “slightly banged up” L water freighter
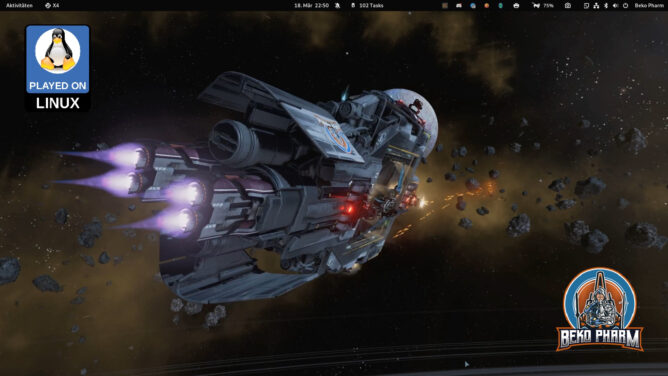
I’m wondering how to present ultra wide screenshots for a while now, because most people will not have an ultra wide display at hand or not run their browser in fullscreen on such a device. A scaled down version with retained ratio also just don’t really cut it:
Now what if we could wrap this in some sort of 360° image? This isn’t really 360°, of course but you get the idea. A quick search usually yields JS libs like Pannellum (https://pannellum.org/), which look great for this use-case as well and yes we could also solve this in CSS by using an animation and go for a little camera ride.
What if we could optionally also make use of a gyroscope though? You know, that sensor every mobile phone, tablet and VR device comes along with. So the user could device where to look just by moving the device around?
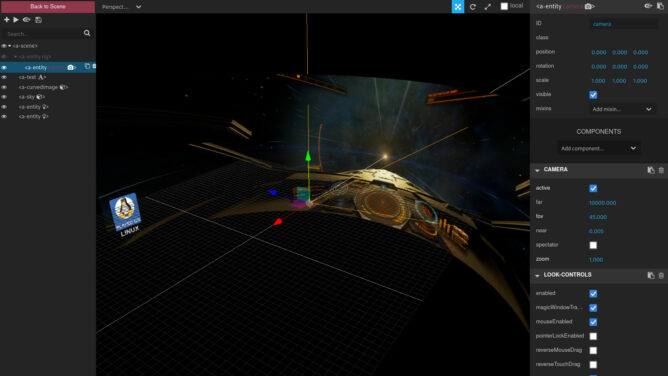
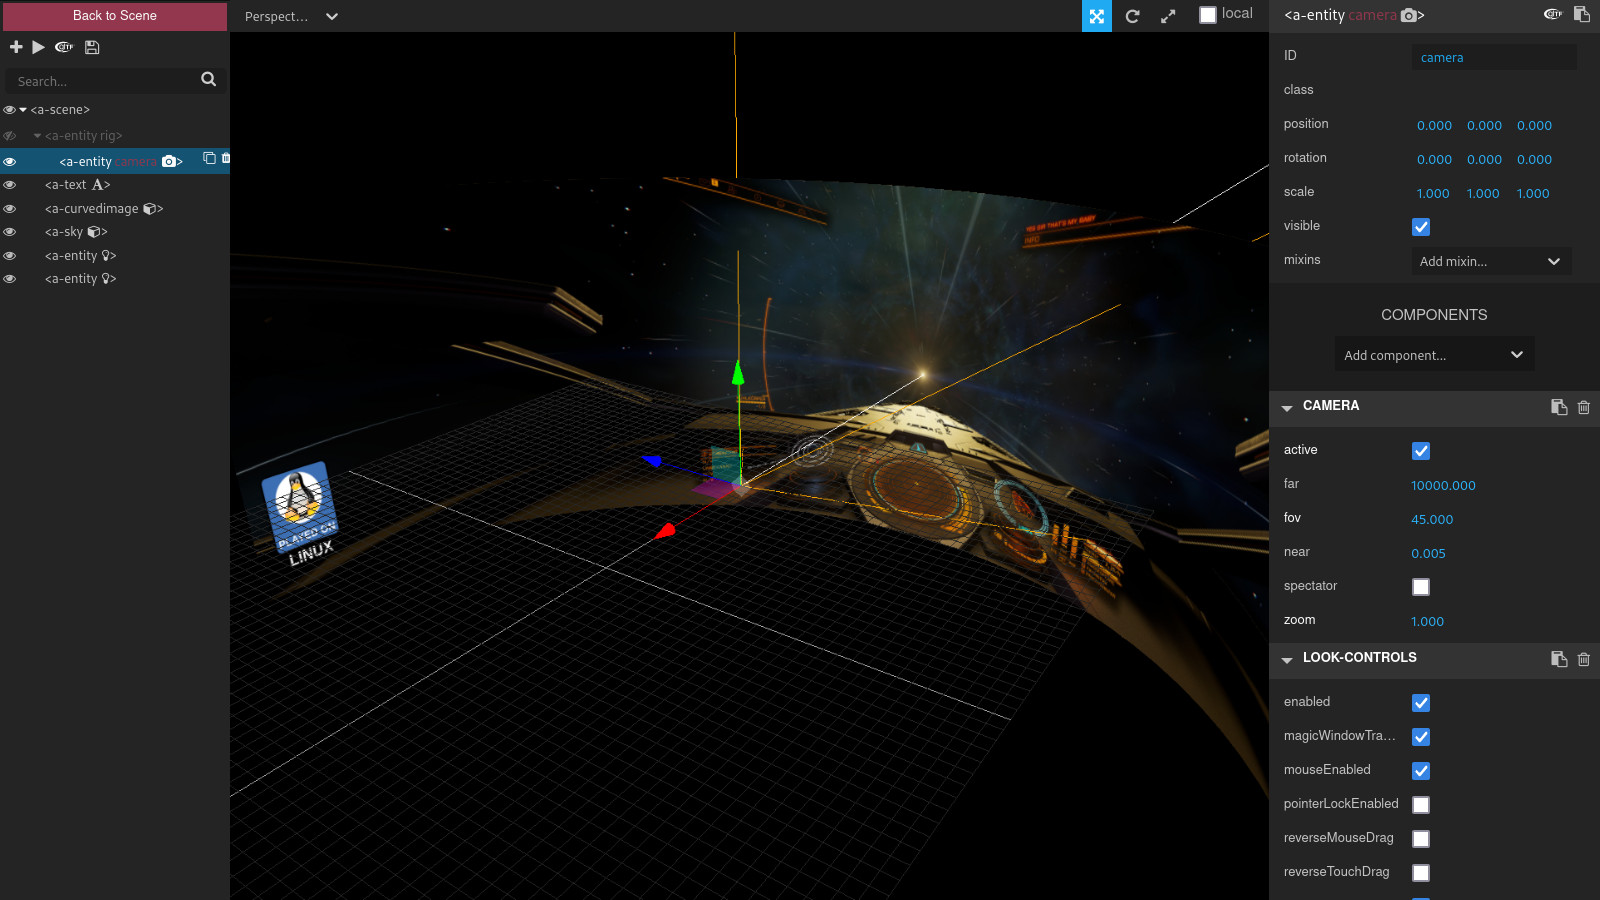
This was when I stumbled over A-Frame (https://aframe.io), which is basically a library for building 3D AR or VR experiences and while I may only scratching it’s surface with my quick tests here it does deliver exactly what I was looking for.
I built demos for various games today and I don’t know how long I’ll host the files here but they all follow the very same code pattern that I’ll add in the end:
Please be aware that I’m loading a ~5mb blob of JS code directly from A-Frame in the demos so don’t check them out if that is a problem for you. The image asset adds another whopping MB so please be patient. The best experience is on a mobile phone where you should be able to look around by moving the phone left and right. It works on a desktop browser too where the mouse can be used to look around.
Feel free to copy this snippet and play around with it. Just keep in mind that you have to use _local_ assets too or they won’t show up. Make sure to read the documentation too and play with the built in inspector opened with the key combination ctrl + alt + i.
And yes I’ll happily take a CSS only variant too but I really doubt that’s possible without loosing features like gyroscope data usage.
I didn’t use my Steam Link for some time and was kinda surprised by the new UI in Big Picture Mode. And also very unhappy because it was a stutter feast with buffer artefacts all over the place. Once I could get a game running it was butter though so something was up with the streaming mode of the UI. I’ve no really an idea what’s going on there but this was always a problematic thing with my AMD GPU under Gnome using Wayland when it comes to streaming and remote play. I ticked off the basics and disabled the blocklist for unknown GPUs, made sure that AMD hardware acceleration was enabled for the host in the Big Picture setting and even tried to launch it with the old big picture mode but no dice:
steam pipewire -pipewire-dmabuf -oldbigpicture
After reading around a lot on the bugtracker at https://github.com/ValveSoftware I eventually learned that the hardware acceleration for remote play is usually done with VAAPI and that there is debug information in ~/.local/share/Steam/logs/streaming_log.txt and sure enough here it was:
ffmpeg verbose: libva: VA-API version 1.16.0
ffmpeg verbose: libva: User environment variable requested driver 'radeonsi'
ffmpeg verbose: libva: Trying to open /usr/lib/dri/radeonsi_drv_video.so
ffmpeg verbose: libva: Found init function __vaDriverInit_1_16
ffmpeg verbose: libva: va_openDriver() returns 0
ffmpeg verbose: Initialised VAAPI connection: version 1.16
ffmpeg verbose: VAAPI driver: Mesa Gallium driver 22.3.5 for AMD Radeon RX 6700 XT (navi22, LLVM 15.0.7, DRM 3.49, 6.1.11-200.fc37.x86_64).
ffmpeg verbose: Driver not found in known nonstandard list, using standard behaviour.
ffmpeg verbose: Input surface format is nv12.
ffmpeg verbose: Compatible profile VAProfileH264Main (6) is not supported by driver.
ffmpeg error: No usable encoding profile found.
So the profile was missing and a check with vainfo confirmed this:
This was the moment when my brain did pull off one of it’s tricks and remembered me about the story about Fedora _disabling_ hardware acceleration for H264 due to proprietary concerns some months ago and yes I did recently upgrade to Fedora 37 🤯
Thankfully the community stepped in already and fixed mesa drivers are only one dnf install away on rpmfusion, so there is no need to recompile this with h264 support (and some others) manually. There is a caveat though because the swap command would happily delete the needed 32bit versions for Steam and only install the 64bit version of the swapped package. Keeping this in mind the required commands are basically this (and if this breaks your system I do not want to hear about it – use your brain!):
And sure enough the Steam Link started working again. Somewhat. Now I have issues that some games don’t get captured or loose focus eventually but that I’ll debug another day 😩
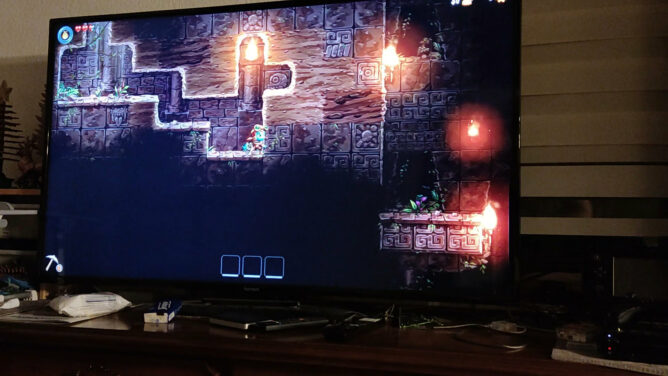
Video: Starting Steamworld Dig 2 and showing system overview
Linux Gaming in 2023 is easy. Remote Play… not so much.
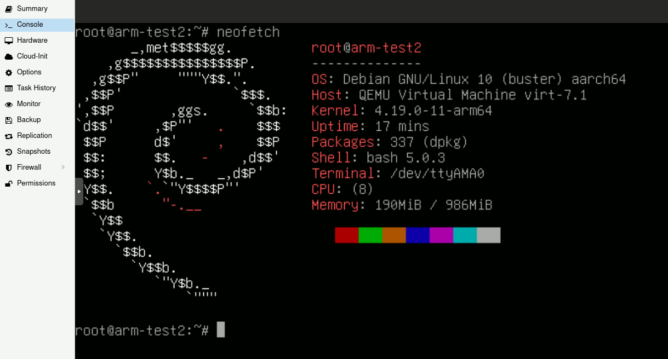
Some time ago I needed a virtual #ARM machine and while I’m not entirely sure any more why that was I did seem to have an inspirational moment and made a template of this. Here is what the #qemu config for #Proxmox _may_ look like:
It makes sense to install the package cloud-init to some stuff can be set from outside of the machine.
…and yes, it’s just as slow as expected from an ARM 🤓
I’m also not entirely sure if this is really officially featured by Proxmox (just like btrfs 🤷) but the machine was doing it’s job without an issue for years and I did just replay the template on VE 7.4 so I guess it’s fine 🤷
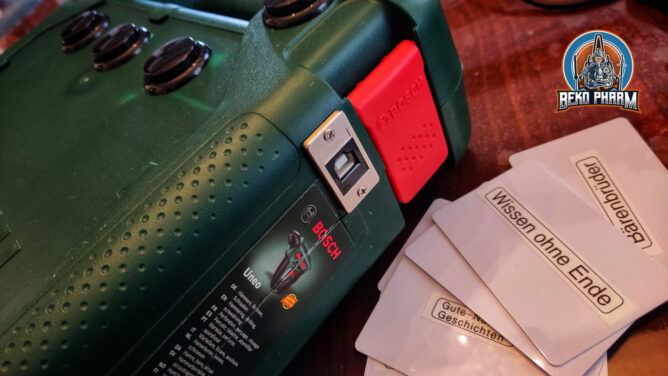
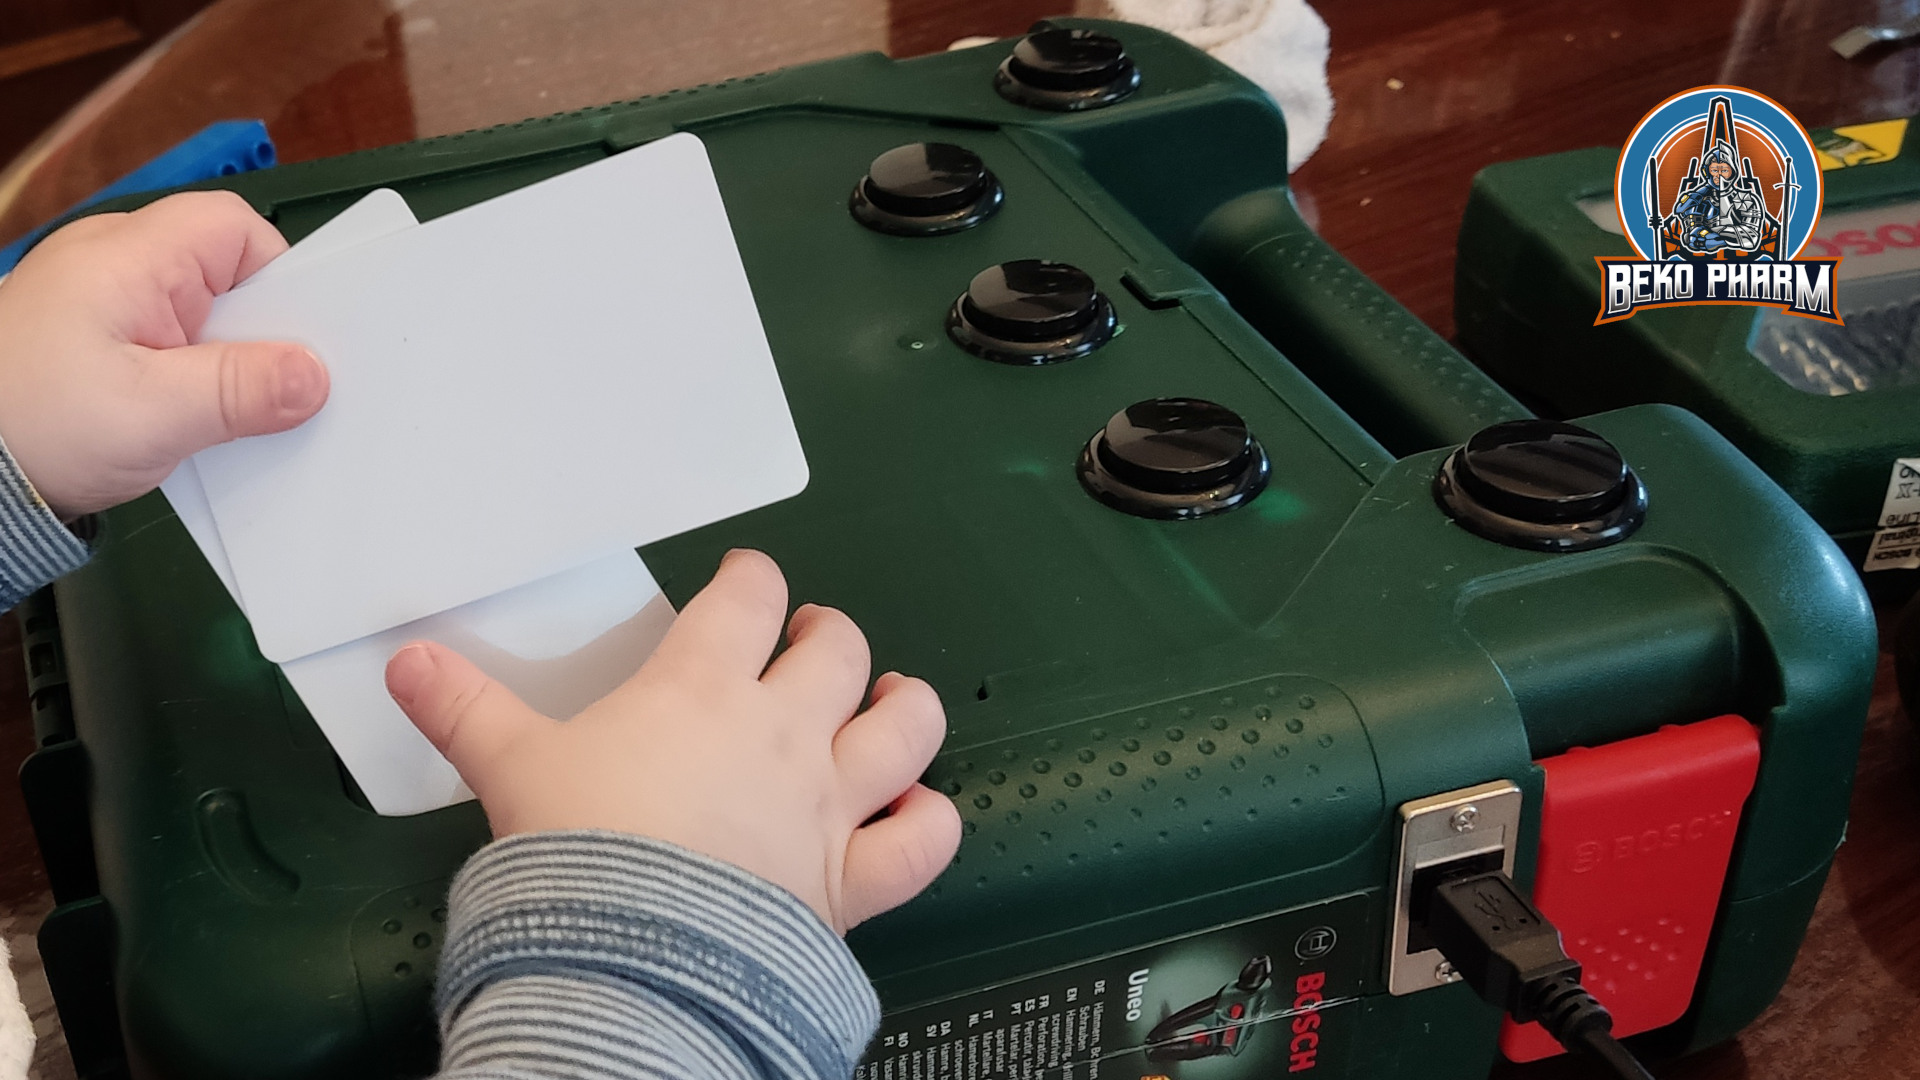
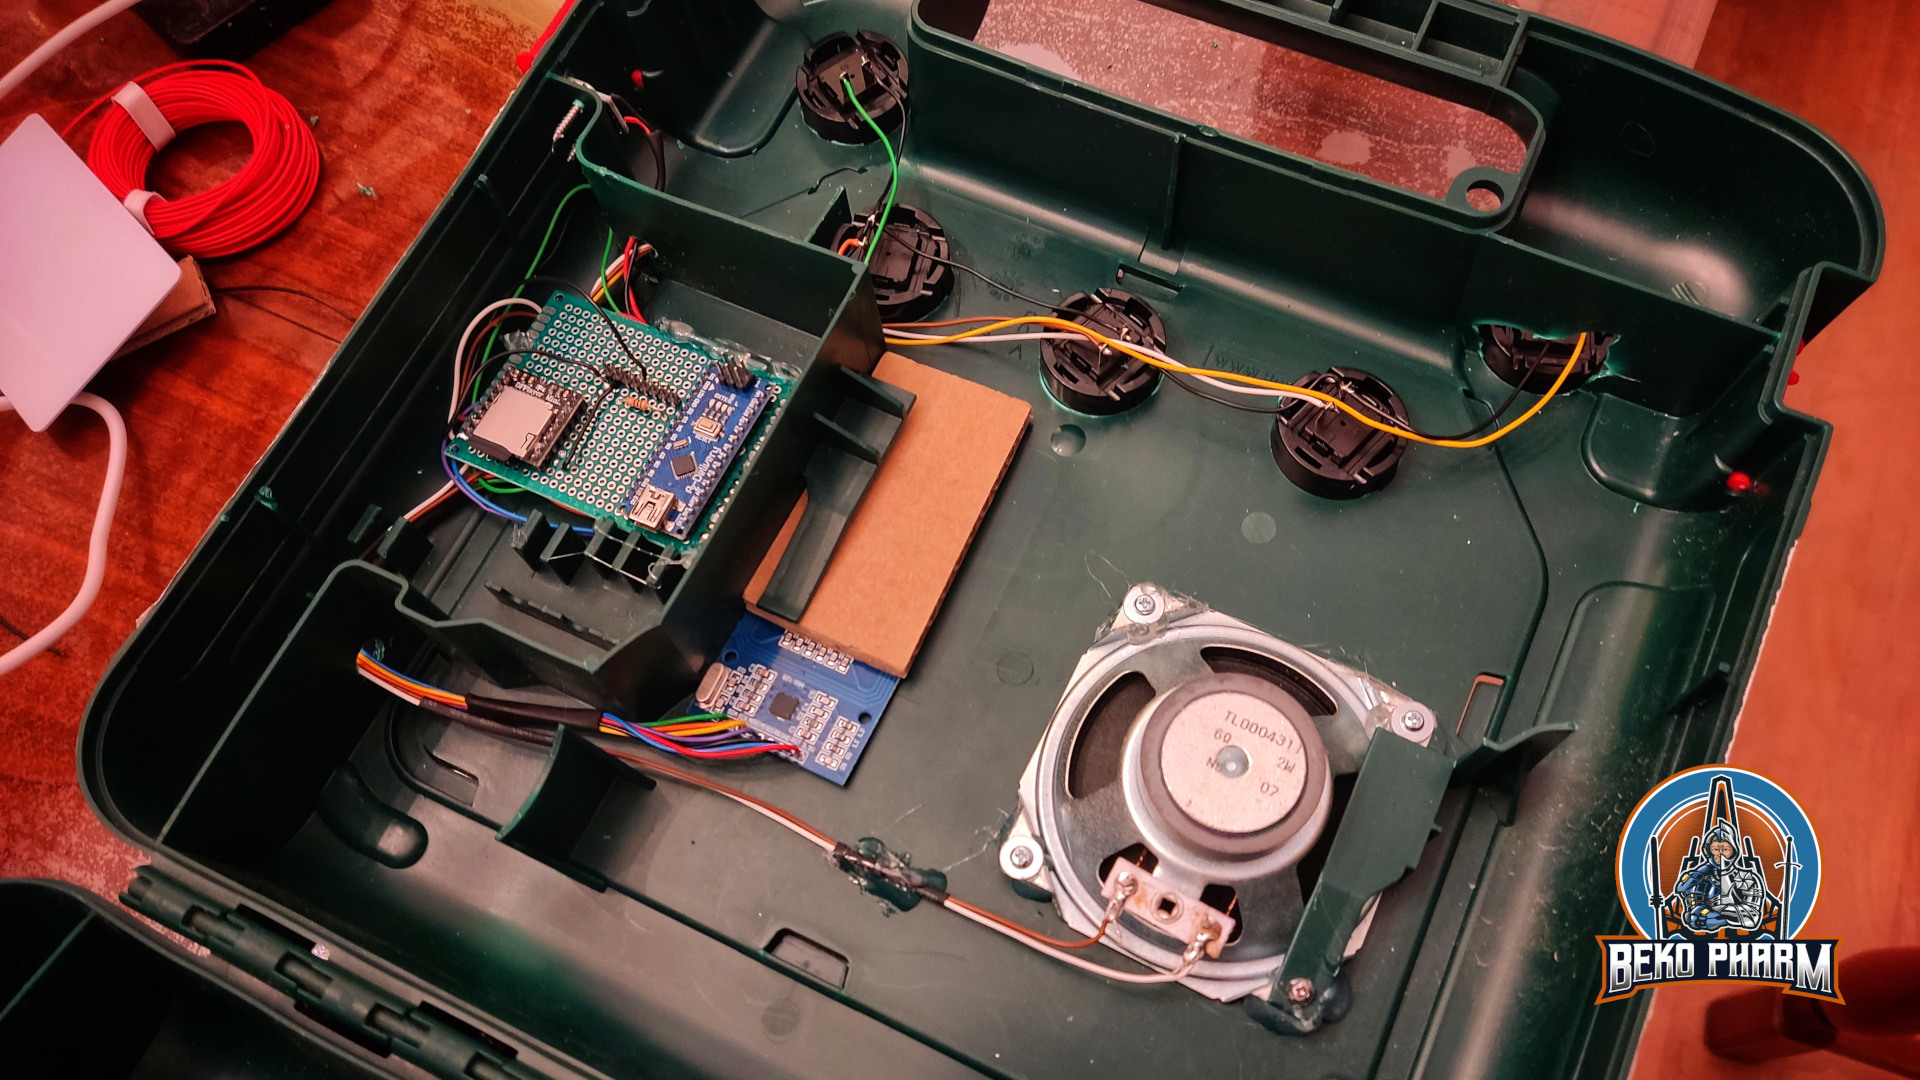
This is a project I kept postponing for years but when I eventually got my hands on all the required parts I had no longer an excuse and eventually built the first. It’s a portable music player for children that does not require internet access. It features selections of pre-installed music or audio books via RFID cards, that may come in all shapes and may even be integrated in toys. There are also 3 to 5 playback controls in the form of huge arcade buttons. Ideal especially for our middle one, who has to endure stationary stay for most of the week in a hospital.
And while this box is still missing proper decorations and button decals it’s full functional and portable. Also hey, kids ain’t stupid – they find the proper button without decal too. Even the baby found out where to put the RFID cards for the music to change 😉
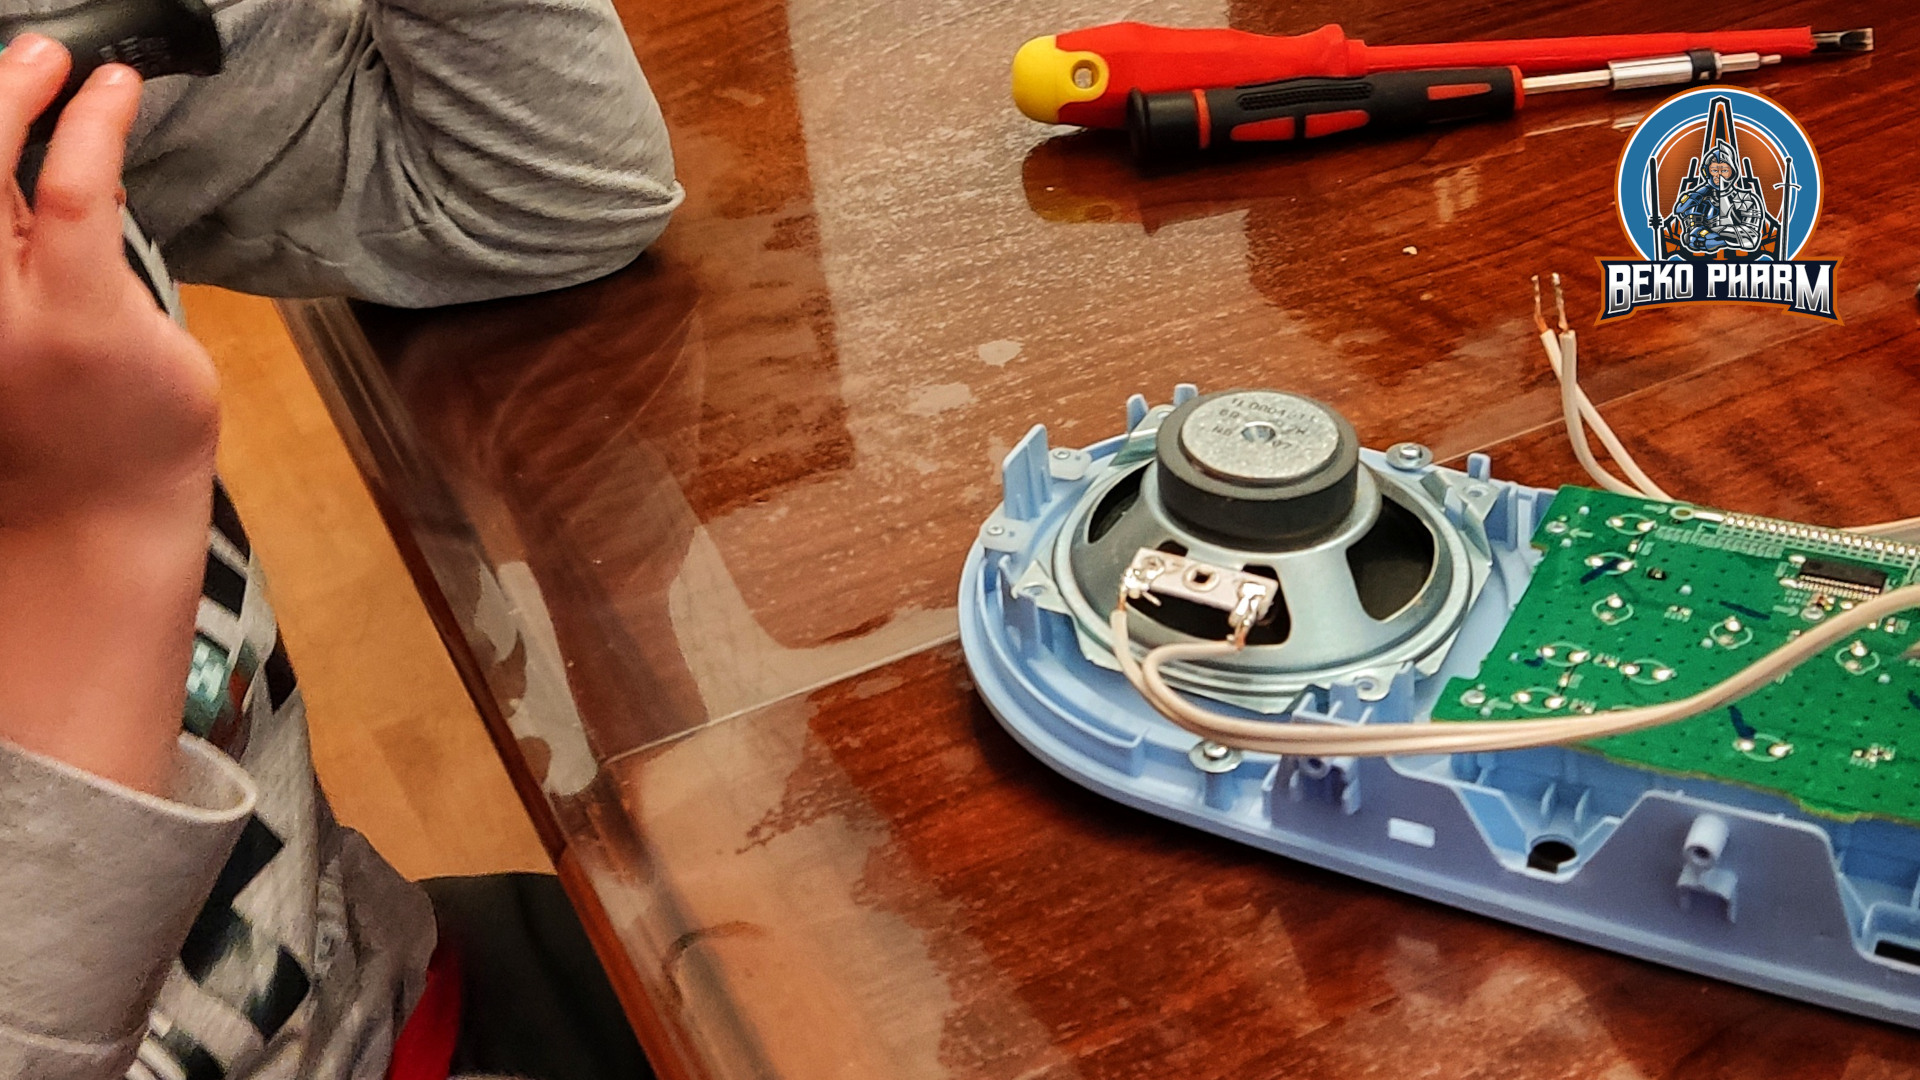
The leg work for this was done by @xfjx@chaos.social and the project is described in great detail at https://www.voss.earth/tonuino/ – I did however not order the offered PCB and just soldered everything to a generic maker board to keep the costs down. Just like the arcade buttons, that I had left over from another project, I also have a bunch of such boards. The speaker was salvaged from an old entertainment system that broke down long ago and the box… ah well I guess it speaks for itself. Can’t say I was happy with the drill but the box was just perfect for our purpose.
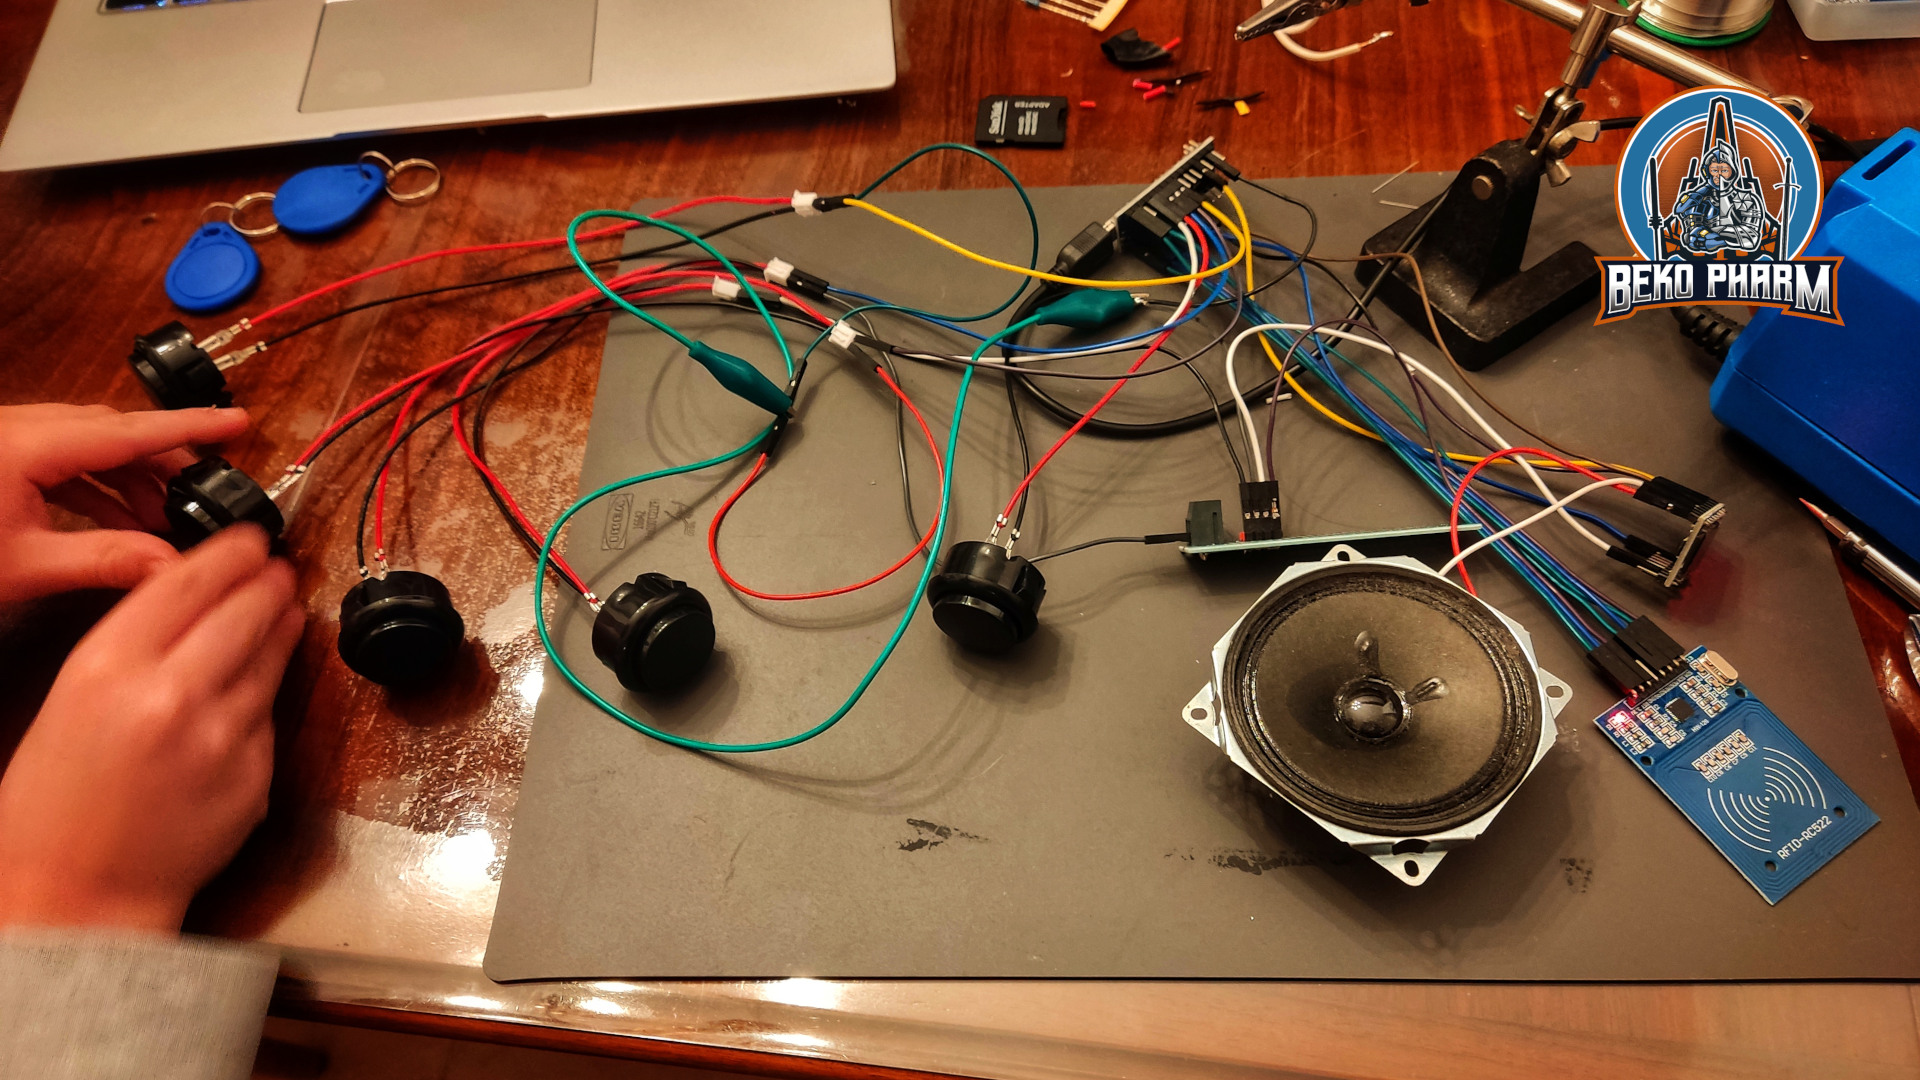
First we built a test setup after salvaging all the needed hardware. The Ardunio parts are off the shelf, nothing special here. I had to improvise a little on the wiring due to missing wires. I opted for the older branch that just needs Arduino Studio, to install the software itself. There is a more modern version using platformIO but something with that does not like my vscode and I never managed to successfully compile it.
I eventually got the idea how the RFID cards worked and could be trained to the system and also did some tests like it’s maximum power usage. It has a passive speaker and cranked up to max it would consume 0.09A max – and on regular volume it was sitting at comfortable ~0.06A. Which is pretty fine. This would run for days with a decent power bank that could be dropped right into the box later if no external PSU is used.
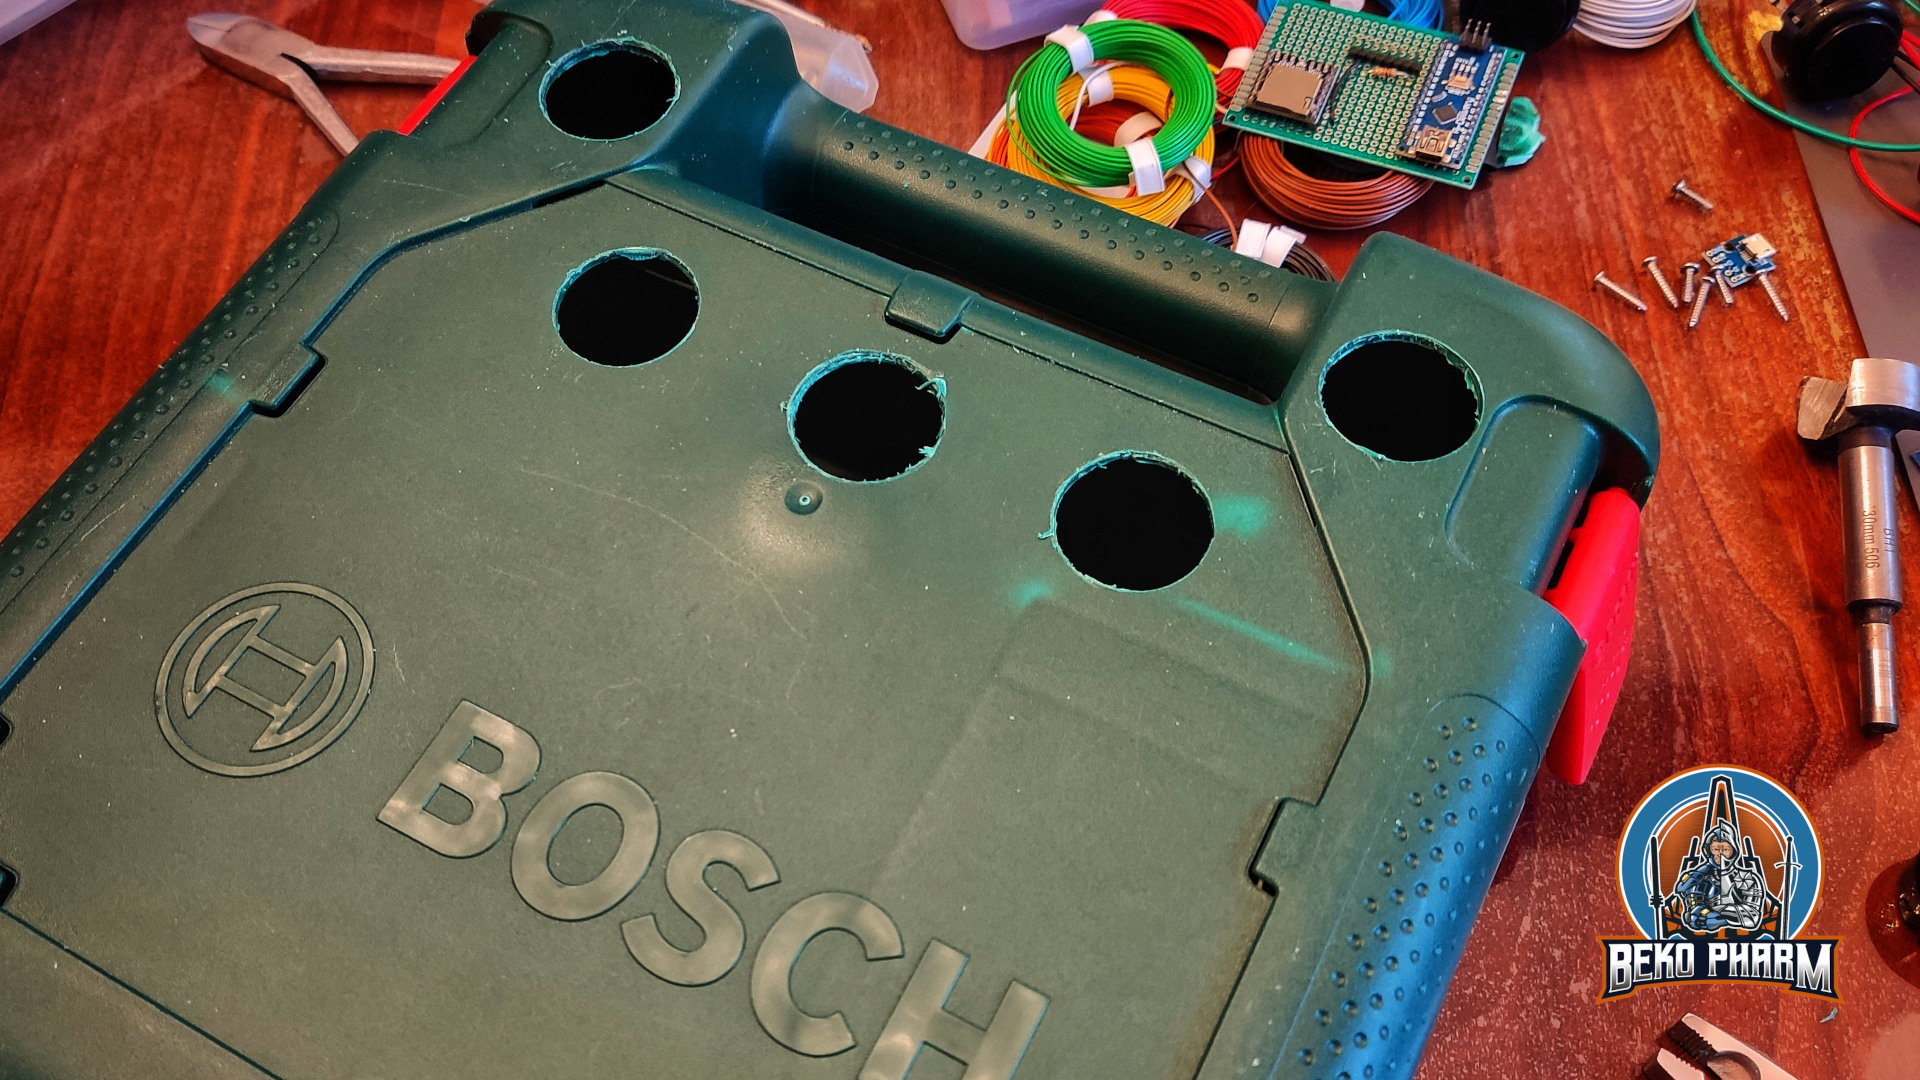
Next was preparing the box. Luckily I had just the right drill for the buttons but making the holes was a pain in the neck. This had to be done very slow because the hard plastic would easily rip and splinter. I opted for a very massive USB connector in the end because the microUSB one used first broke on the 3rd use already. That was probably a little bit too cheap. The replacement is way more sturdy, which is kinda what I want for the children anyway. Everything the box needs to operate, like an old phone charger, a very long USB cable, and the RFID cards do fit inside the box for transport.
So one of the questions left was what to put on it’s internal SD card. Some of their favourite music, of course. What else though? Easy. We have a public audio centre at https://www.ardaudiothek.de/ offering a lot of stories and podcasts even for children. Downloading them one by one manually was cumbersome though. Luckily @1337core@chaos.social was just releasing his first version of Audiothek Downloader at https://github.com/Leetcore/audiothek-downloader so I had more gigabytes than the SD card could manage in minutes. The only issue was that the SD card needs the audio files enumerated so I did some quick scripting to rename the downloaded files. I had also no use for the downloaded cover images. It’s not beautiful but it got the job done:
#!/bin/bash

folder=$1
oldpwd=`pwd`

if [[ -z $folder ]]; then
    echo "Missig paramater id"
    exit
fi

folder="output/${folder}"

if [[ ! -d ${folder} ]]; then
    echo "Missig folder ${folder}"
    exit
fi

cd $folder
shopt -s extglob
for filename in +([0-9])_*.*; do
    [ -e "${filename}" ] || continue
    oldfile=${filename}
    # remove including the first underscore to get the index
    index=${filename%%_*}
    index=${index##+(0)}

    # pad the number with zeros
    newfile=`printf %03d ${index}`
    # combine new index with old filename, remove up and including first underscore
    newfile=${newfile}_${filename#*_}
    if [[ ! -f ${newfile} ]]; then
        mv -v "${oldfile}" "${newfile}"
    fi
done

declare -i n=1
declare -i i=1

for filename in *.mp3; do
    [ -e "$filename" ] || continue

    target_dir=`printf %02d ${i}`
    if [[ ! -d ${target_dir} ]]; then
        mkdir ${target_dir}
    fi

    target_file=`printf %03d ${n}`

    if [[ ! -f "${target_dir}/${target_file}" ]]; then
        mv -v "${filename}" "${target_dir}/${target_file}.mp3"
    fi
    n+=1

    if (( n > 255 )); then
        n=1
        i+=1
    fi

done

cd $oldpwd
exit 0
This goes into e.g. to-tonUINO.sh into the root folder of the Audiothek Downloader where it can be executed after downloading a category. Like this for example:
The resulting folder|s can be renamed, depending on what is already on the SD card, and moved to the SD card. It also makes sense to set the RFID card to audiobook mode so the TonUINO saves the position for the listener and does not start at the beginning again.
Now it’s up to the children to do some decorations. Our oldest wants her version built into a box that looks like a book. Hope we can get that one done soon too.
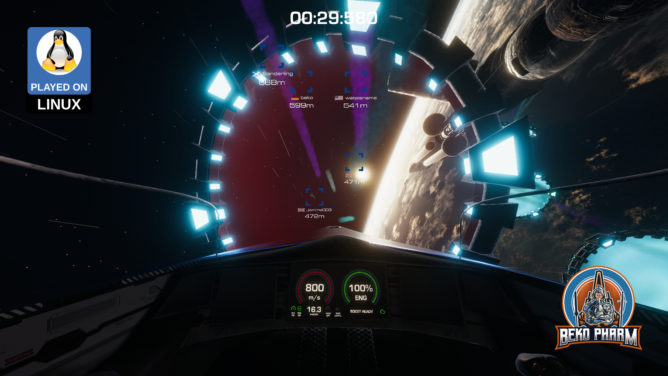
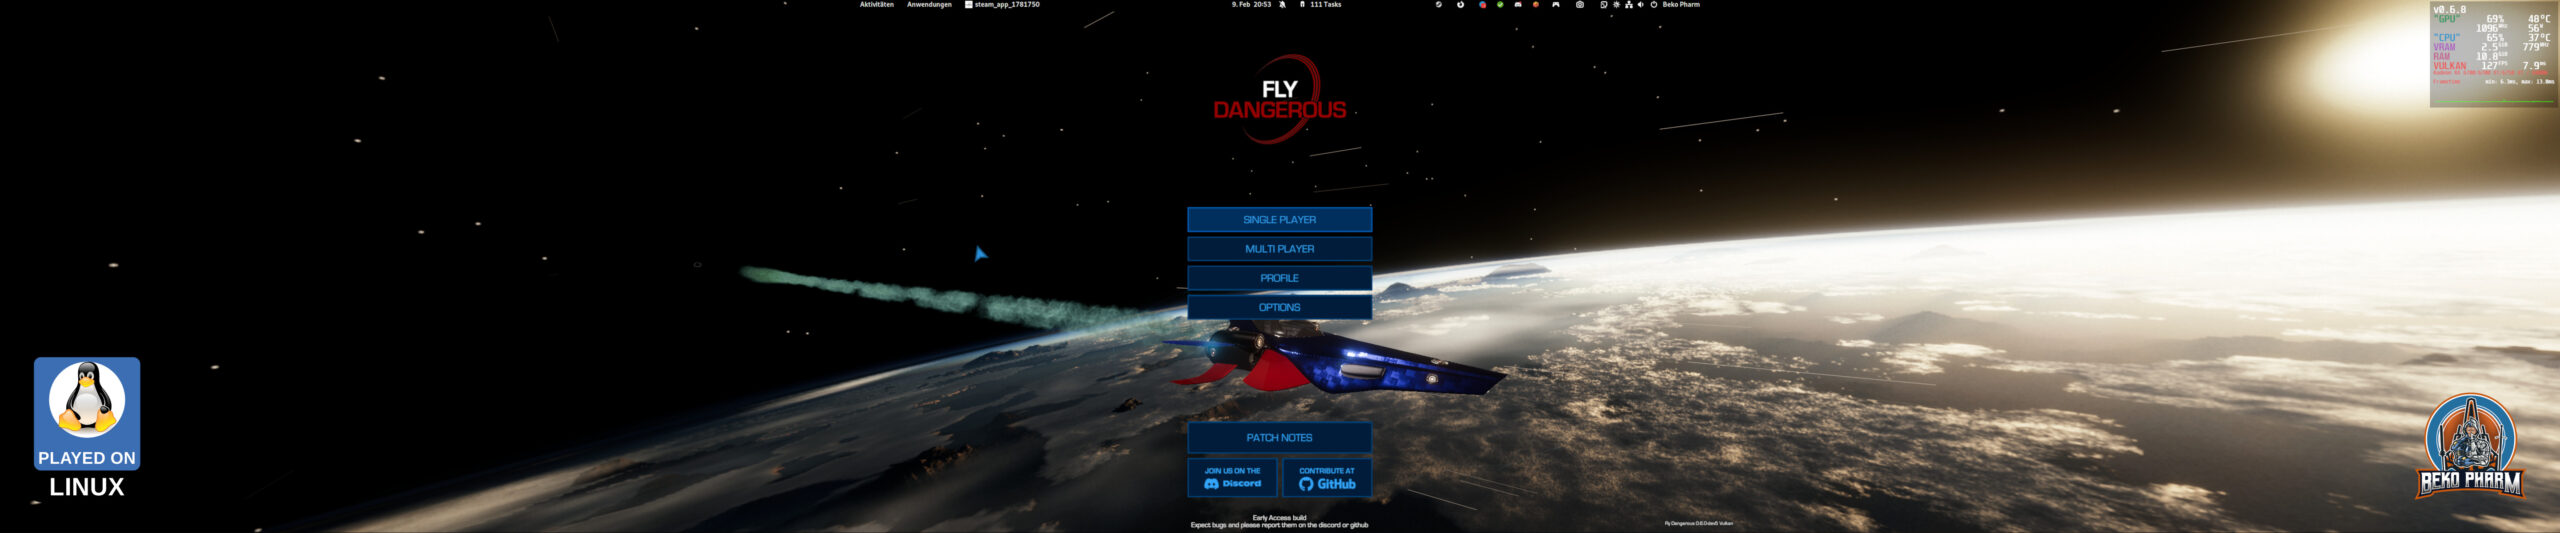
I usually play #FlyDangerous on Linux PC. I switched to Proton because I was eager to see some upcoming changes, like #headtracker support, on the public_beta branch. And while this works[1] I was once more flabbergasted how complicated it is to set my desired display resolution of 5760×1200. I’m using a multihead setup with several displays and as usual the game engine would not let me _simply_ set that. Even in windowed mode (I mean I get that this won’t work with fullscreen).
There are several ways to work around this, especially with Proton, but I was looking for the prefs file I know from Linux. I found it in the end in the file compatdata/1781750/pfx/user.reg (that’s like the Windows registry but as plain file read by Wine) where the values are stored as dword under [Software\\StarGoat\\FlyDangerous]. In hex.
"Screenmanager Resolution Height_h2627697771"=dword:000004b0
"Screenmanager Resolution Width_h182942802"=dword:00001680
"Screenmanager Resolution Use Native_h1405027254"=dword:00000000
So 0780 and 04b0 are in the end 5760 and 1200. And sure enough, on the next game start I get _my_ desired resolution:
Sadly when I change settings in the game this gets overwritten again – so keep a backup around and drop it in again. This may even be added to a script – let’s see how long until this gets on my nerves and I automate that.
For the interested: This is how the same thing looks on the native version in the file ~/.config/unity3d/StarGoat/FlyDangerous/prefs
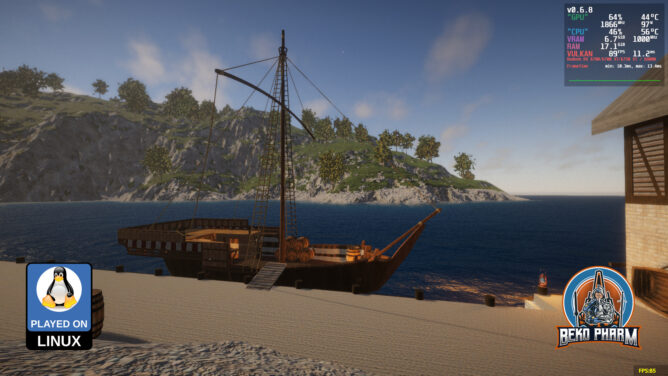
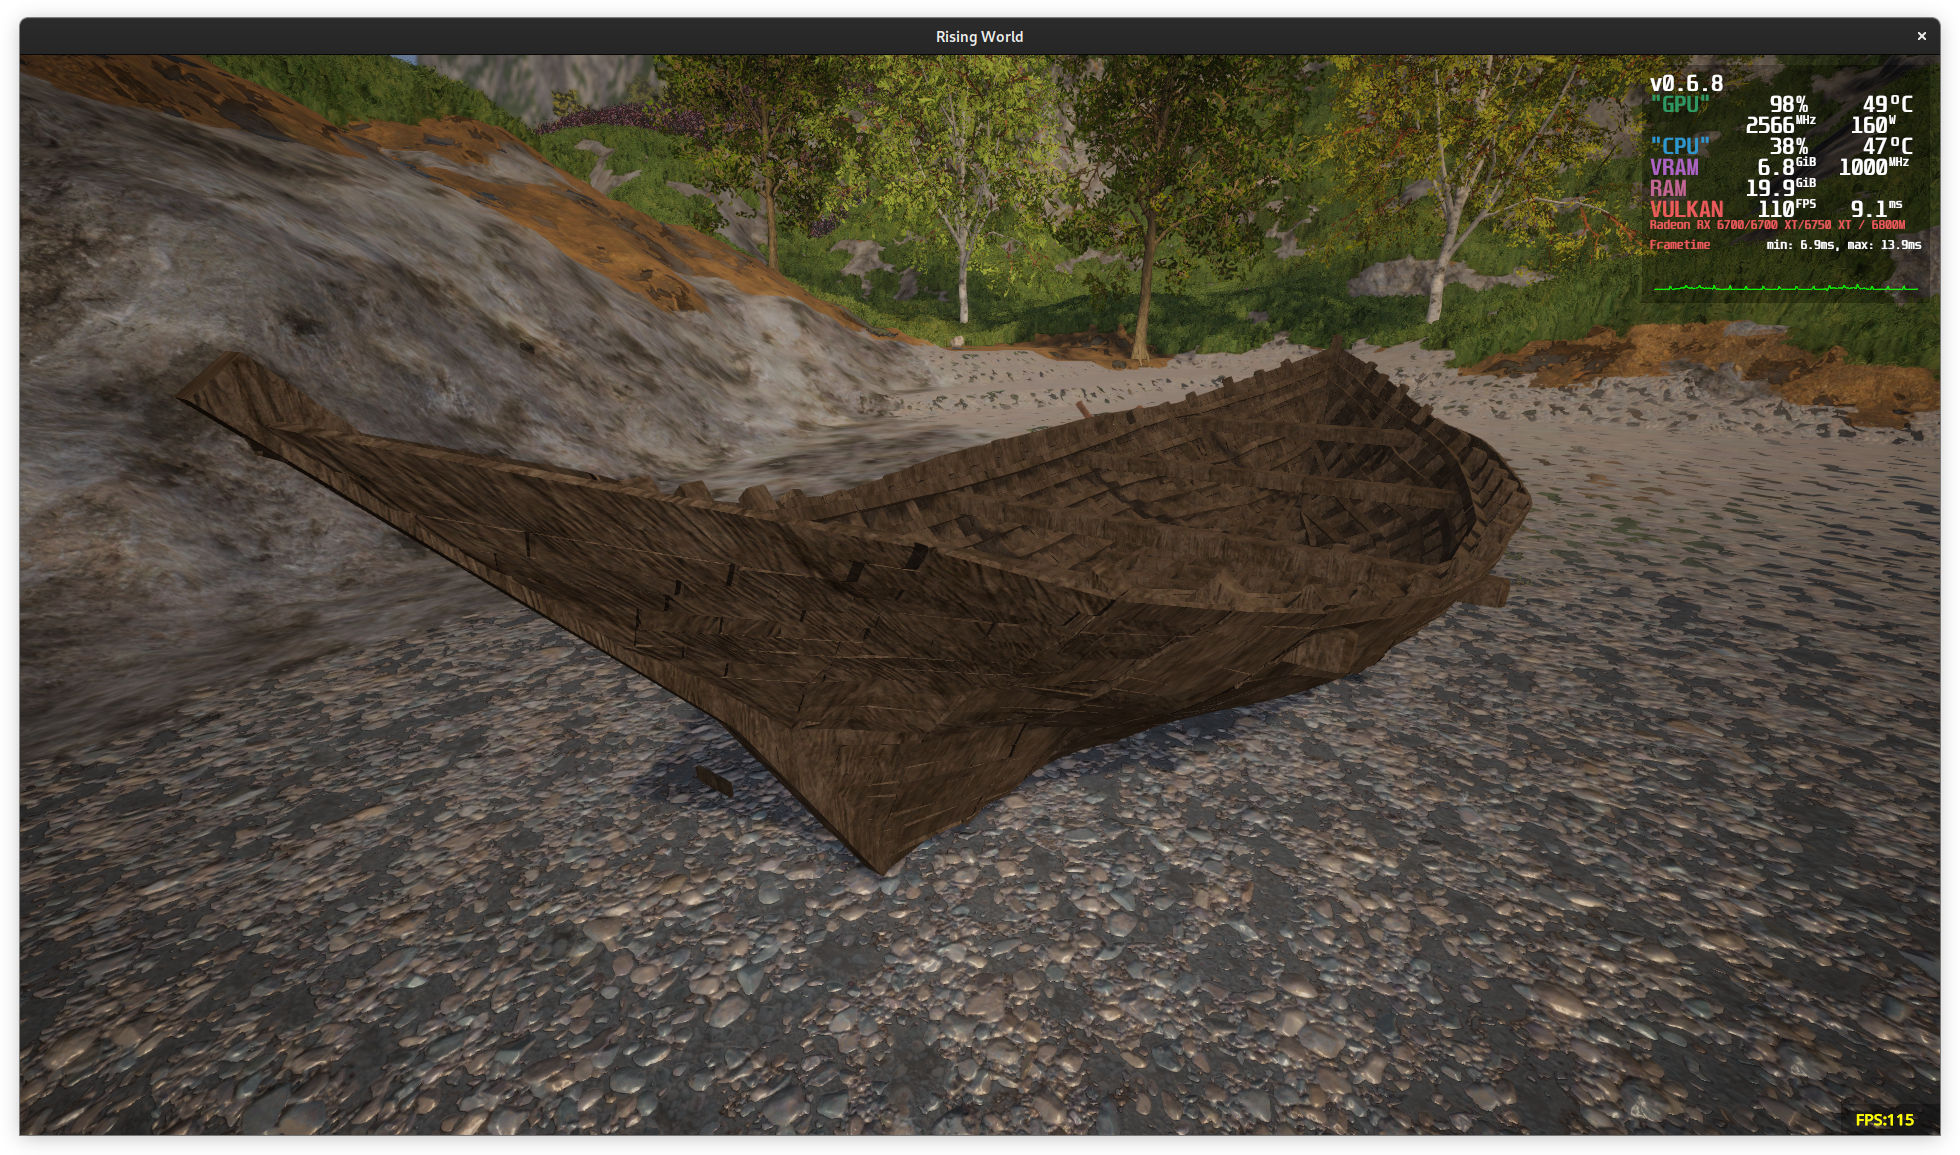
Some weeks ago I started making a #cog ship for #RisingWorld based on NZ-43 (14C) and while I was happy with the basic result it helped me mostly to get an understanding how such ships were made.
This is a very specific ship type that was widely used from the 12th century on for trade via the sea. It was between 15 to 25 meters long, had one square sail and was crewed by approximate 12 people that worked in shifts. Unlike other sailing ships it was very reliant on wind direction but it’s flat bottom permitted it to be beached without taking damage so it could be unloaded everywhere e.g. during low tide. The aftercastle on it’s stern deck makes for a very distinct impression and can be recognized from many period depictions of ships. Several full sized replica have been built to this date.
The “Bremen Cog” is the best preserved example of this ship type. It’s wreck from ~1380 was discovered in the Weser in 1962. It took almost 40 years until it could be presented to the public. It’s my understanding that the conservation techniques applied had to be developed first. It’s on display in the German Maritime Museum and the cog apparently played a huge role in the founding of the museum itself: https://www.dsm.museum/en/exhibition/exhibitions/bremen-cog
The museum is located in 27568 Bremerhaven / Germany (and closed during the wintertime). No idea when I’ll get the chance to visit this but the museum does also foster a YouTube channel and one of the most recent videos up on their channel is a drone flight around and through the Bremen Cog made by Dennis Vogt so make sure to check this out: https://www.youtube.com/watch?v=KjYigiyF014
So why did I take this effort on me to recreate this famous ship type once more in a game? Curiosity and hyper focus I guess. I can tell you it was cumbersome because the game does not support bend objects so everything is basically a block. It does also not feature tools for e.g. Bézier curves or something. I spent quite some hours trying to get the hull and proportions right and while the superstructures are kinda opinionated I’m really happy with the end result. I also saved a lot on the ropes and while I know in theory how this should work and look it’s just _too much work_ to get this right in the game. So I only went with the most important running ropes. I hope any navigators reading this can forgive me 😉
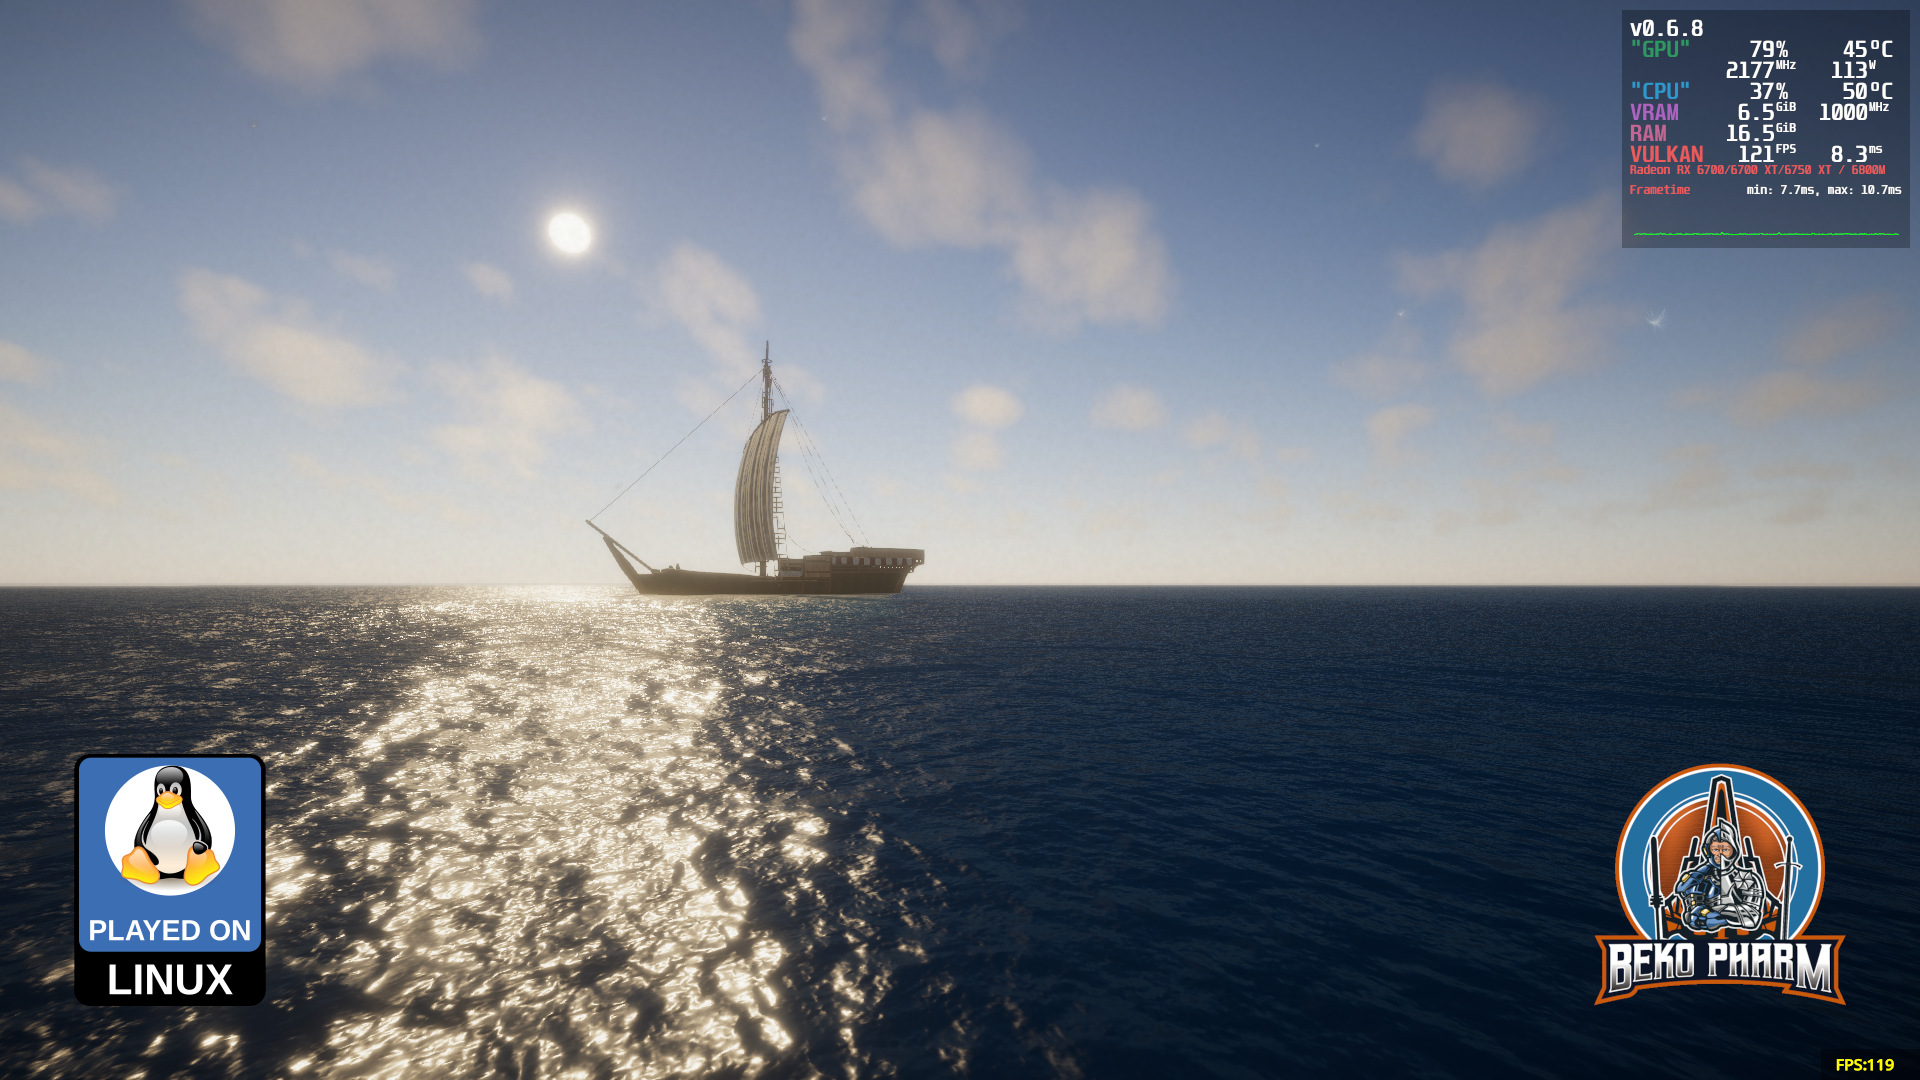
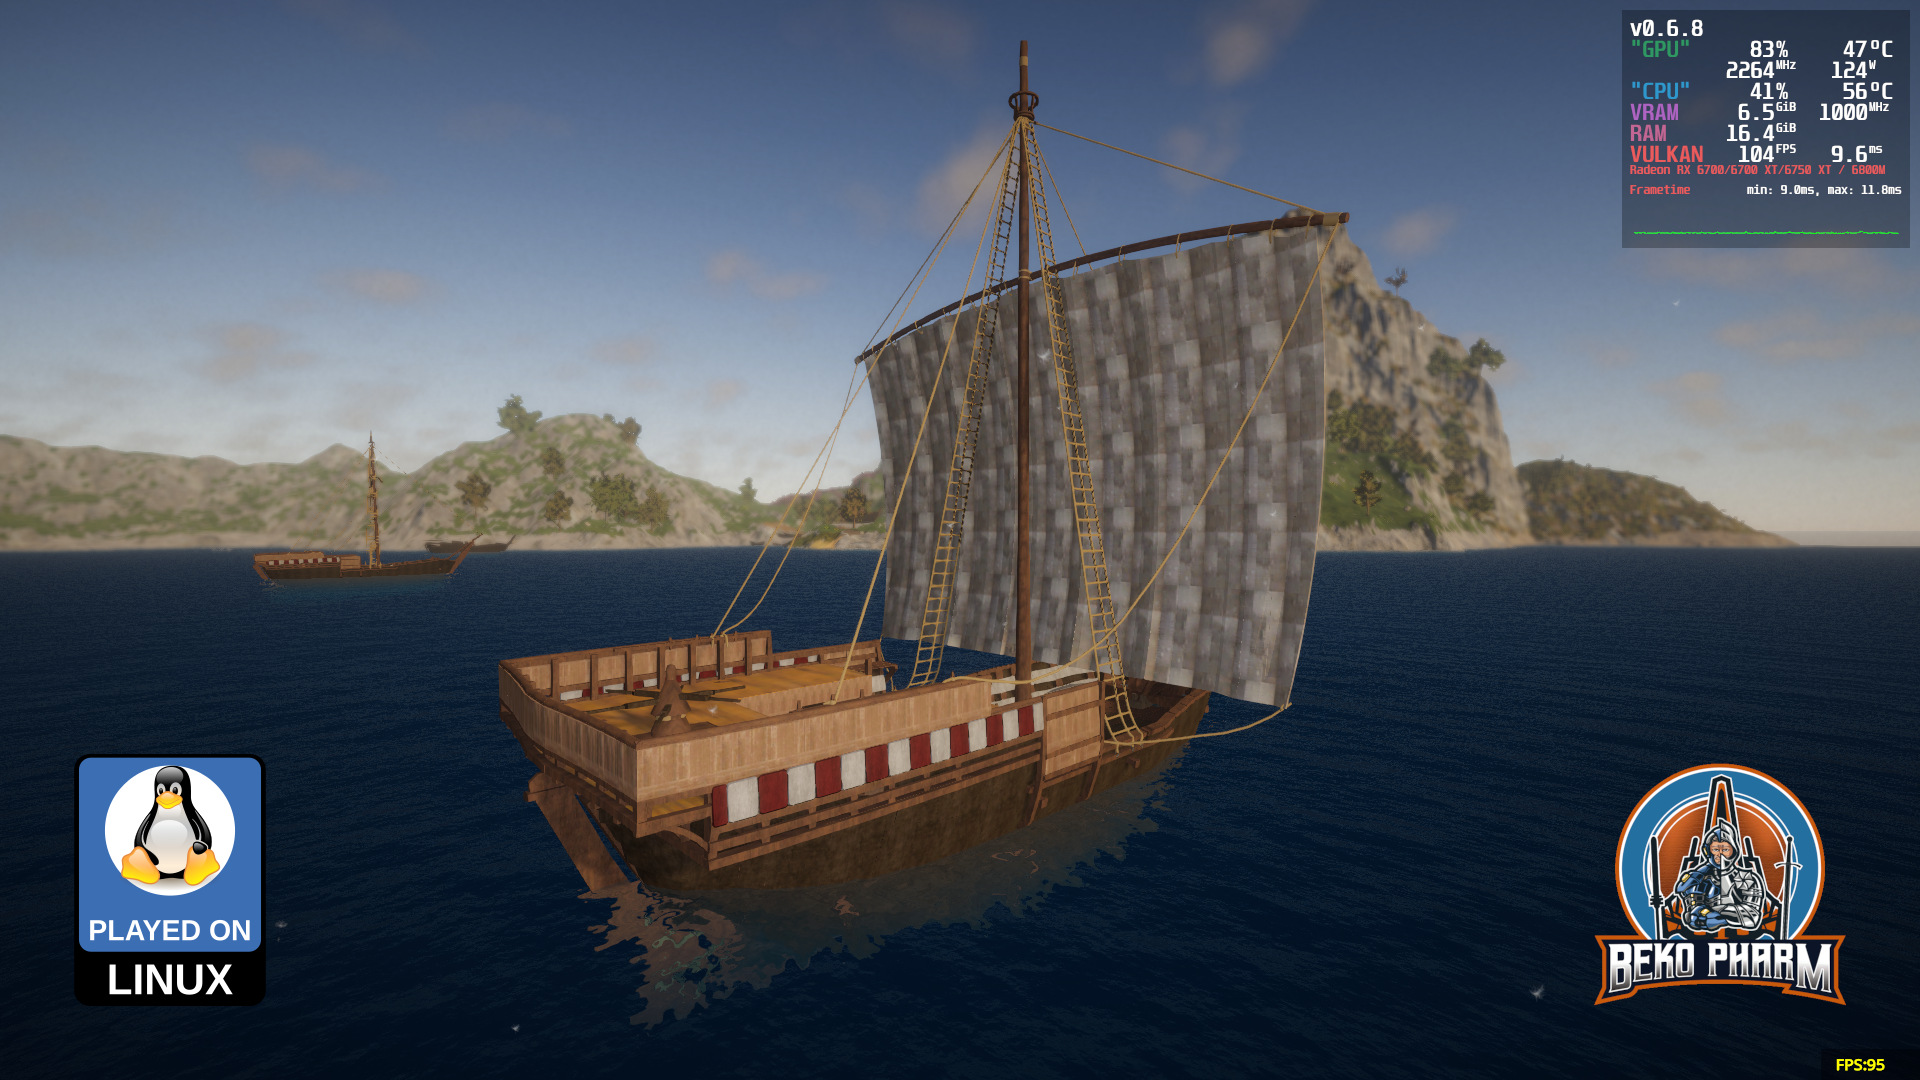
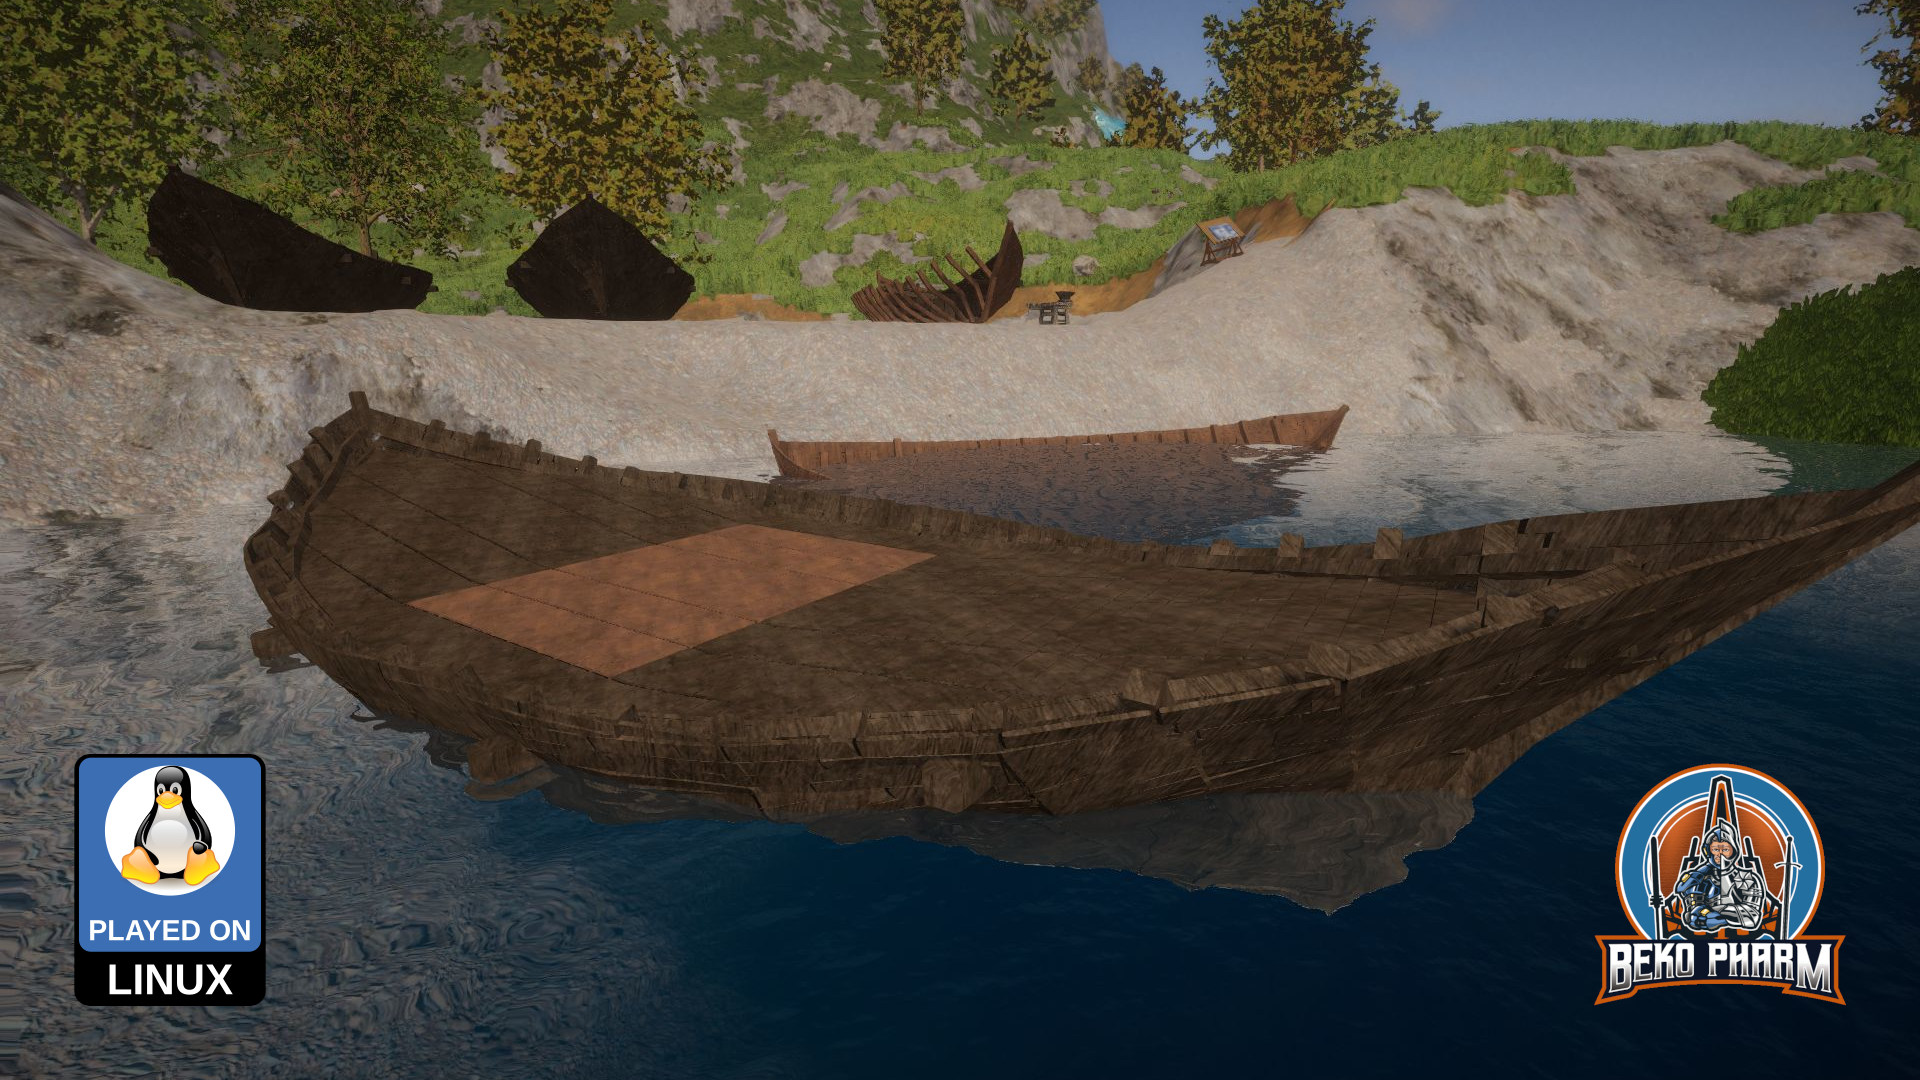
The final result of the Bremen Cog under sails
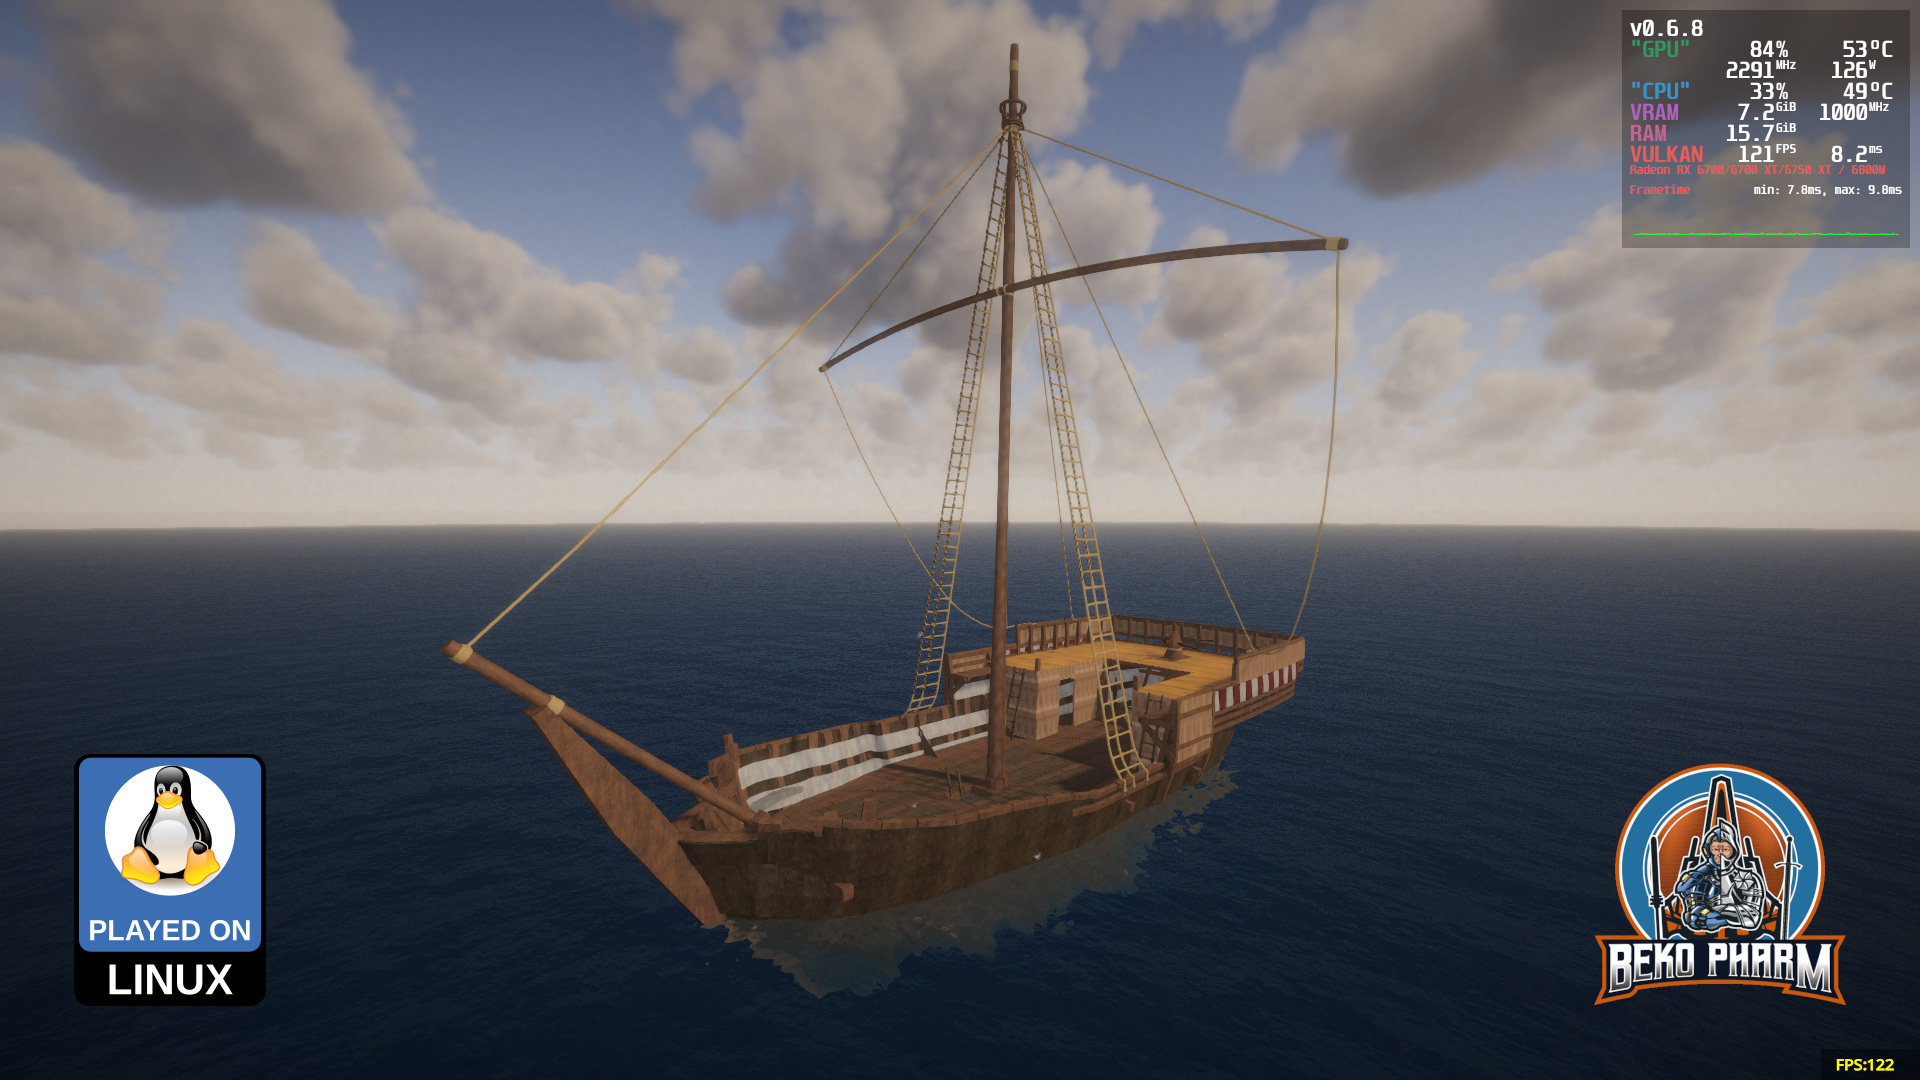
I also prepared a variant without a sail and maybe I’ll even create a version with a reefed sail and with another version of the bow someday. I don’t know yet for I feel very exhausted from this little side project for now.
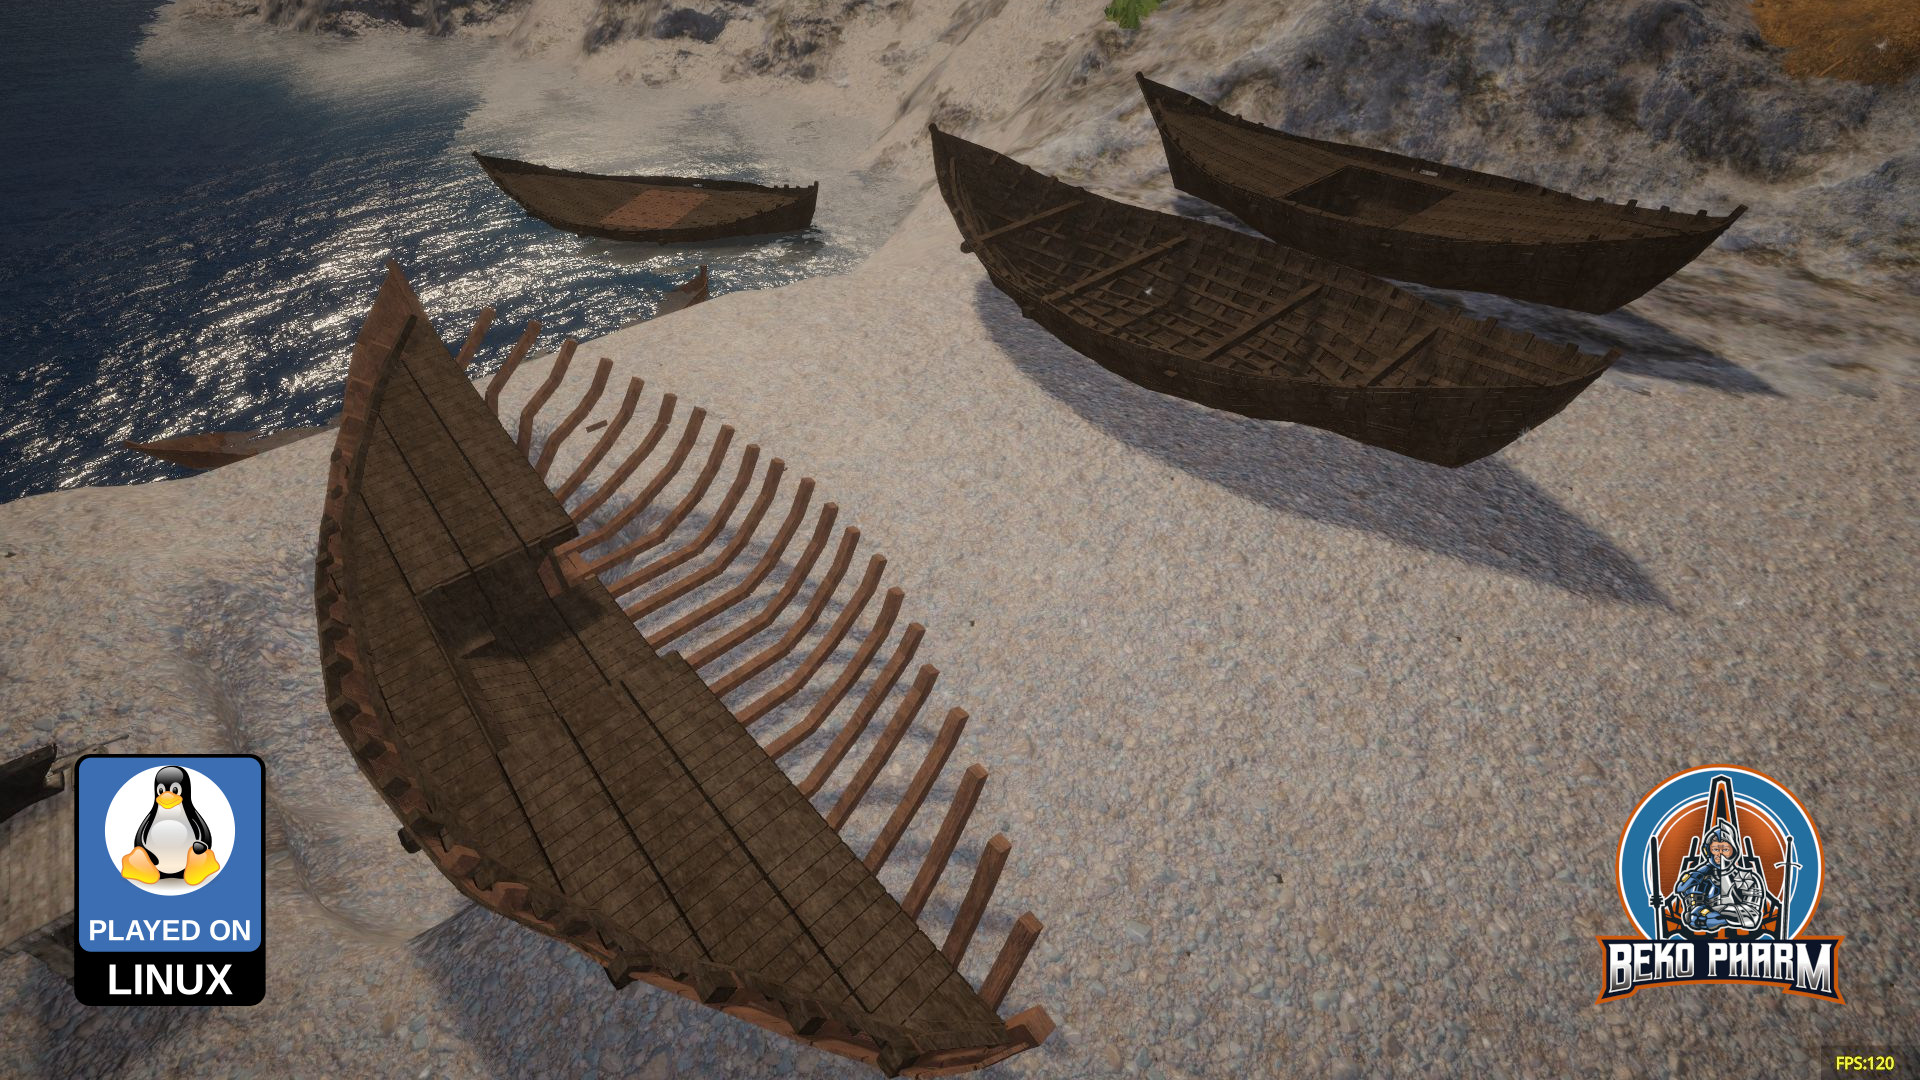
The final result of the Bremen Cog without sails
It’s also very sparse on final details because I can imagine that the blueprints for this ship will see a lot of reuse on various servers of the game so it should be really easy to individualise each placement with different colours or textures or cargo.
Speaking of: The blueprints for Rising World (Unity) can be downloaded from here:
You’re free to share and adapt this work as indicated by the CC-BY-SA 4.0 license. Please do inform me if you make use of this simply because that would make me very happy. It’s not required though.
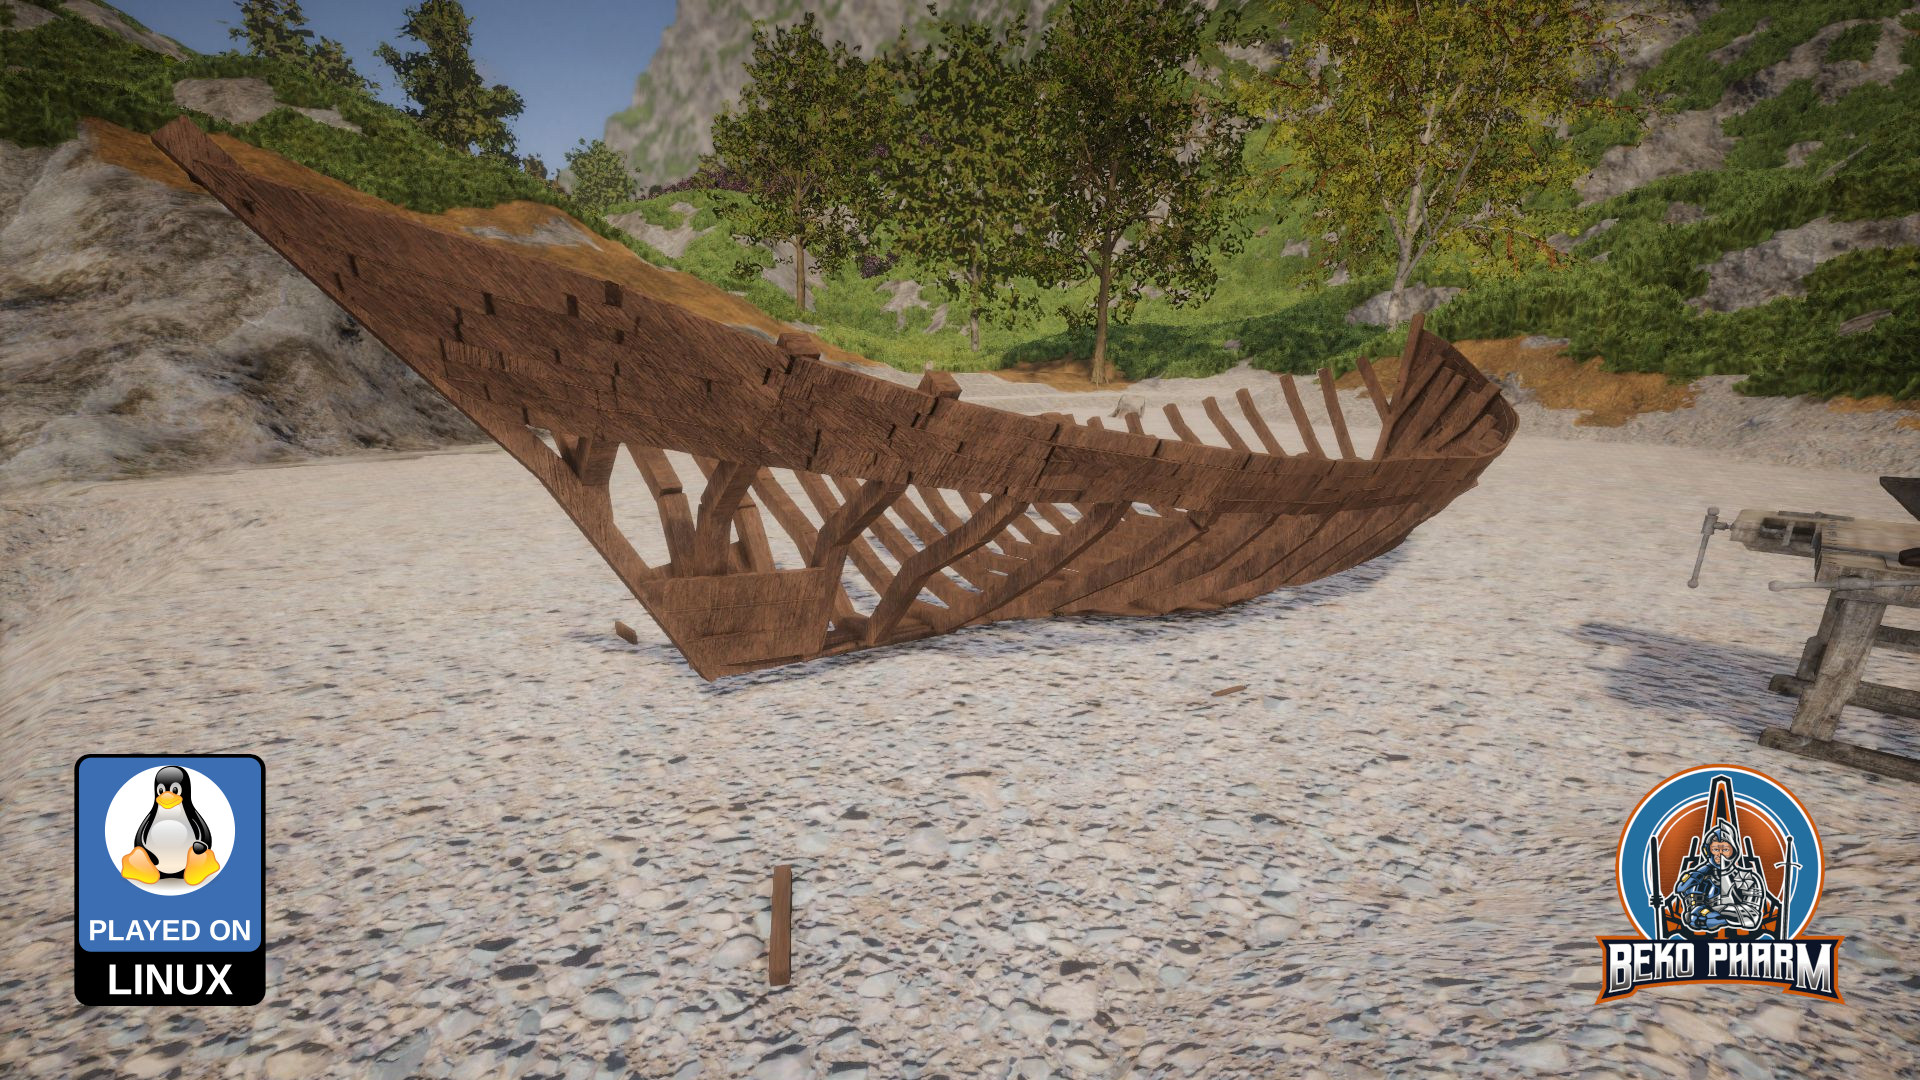
Working on a #cog loosely based on NZ-43 (14C). It’s approximately 12m long 🙂
First time I’m trying my luck with a vessel and not a building. The curving is difficult to realise in #RisingWorld tho.
It started life in the old Java version of the game because the new Unity version has no posters yet. I had to segment the plan of the cog (carved in a very bad resolution from a PDF) into several in-game posters that had to be aligned in-game again to get the proper measurements.
After that I moved the blueprint of the frame over to the new version and started putting planks on it. A cumbersome process during which I learned a lot. I’ll probably make another and more improved hull based on the gathered know how.
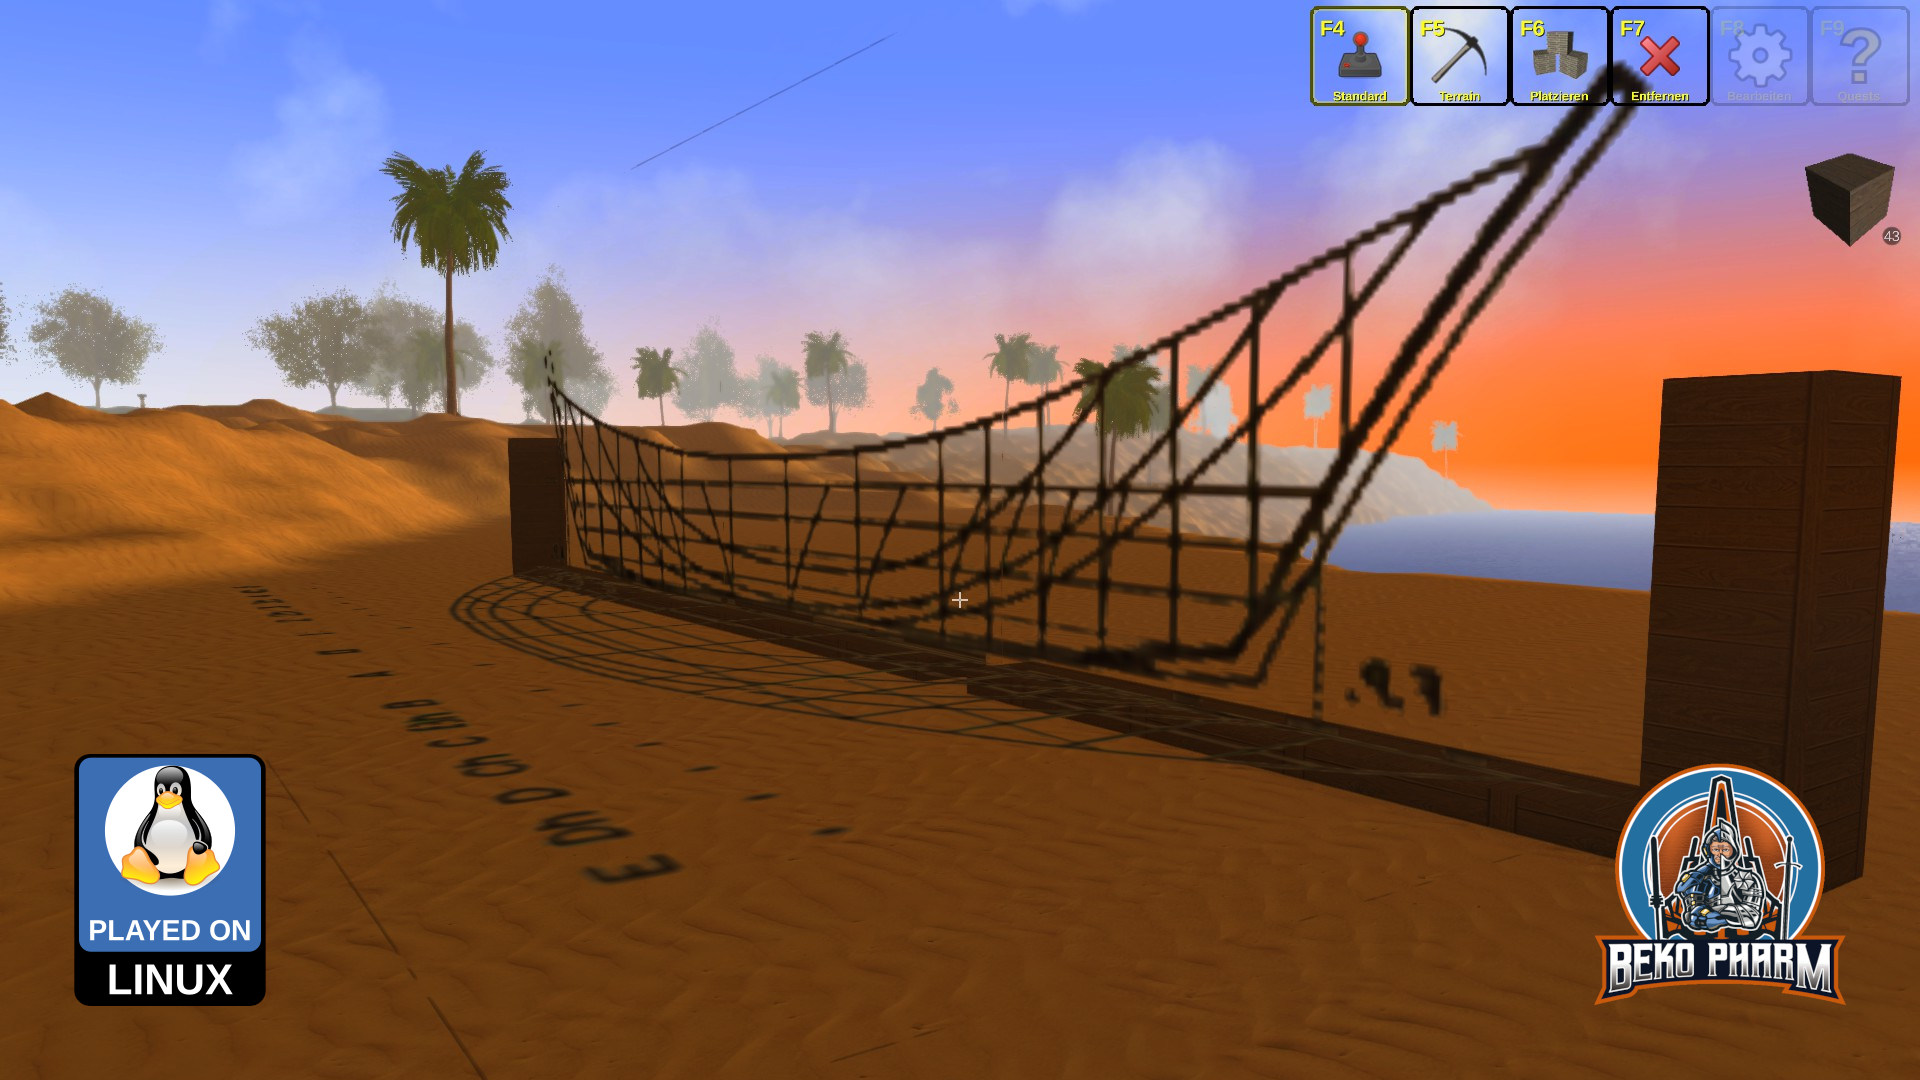
I also fell straight into another “not yet implemented” trap. RisingWorld has a flip command to mirror an object and I kinda assumed this would work with blueprints too. It does not. And I was really not looking forward to put plank on both sides of the frame.
Luckily most of the leg work to read the binary blueprints was done by @paulevs before who released https://github.com/paulevsGitch/BlueLib under the MIT license. It has been a while that I touched Java but I could come up with some code of my own that would flip the planks only (I used rounded cubes for the planks exclusively) making use of this lib and the very first try at it looked promising already.
Here is the source I came up with in case you wonder:
I’m kinda happy with the result. This Lib also allows me to change the texture of the elements so I don’t have to worry how the used texture during the construction may look in the end.
Now onwards to improve the curves. I really wish for a bend mode where the beginning would snap on to an existing object and the opposite plane could be moved around individually.