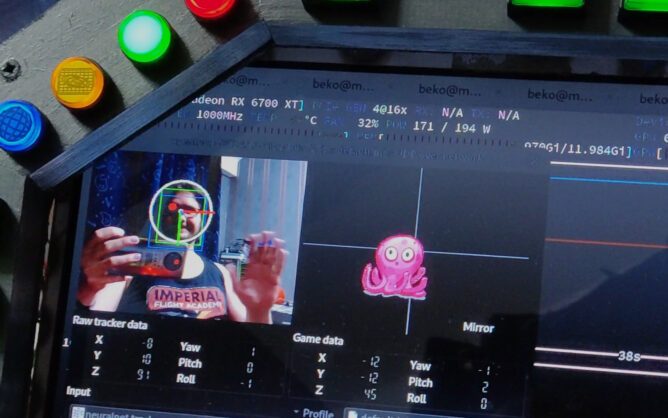
It has been a while that I tried #StarCitizen. With the new #Neuralnet Tracker plugin (AI haha) for #OpenTrack we get head tracking without annoying IR LEDs or reflecting stripes just by reading the webcam video feed. This is apparently fast enough to try #headTracking without a dedicated #headTracker nowadays. And all that on a #Linux PC. Took some fiddling but the concept still works. What a time to be alive.
I held an online presentation and talk for 2h about #LinuxGaming some weeks ago **in German**. The presentation itself (20m) went live today with **English subtitles** on the channel of @Sciencekeeper@troet.cafe (Stellanebula project lead). I mention #X4Foundations as example for native games but the main focus is, due to the audience: a huge German Elite Dangerous wing, focused on #EliteDangerous (and some #StarCitizen for good measure). I’m going to release the talk that happened after this eventually but I have to cut this first, which is _a lot_ of work, so no promises yet. Mebbe this is of interest for someone else too: https://www.youtube.com/watch?v=wmaj-MyRkPs.
This presentation was made for absolute beginners as intro into the topic #GamingOnLinux.
I’m wondering how to present ultra wide screenshots for a while now, because most people will not have an ultra wide display at hand or not run their browser in fullscreen on such a device. A scaled down version with retained ratio also just don’t really cut it:
Now what if we could wrap this in some sort of 360° image? This isn’t really 360°, of course but you get the idea. A quick search usually yields JS libs like Pannellum (https://pannellum.org/), which look great for this use-case as well and yes we could also solve this in CSS by using an animation and go for a little camera ride.
What if we could optionally also make use of a gyroscope though? You know, that sensor every mobile phone, tablet and VR device comes along with. So the user could device where to look just by moving the device around?
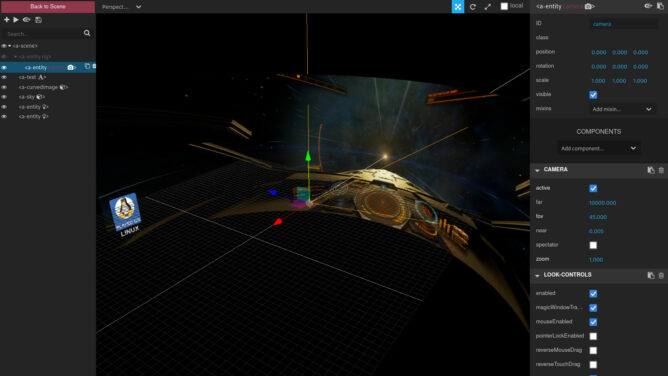
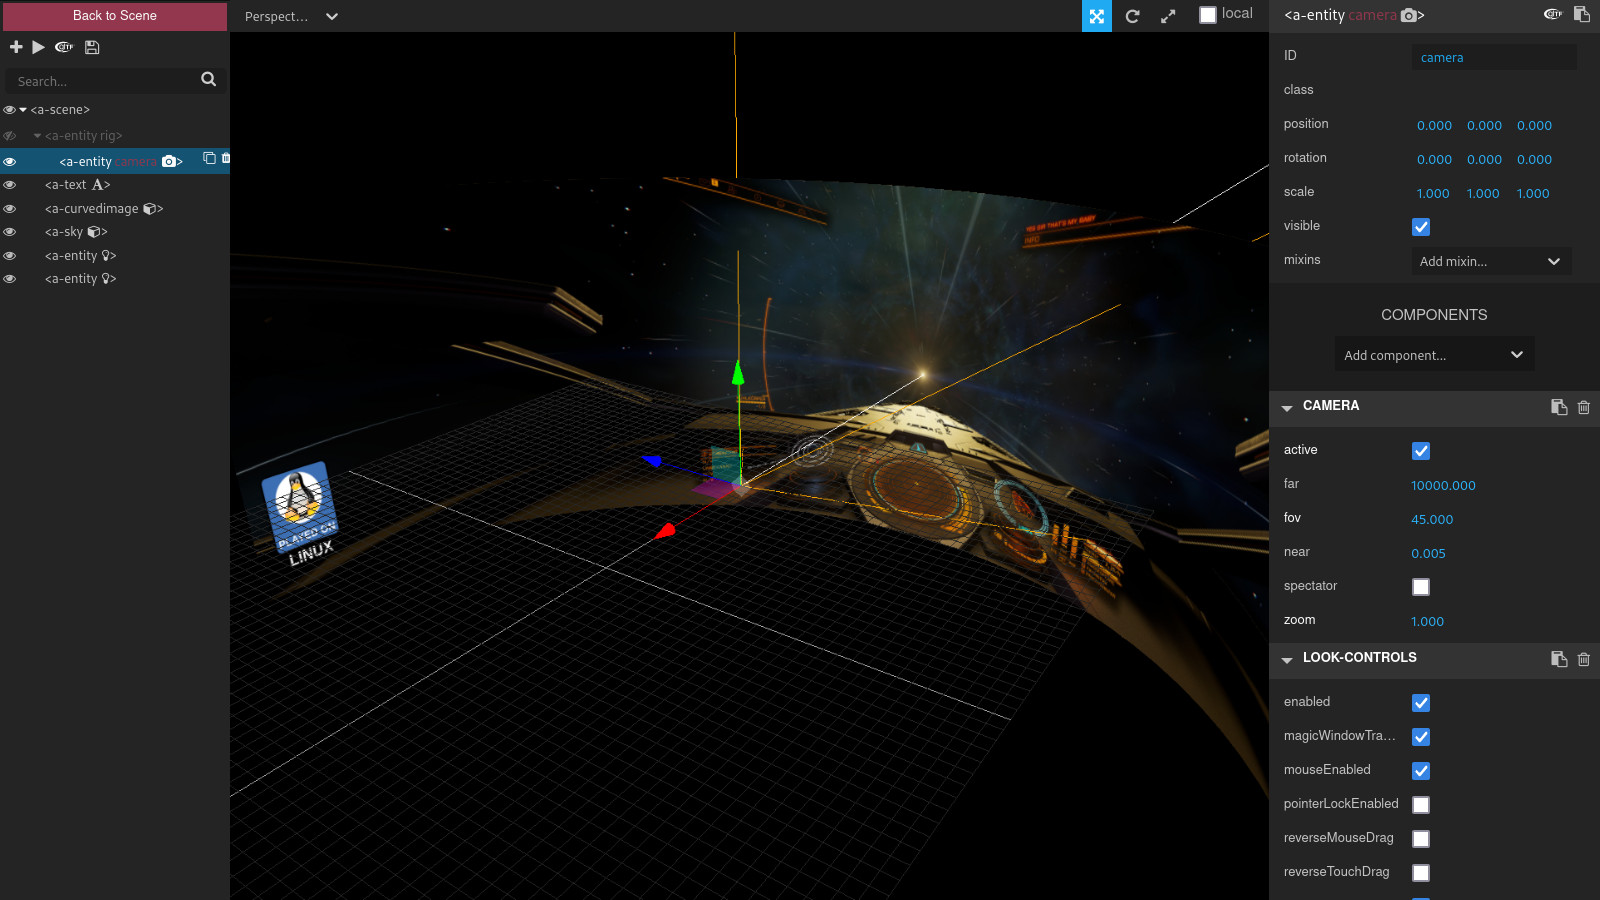
This was when I stumbled over A-Frame (https://aframe.io), which is basically a library for building 3D AR or VR experiences and while I may only scratching it’s surface with my quick tests here it does deliver exactly what I was looking for.
I built demos for various games today and I don’t know how long I’ll host the files here but they all follow the very same code pattern that I’ll add in the end:
Please be aware that I’m loading a ~5mb blob of JS code directly from A-Frame in the demos so don’t check them out if that is a problem for you. The image asset adds another whopping MB so please be patient. The best experience is on a mobile phone where you should be able to look around by moving the phone left and right. It works on a desktop browser too where the mouse can be used to look around.
Feel free to copy this snippet and play around with it. Just keep in mind that you have to use _local_ assets too or they won’t show up. Make sure to read the documentation too and play with the built in inspector opened with the key combination ctrl + alt + i.
And yes I’ll happily take a CSS only variant too but I really doubt that’s possible without loosing features like gyroscope data usage.
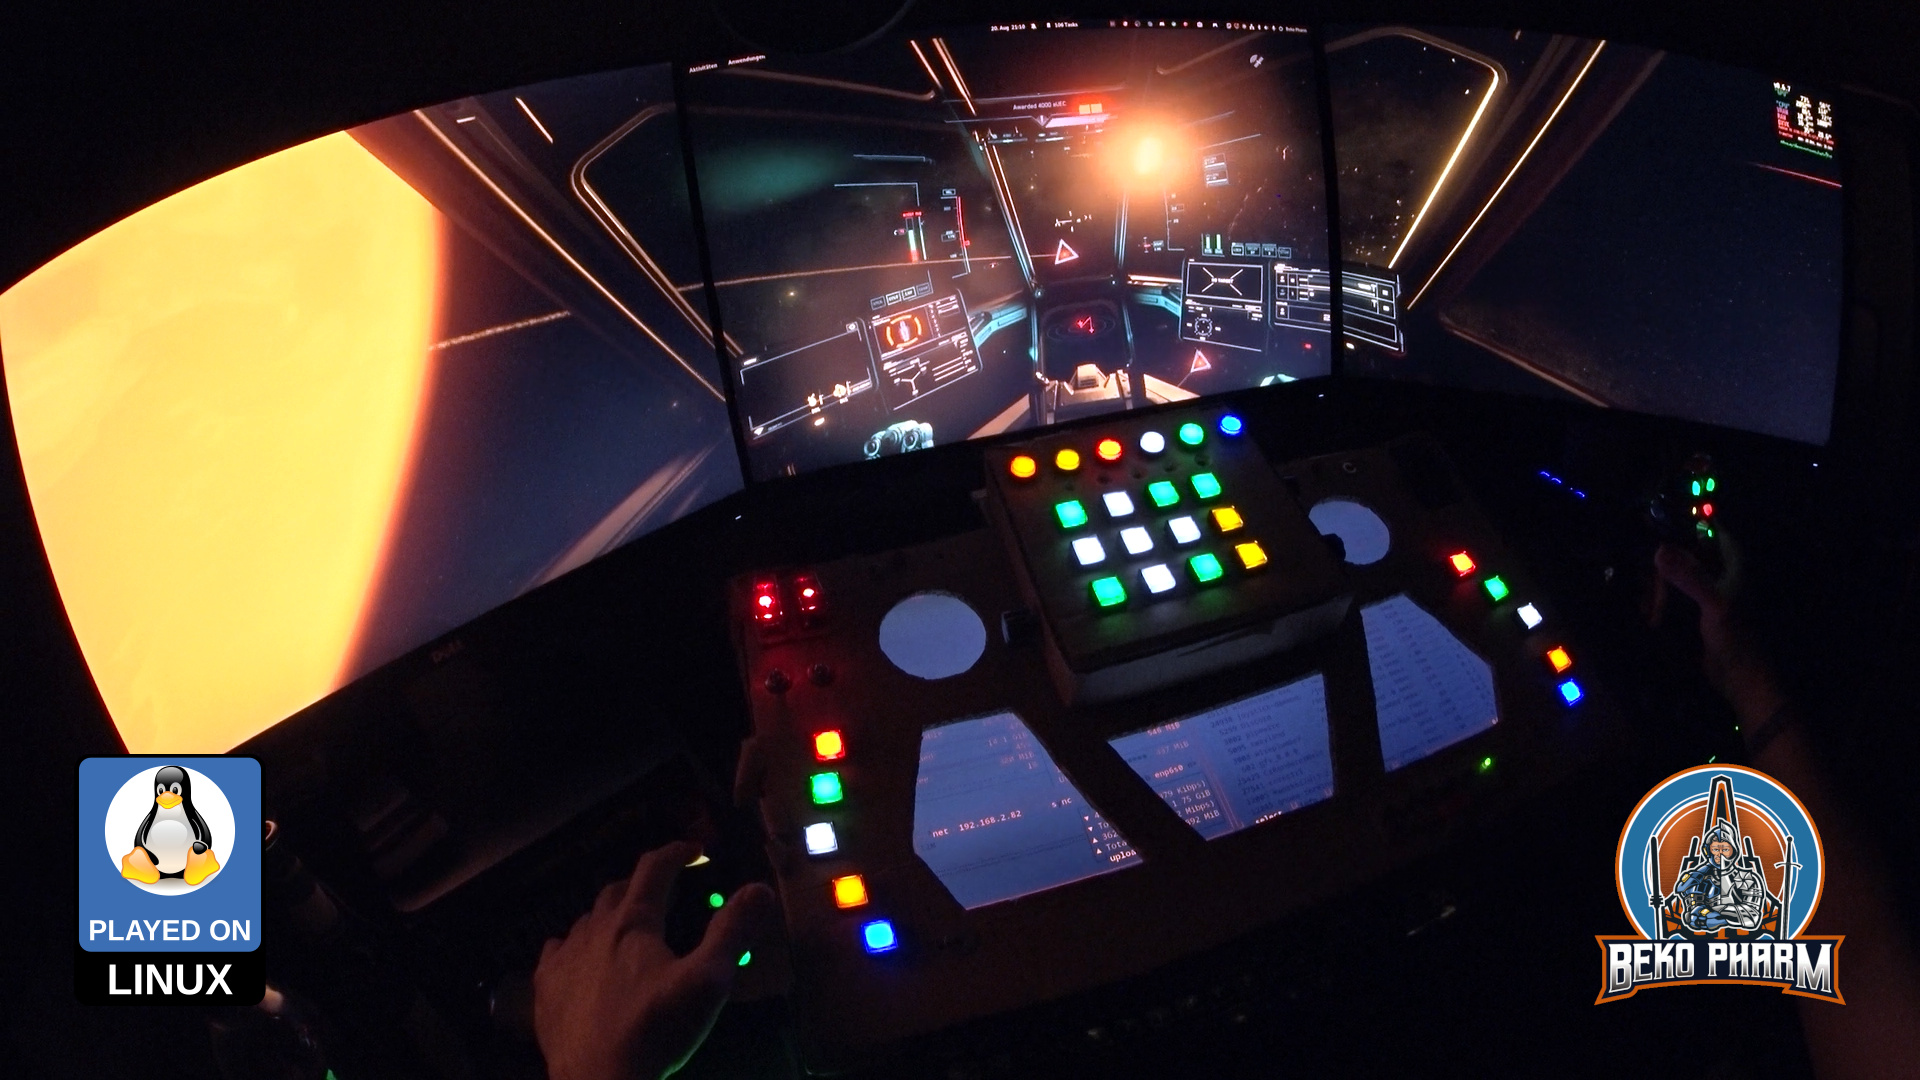
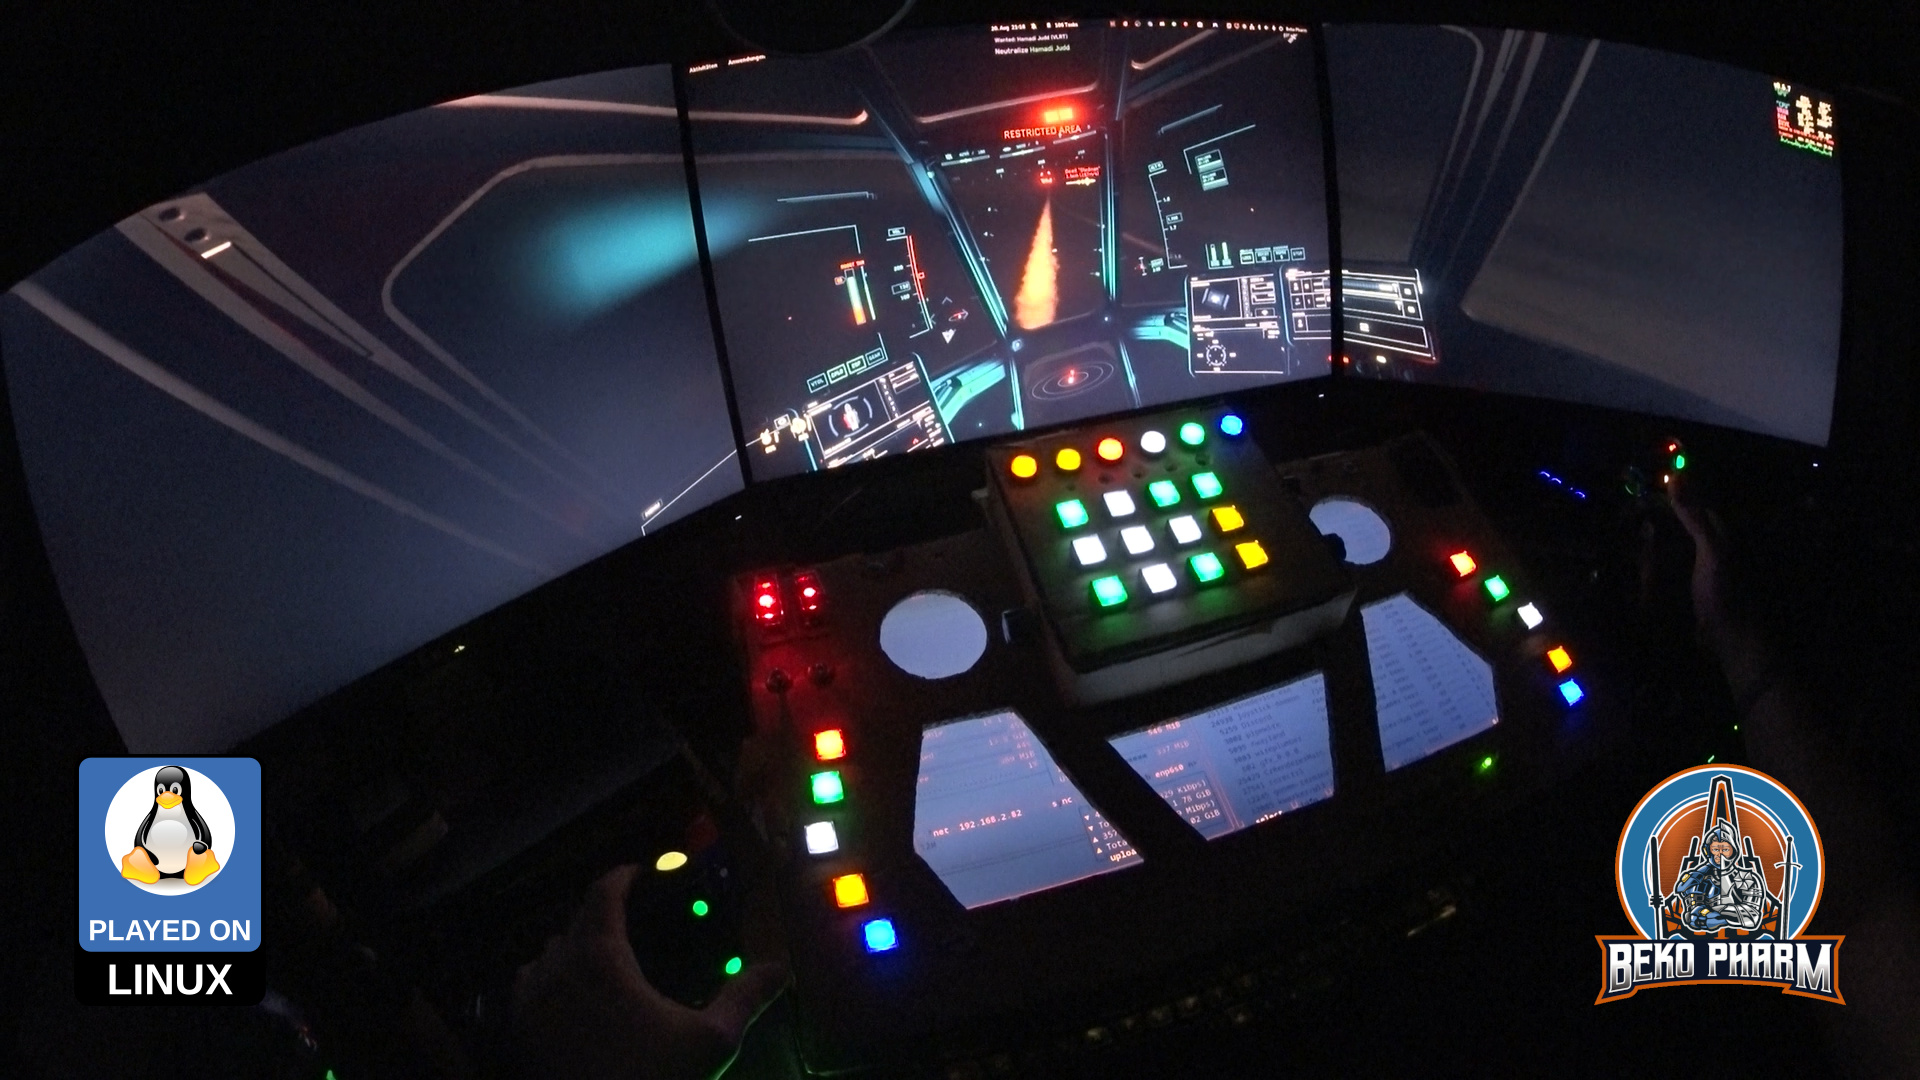
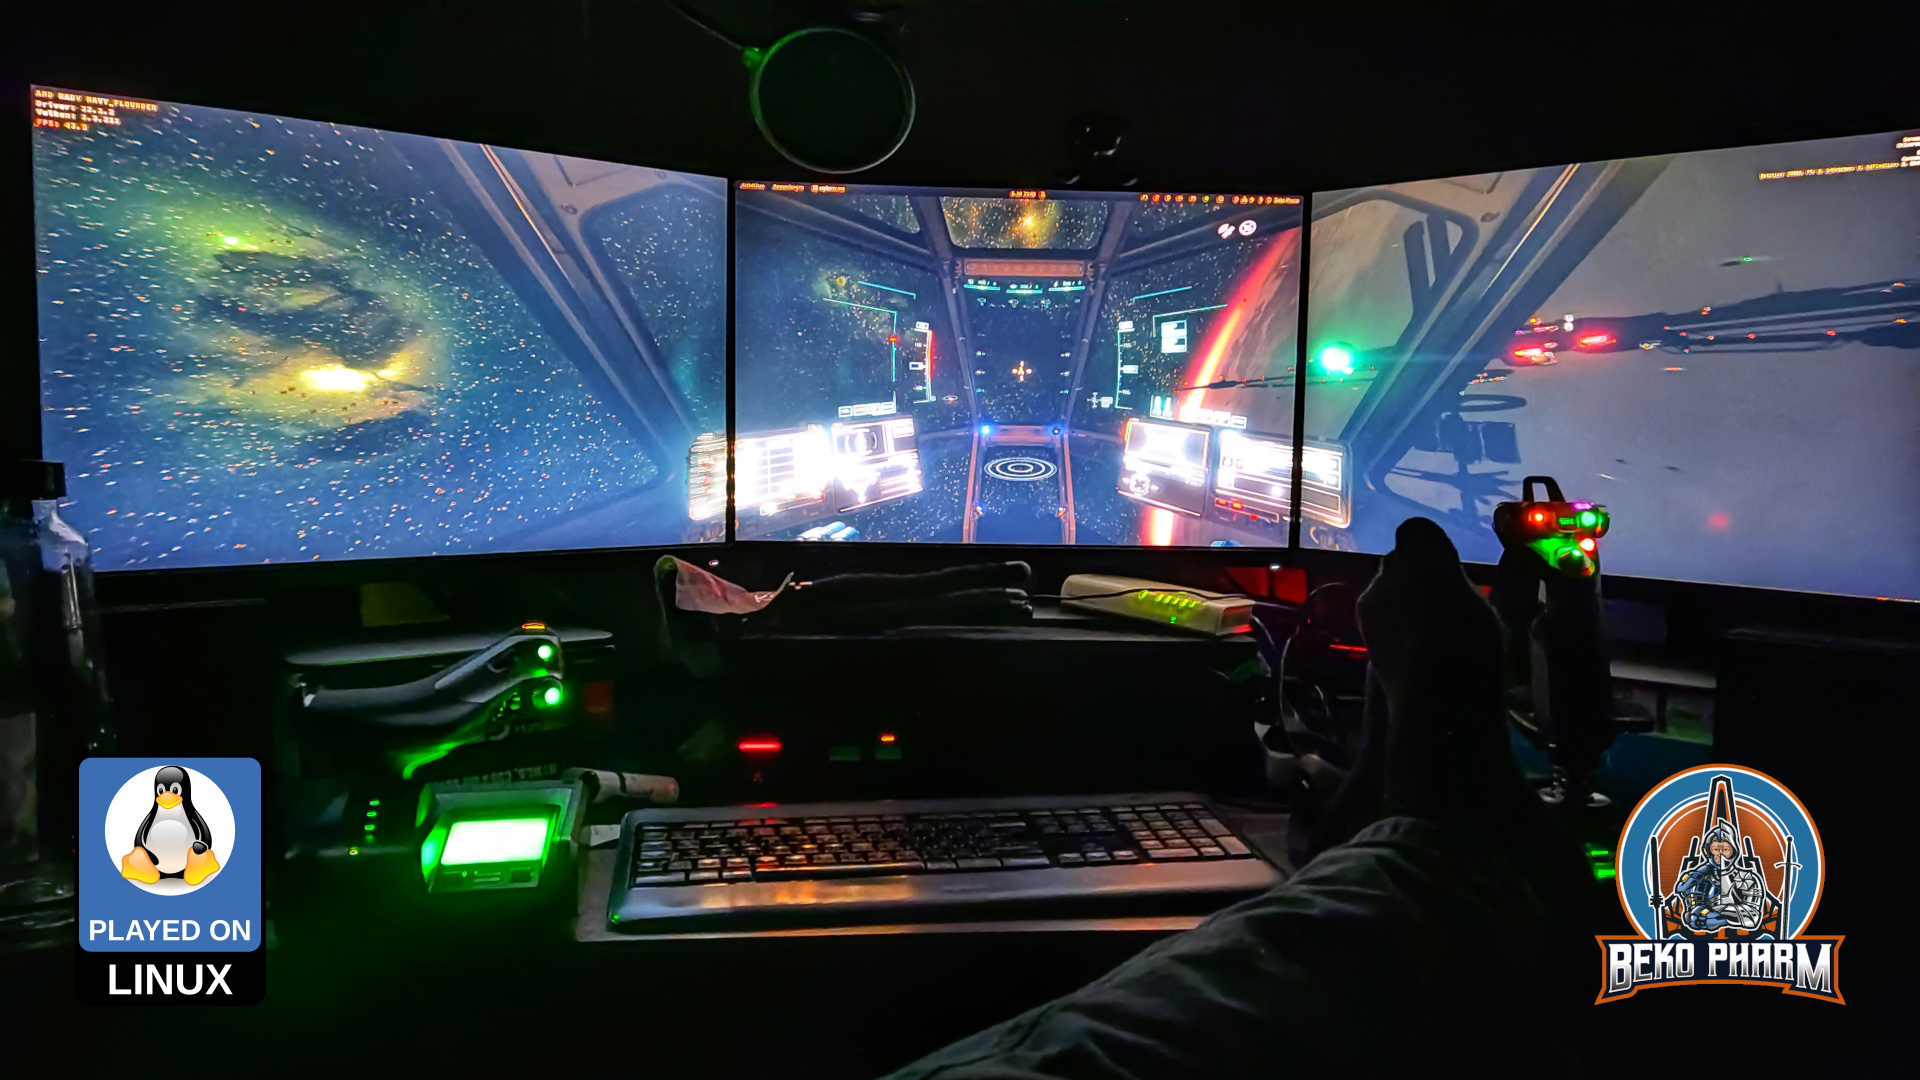
A lot happened since my last update on the simpit – under it’s hood. Function wise it changed not so much so the older demonstration video is still better for a quick demo. I still assembled a new video from clips of the first evening with the new hardware:
Quick trip from Armstrong Orbital over to the huge crater on HIP 117029-4 and back
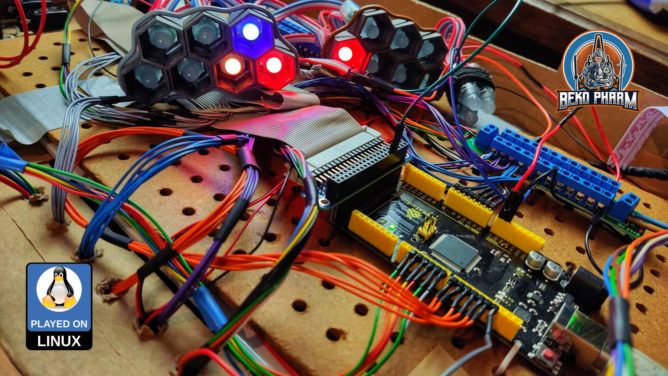
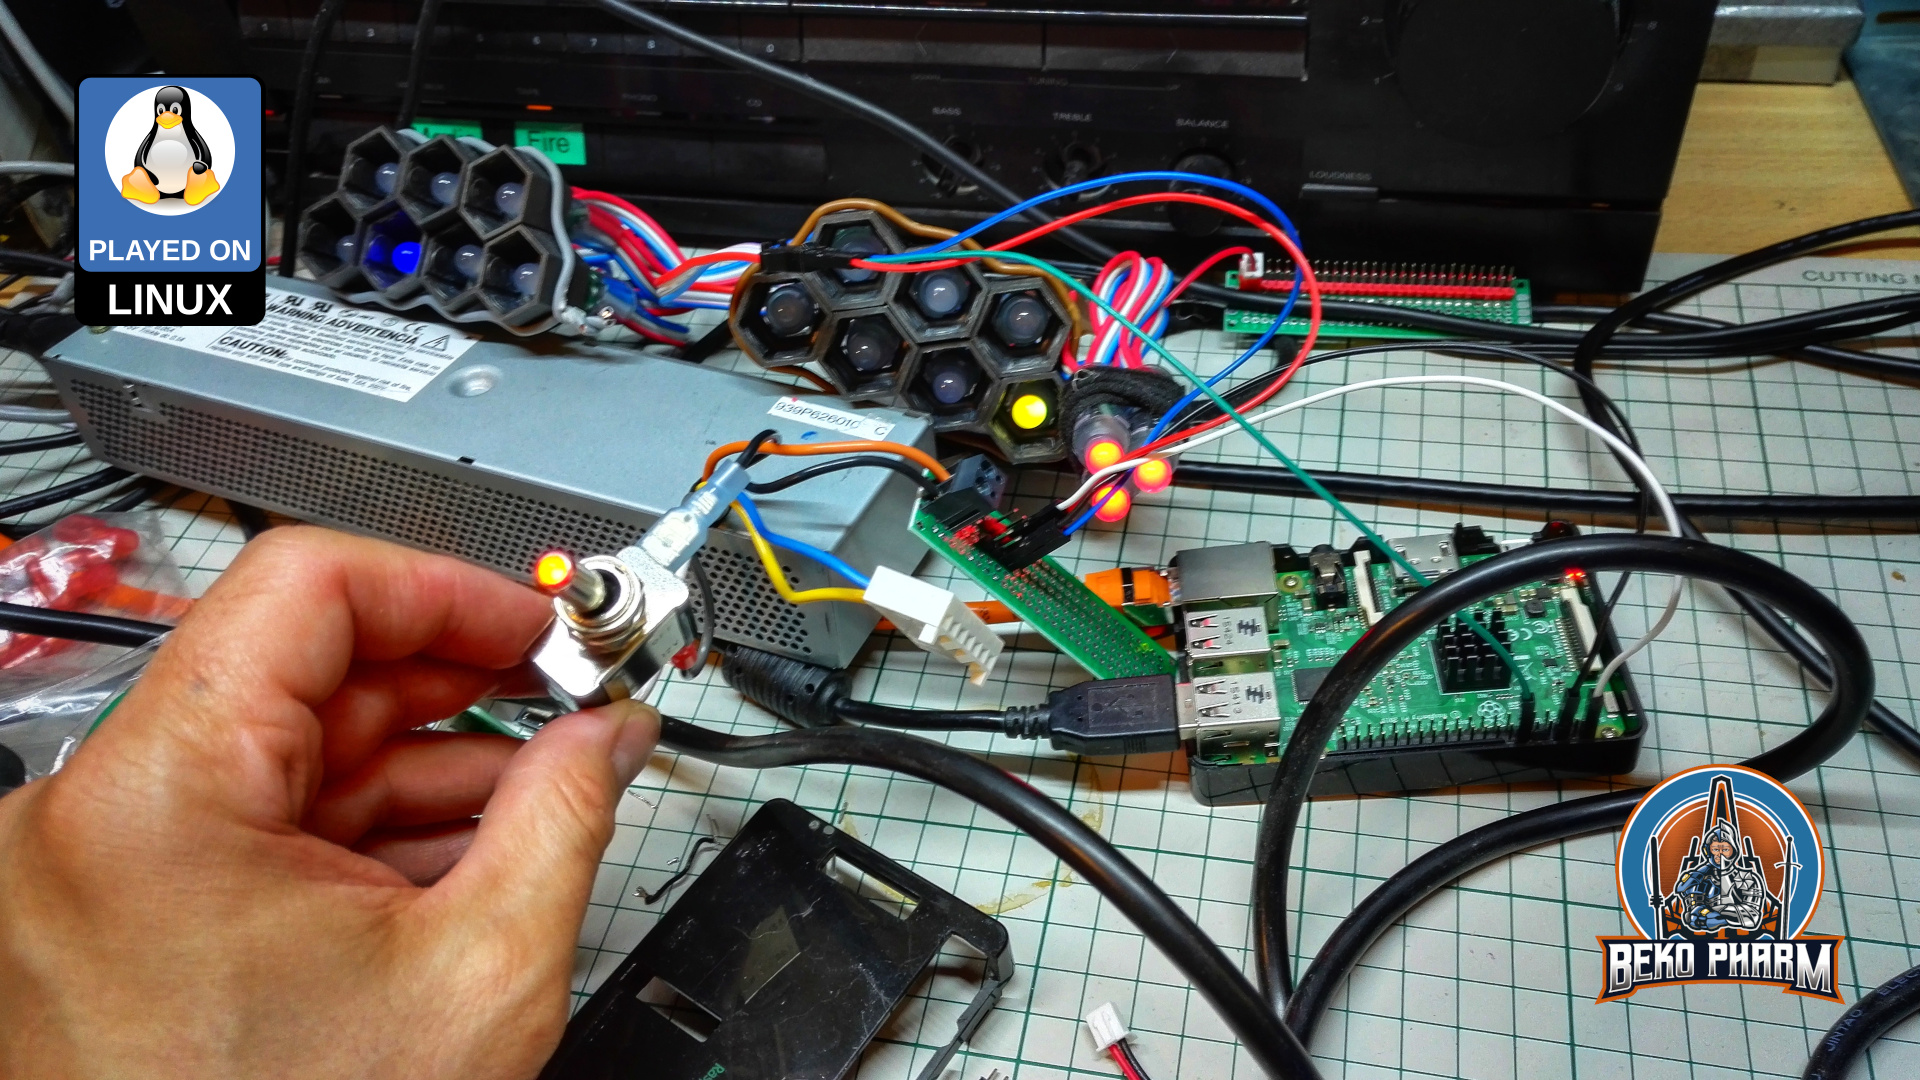
So what changed? I got rid of the CY-822A USB joystick controller that, while good, was also limiting. Especially in inputs and how they would react. The Raspberry Pi, that I used to drive the status indicators, is also gone. This is all replaced by one single Arduino Mega that is connected via serial over USB.
A custom joystick daemon written in Rust is listening for data from the #Arduino and feeds back the flags of Elite Dangerous to drive the blinken lights. I also extended the source to add me some rotary encoders (with push button function) and I’m very happy with the result of this. That makes a whopping amount of 48 buttons and 6 axis (where 2 axis make one hat). And it feels _so good_ to have e.g. self destruct or eject cargo save under a protective cover now 😀
An enemy vessel exploded, the bounty is mineThat rocket was too close for comfortLimping to a hangar after taking battle damageEvading a firestorm from behind by moving sidewaysVarious screenshots from a gaming session of StarCitizen
The panel also got an external PSU with enough ampere to drive as many LED as I may imagine so I no longer abuse a phone charger for that or risk frying of the PCB / USB.
With all that in place I streamlined my pre-flight check-list quite a lot because way less hardware is involved and most of this is automated by now. It wasn’t all fun n giggles tho and while the new hard- and software “just worked” in e.g. #StarCitizen it was #EliteDangerous that gave me a hard time to actually use most of the new buttons.
Getting all the precious buttons into Elite as well (okay, limited to 32 thanks to an old dinput library but who is counting at this point – will simply set the rest to keyboard macros instead)
Turns out it had no idea about the device and model identifiers reported by the joystick daemon and that the kernel assumed a gamepad based on declaring e.g. ButtonNorth via the more recent xinput system really didn’t help – because that limited the amount of read buttons via xinput severe! In the end I set it’s identifier to a “vJoy” device. That I found in the DeviceMappings.xml of Elite and since this could be basically anything I gave it a try (and removed all “offending” magic gamepad buttons from the code) and sure enough Elite started accepting the inputs as expected and from there it was smooth sailing – got even the hat working.
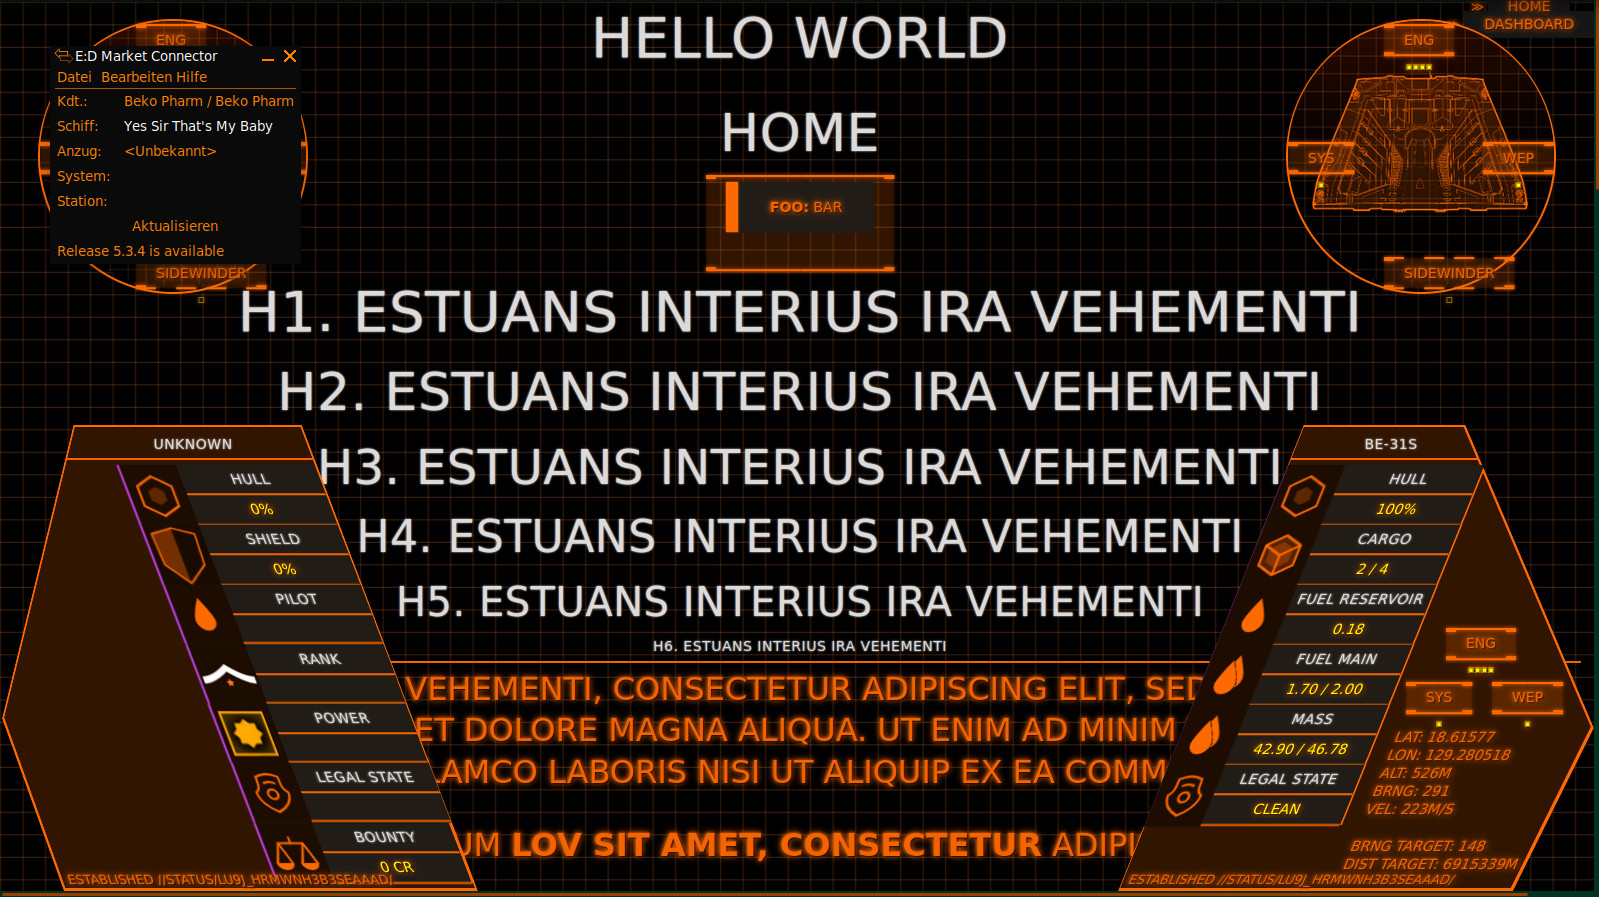
Oh and for everyone who is wondering what exactly they are seeing on the “MFD” when I’m playing Elite: That’s basically a Website using the #Arwes FUI framework. Find a quick demo video here. Without the cardboard covering up parts of the screen it looks basically like this:
What the game showsWhat the ARWES website shows as MFD
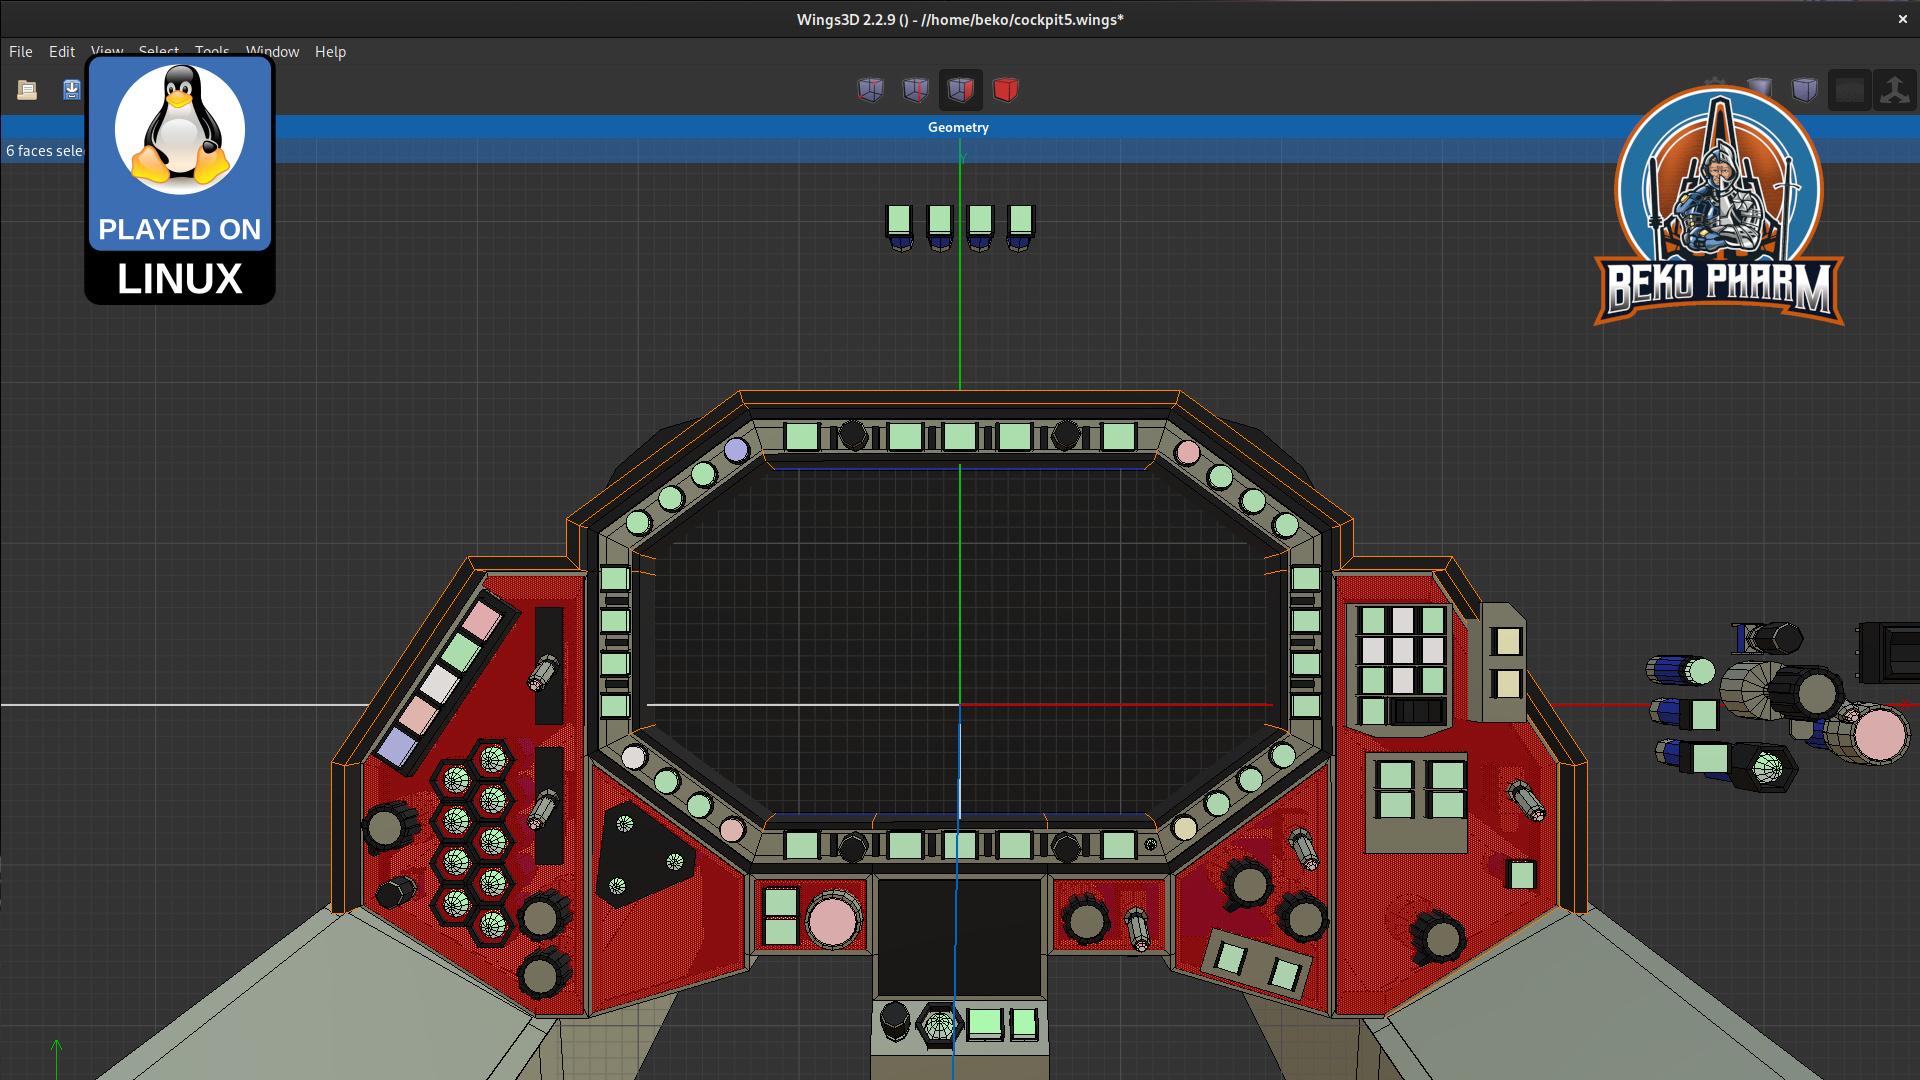
I also started doodles for a version 2 – now that I have an idea what I really want.
Plans for another #SimPit based on a #Macross Valkyrie Cockpit
My Primary Buffer Panel is almost completely revamped 😄 Just an #Arduino now, no more #RaspberryPi in the mix. The CY-822A is also gone. I did add an external PSU to drive as many LED as I can imagine too 😄
I also programmed support for 4 to 8 rotary encoders and there is an additional slide potentiometer sitting on my desk. I still have to find space for that – but I want that very badly since I know how mining in #StarCitizen works 🙂 That makes now 49 buttons and 4 axes so far 🙃
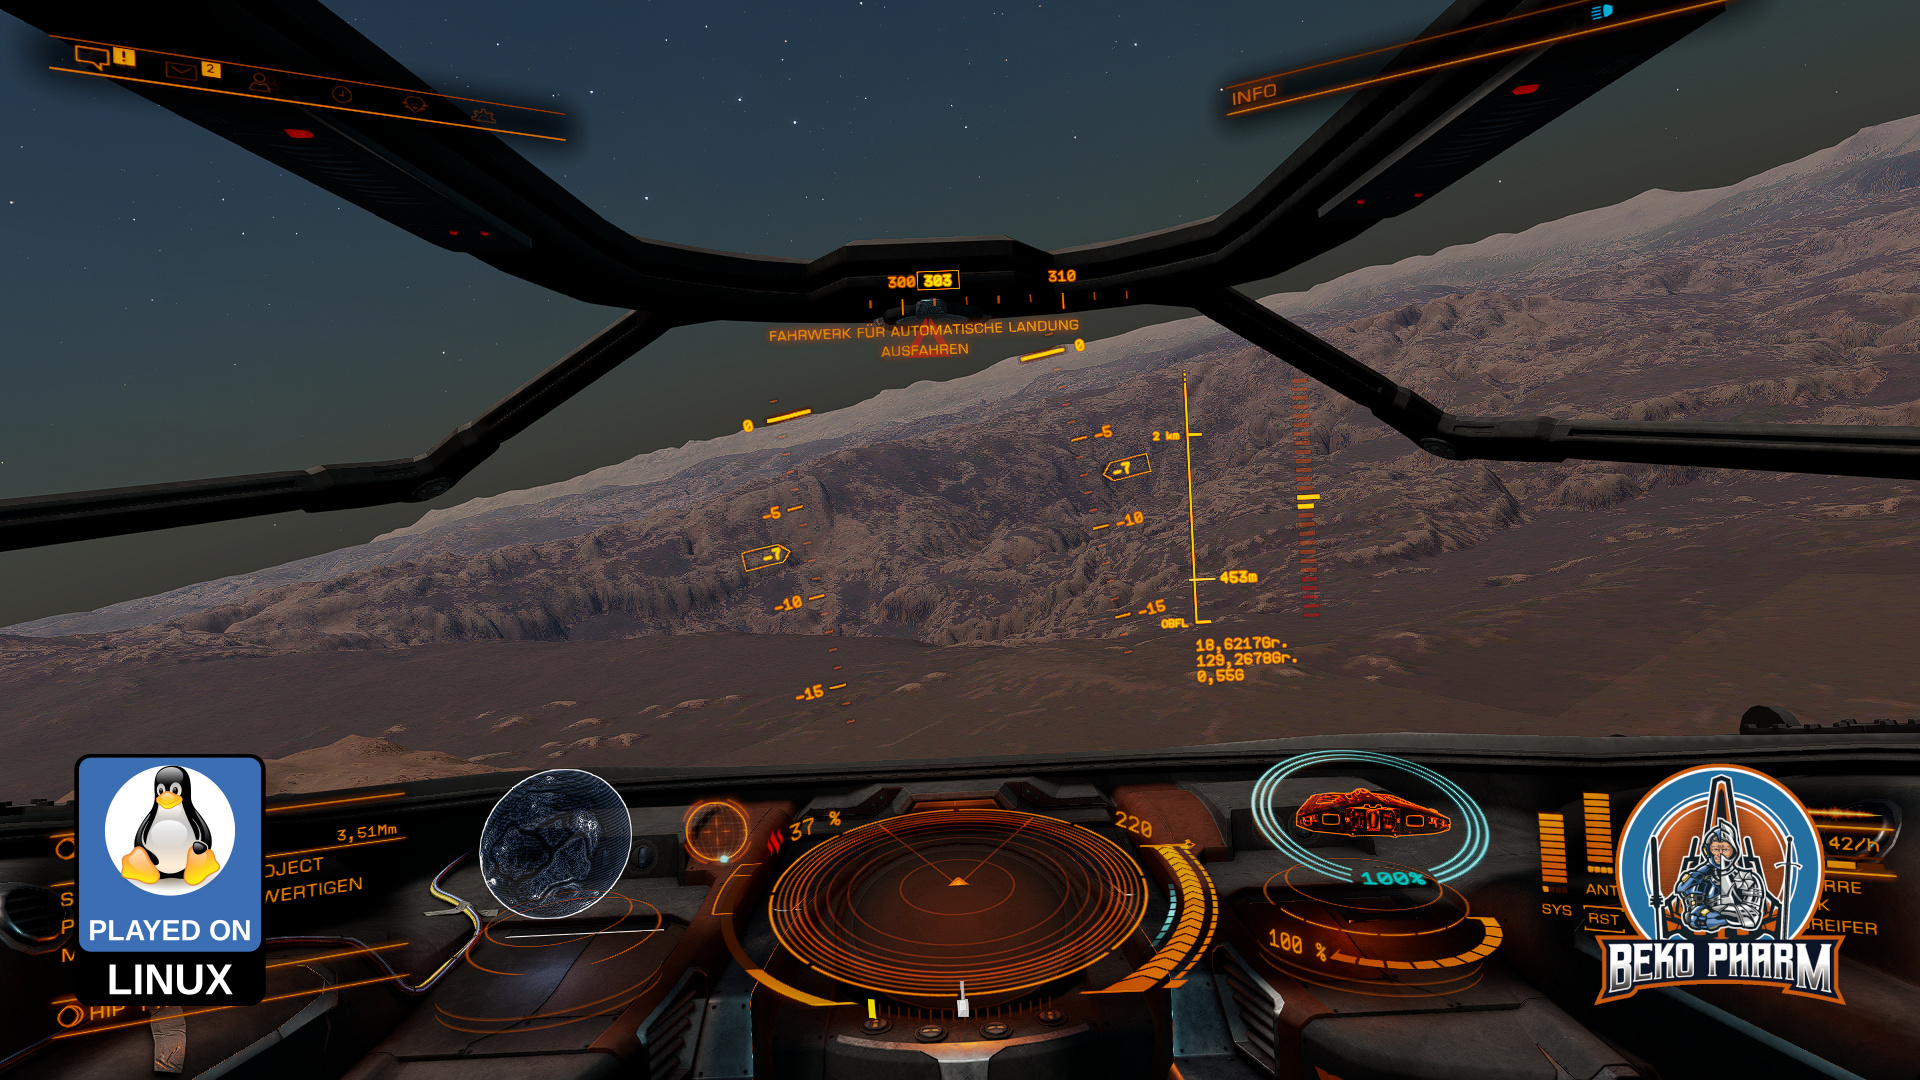
Yesterday I tried various ships in StarCitizen (some “free” event). I launched at Everus Harbor, a station orbiting Everus. When I tested the Dragonfly Black it became old fast circling around on the small landing pad so… why should I now attempt an atmospheric decent instead?
(Sorry for the extra shaking – I had my DIY headtracker on :D)