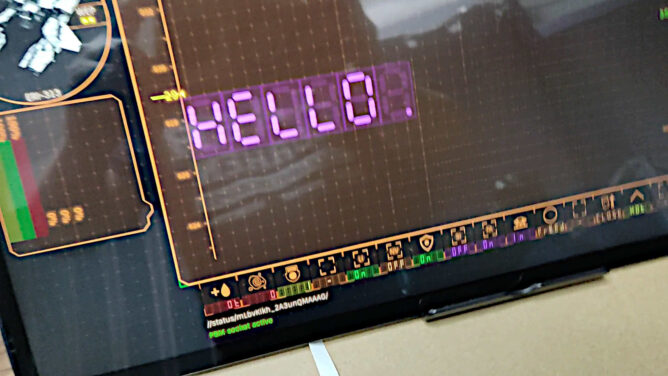
Mostly because of the bad viewing angle. I’m not a huge fan of touch but sometimes it is really useful and if I already spend money why not go the extra mile 🤓
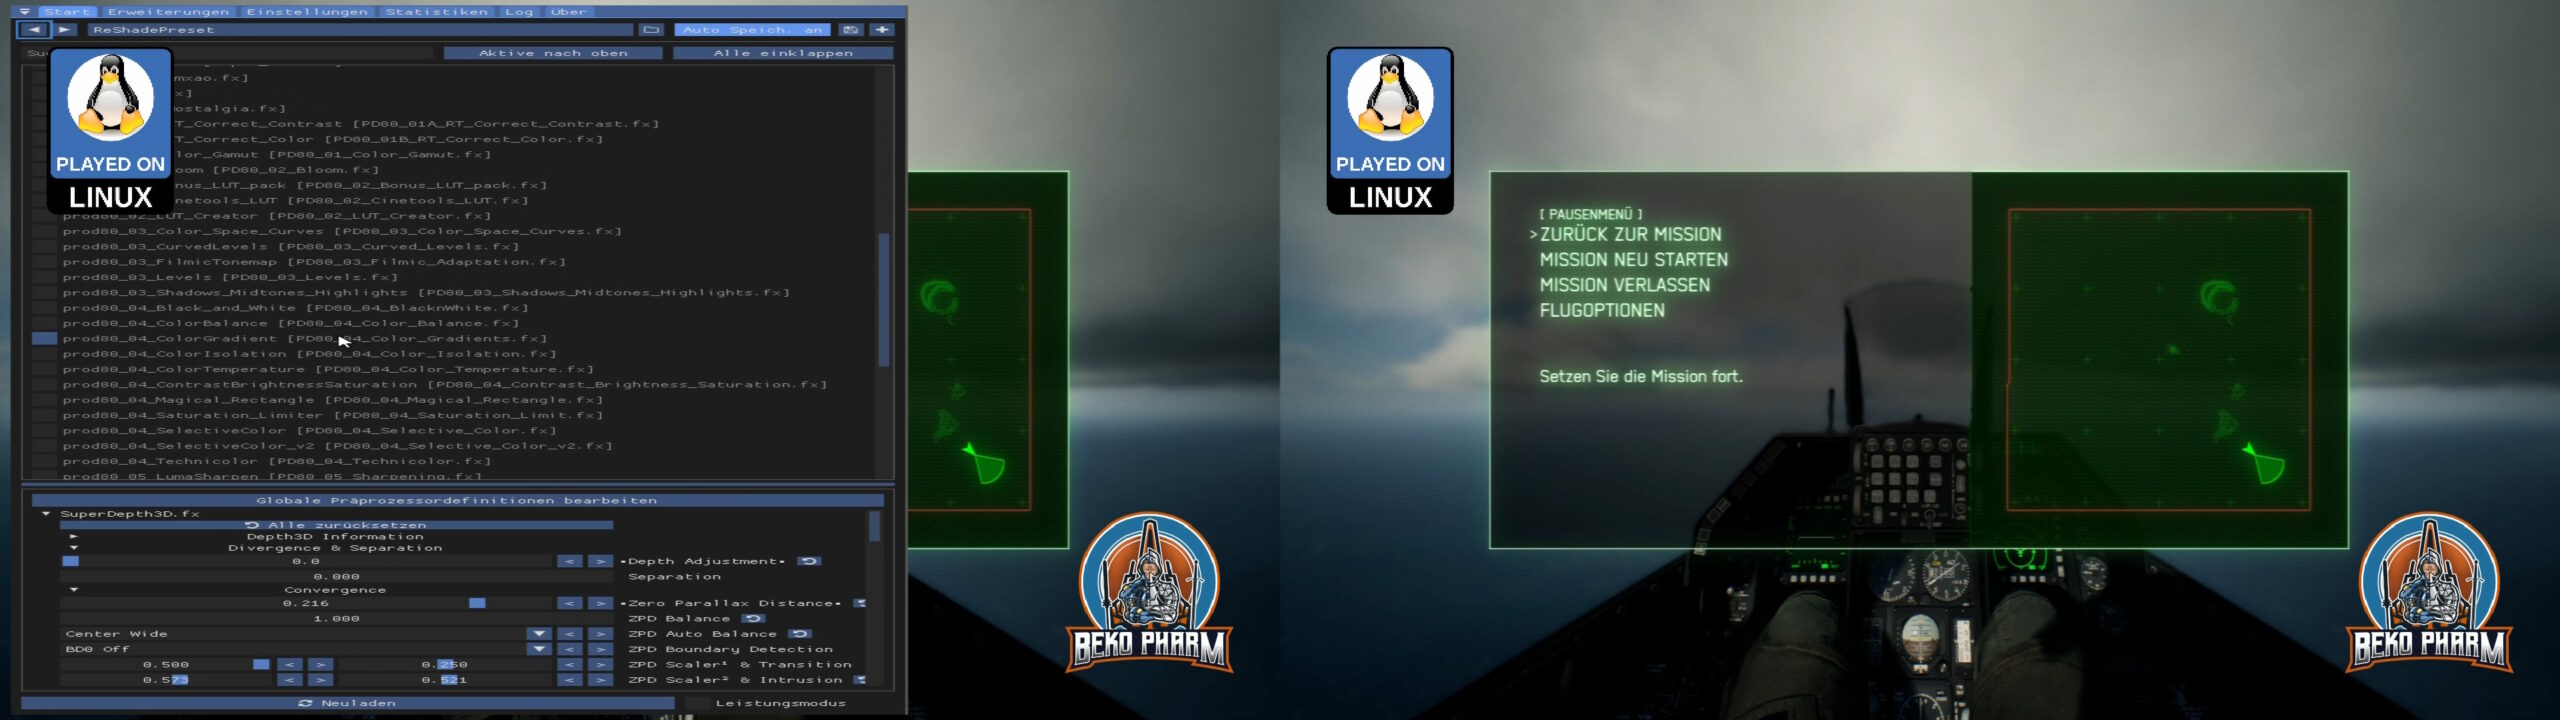
Gna gna. Found out why my Ace Combat started to crash. The culprit is dwmapi.dll, which is needed for the UE4SS mod (Cheat Engine), so I can adjust the FOV – because the devs kinda “forgot” to add a gorram FOV slider to the game that I NEED and absolutely REQUIRE.
Turns out something in there results in an Access Violation on Start with Proton Experimental (and 9). It works fine with Proton 8. I do not remember switching that but that was the solution in the end 😩
This is after I carefully tried lots of stuff like resetting savegame, disable and remove other mods, fiddle with ini files, read miles of debug logs and whatnot.
So I was asked if my head tracking approach of reading the IMU data from my Viture Pro to OpenTrack and SBS (side-by-side) mode with ReShade would also work with StarCitizen.
It works with the Breezy GNOME xr_driver: https://github.com/wheaney/breezy-desktop (but the Vulkan one works probably too but that’s untested). It should also be compatible with other glasses that have IMU for Breezy available.
There is an unlisted SBS version of this video linked in the description. You will need XR glasses that do FULL SBS though to watch it!
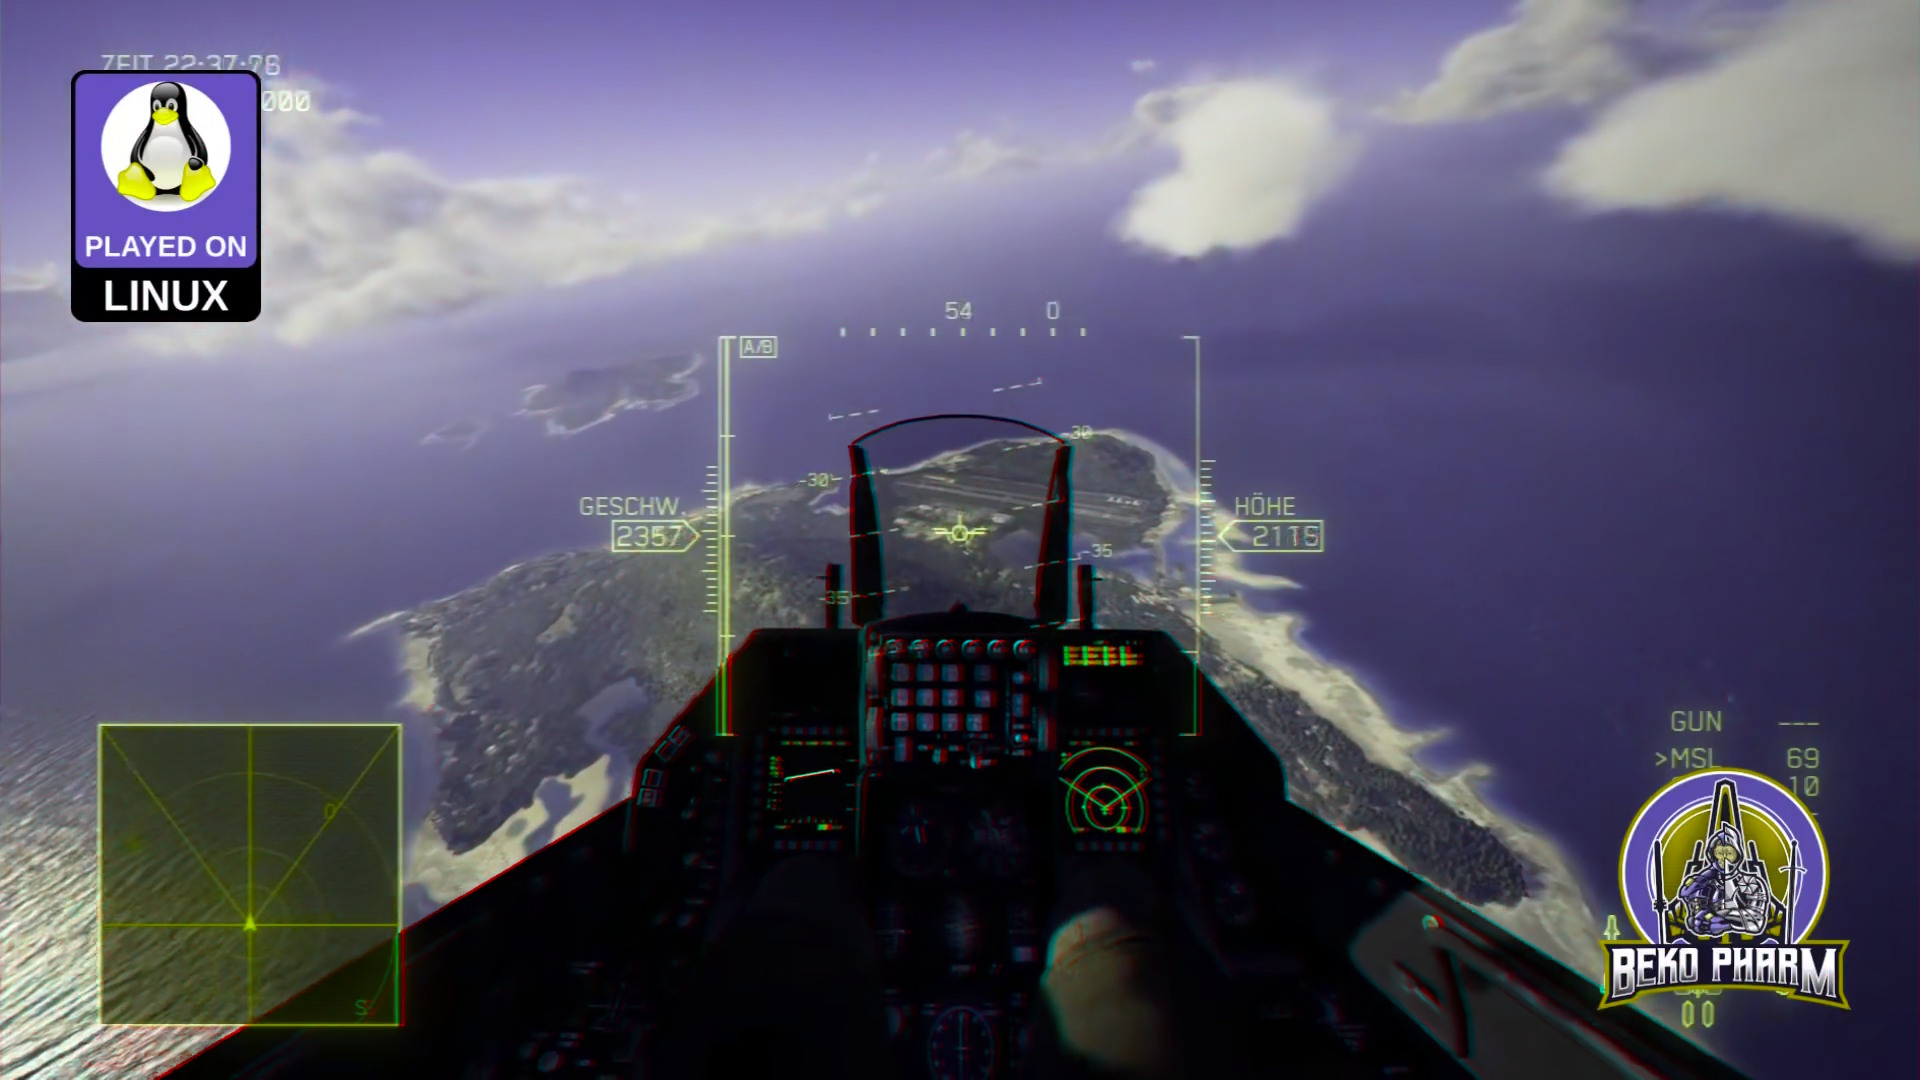
So bear with me if I mix something up, this is all news to me and I’m still flabbergasted. I got myself some XR glasses mostly for watching movies and perhaps some gaming on the Steam Deck a while ago.
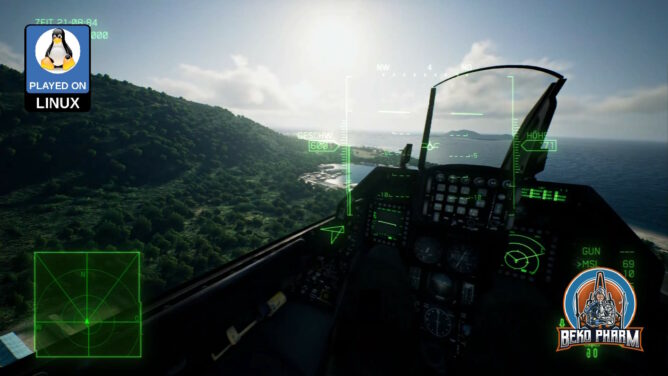
Now I learned about “SBS” (Side-By-Side) mode like ~3 days ago, that the glasses support. I tried this with the game Elite Dangerous first, since this has an SBS mode built in too, and was mind blown. My current favourite time stink is Ace Combat though so I started digging.
Turns out there is this Reshade tool that would forcefully enable such a mode for basically any game with the right shader. Several exist but the first I found, “SuperDepth3D.fx”, seems to do the trick. Enabling it split the 1920×1024 in half with two slightly different view ports, one for each eye. There are many options to fine tune this and I’m still fiddling with this to find the perfect settings but results look great already.
My glasses do Full SBS though and have a resolution of 3840×1024. I read somewhere that wide-screen is possible with more DLL shenanigans with Ace Combat 7 too but I run the game on a Linux PC anyway, where we utilise a tool named “gamescope”. This allows basically to configure a virtual display for each game and override the game resolution in various ways. It also has a stretch option, which is exactly what I needed to get the “compressed” SBS view from 1920 to 3840, where the aspect ratio would fit again. BTW: This also has FSR built in so any upscaling looks good enough too. I’m not entirely sure but I think there’s a similar tool on Windows called “Virtual Deskop”?
Anyway, I already managed to get my head tracker working by mapping the output to a virtual gamepad on the look-around axes before. I also found a mod that enables a wider FOV. Imagine my stupid grinning when everything fell into place: Full SBS with head tracking, a more sane FOV and yes, I jumped all the hoops to get my HOTAS and rudder pedal of my old ViperPit working (which is a different story because my devices are so old that I had to upgrade em to USB before, which involved some Arduinos, programming and soldering). I guess that makes me a member of multiple niches at once 🤓
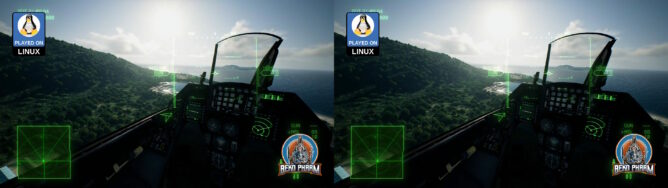
And since I’m aware that nobody can “see” what I’m talking about, without having XR glasses or a VR headset (or a DIY VR Box for smart phones) on their own, have also an Anaglyph 3D render. This requires just some old school two coloured (red and cyan) glasses often made of paper, that many people still have around somewhere, to get an idea.
The colour of the sky? It’s perfect. A deep dark blue.
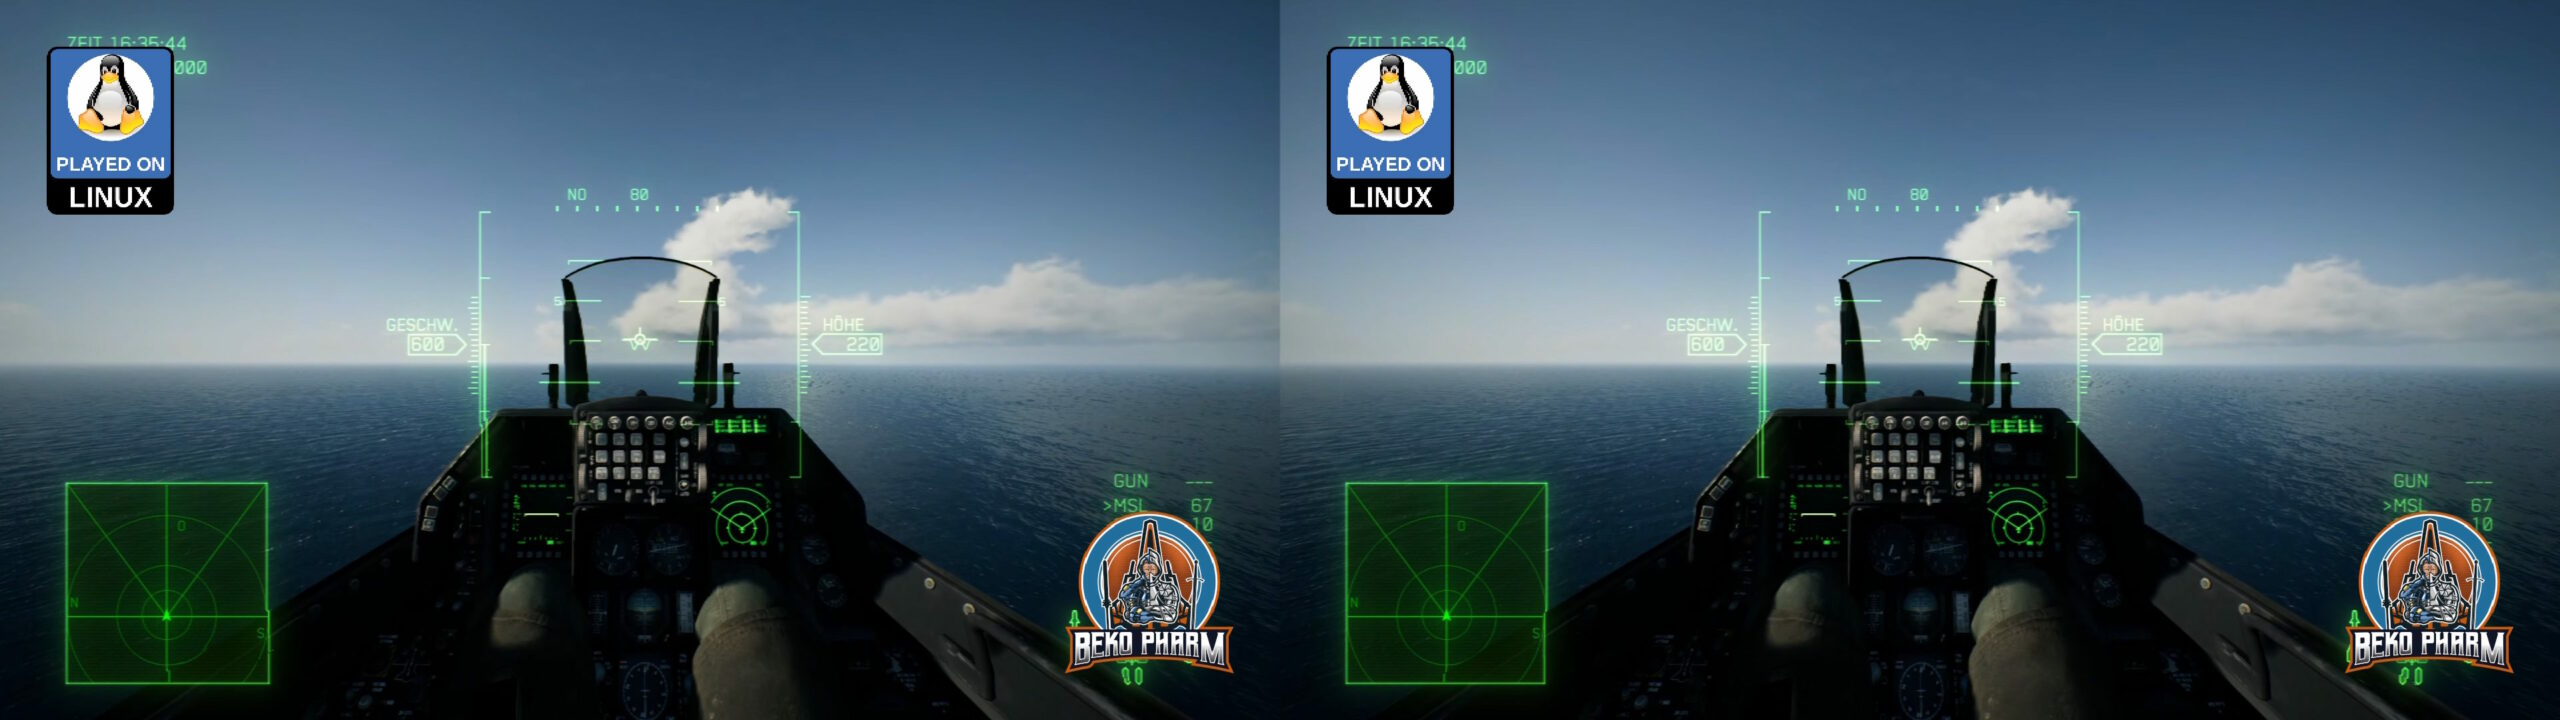
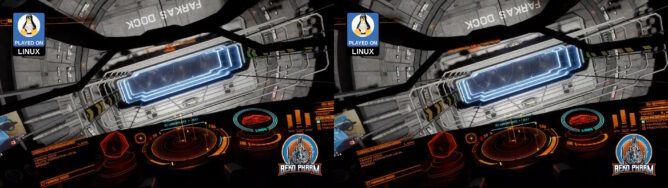
So… this is news to me, because I don’t have a #VR headset, but I can set my #Viture Pro #XR glasses into #SBS (side by side) mode by pressing the small button longer. Some games, like #EliteDangerous, can do this as well without fiddling around with Reshade. I didn’t really expect it but it just works. This way I even get 3D on foot, which is not supported for VR in Elite Dangerous Odyssey at all! Side by side Crosseye mode (right eye left, left eye right) though? Add some head tracking to the mix, which is totally possible, and I get a very nice VR-like experience even on foot in Elite Dangerous – and on Linux PC!
The FOV is somewhat cramped. No idea if this can be tweaked any further but I’ll fiddle with the settings on my next test. Mebbe this can be tweaked (or I use #Breezy Desktop to zoom in somewhat).
Update: I got the aspect ratio somewhat under control. It’s not perfect but much better and an odd combination of window mode and resolution and upscaling, that somehow affects the HUD only but make no sense to me at all. At this point I think it’s simply a bug of Elite. It’s like the HUD doesn’t get the memo to scale up after the intro played. I’m also not sure if this is a side effect of gamescope but I can totally live with this result (though it does start to stutter somewhat on foot but recording this at the same time somewhat overwhelms my rig anyway). These are my gamescope settings with Steam:
Max-scale is probably not needed but it was started with this so I won’t omit it now.
The ingame settings are 1280×960 and windowed with _NO BORDER_. Every other mode broke the aspect ratio even more! That is also true for 1920×1024, which would have made _some_ sense to me at least, but this did also NOT work FOR ME.
This results in a pixelated HUD which is worked around with upscaler INTERNAL or AMD CAS cranked to x2 – AMD FSR did NOT WORK.
If someone could enlighten me on this: Bring it!
YMMV.
e voila, perfect aspect ratio.
Wonder if my GPU manages to keep this up though. May have to throw FSR into the mix.
We installed #Nobara#Linux on the PC of a friend yesterday and it took so god damn long because… dude managed to _repeat_ a typo for the password on the user creation step so we could not log in after 5 minutes of installing + reboot 🤣
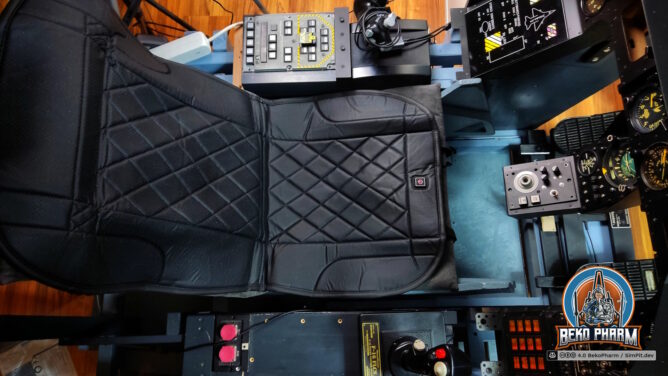
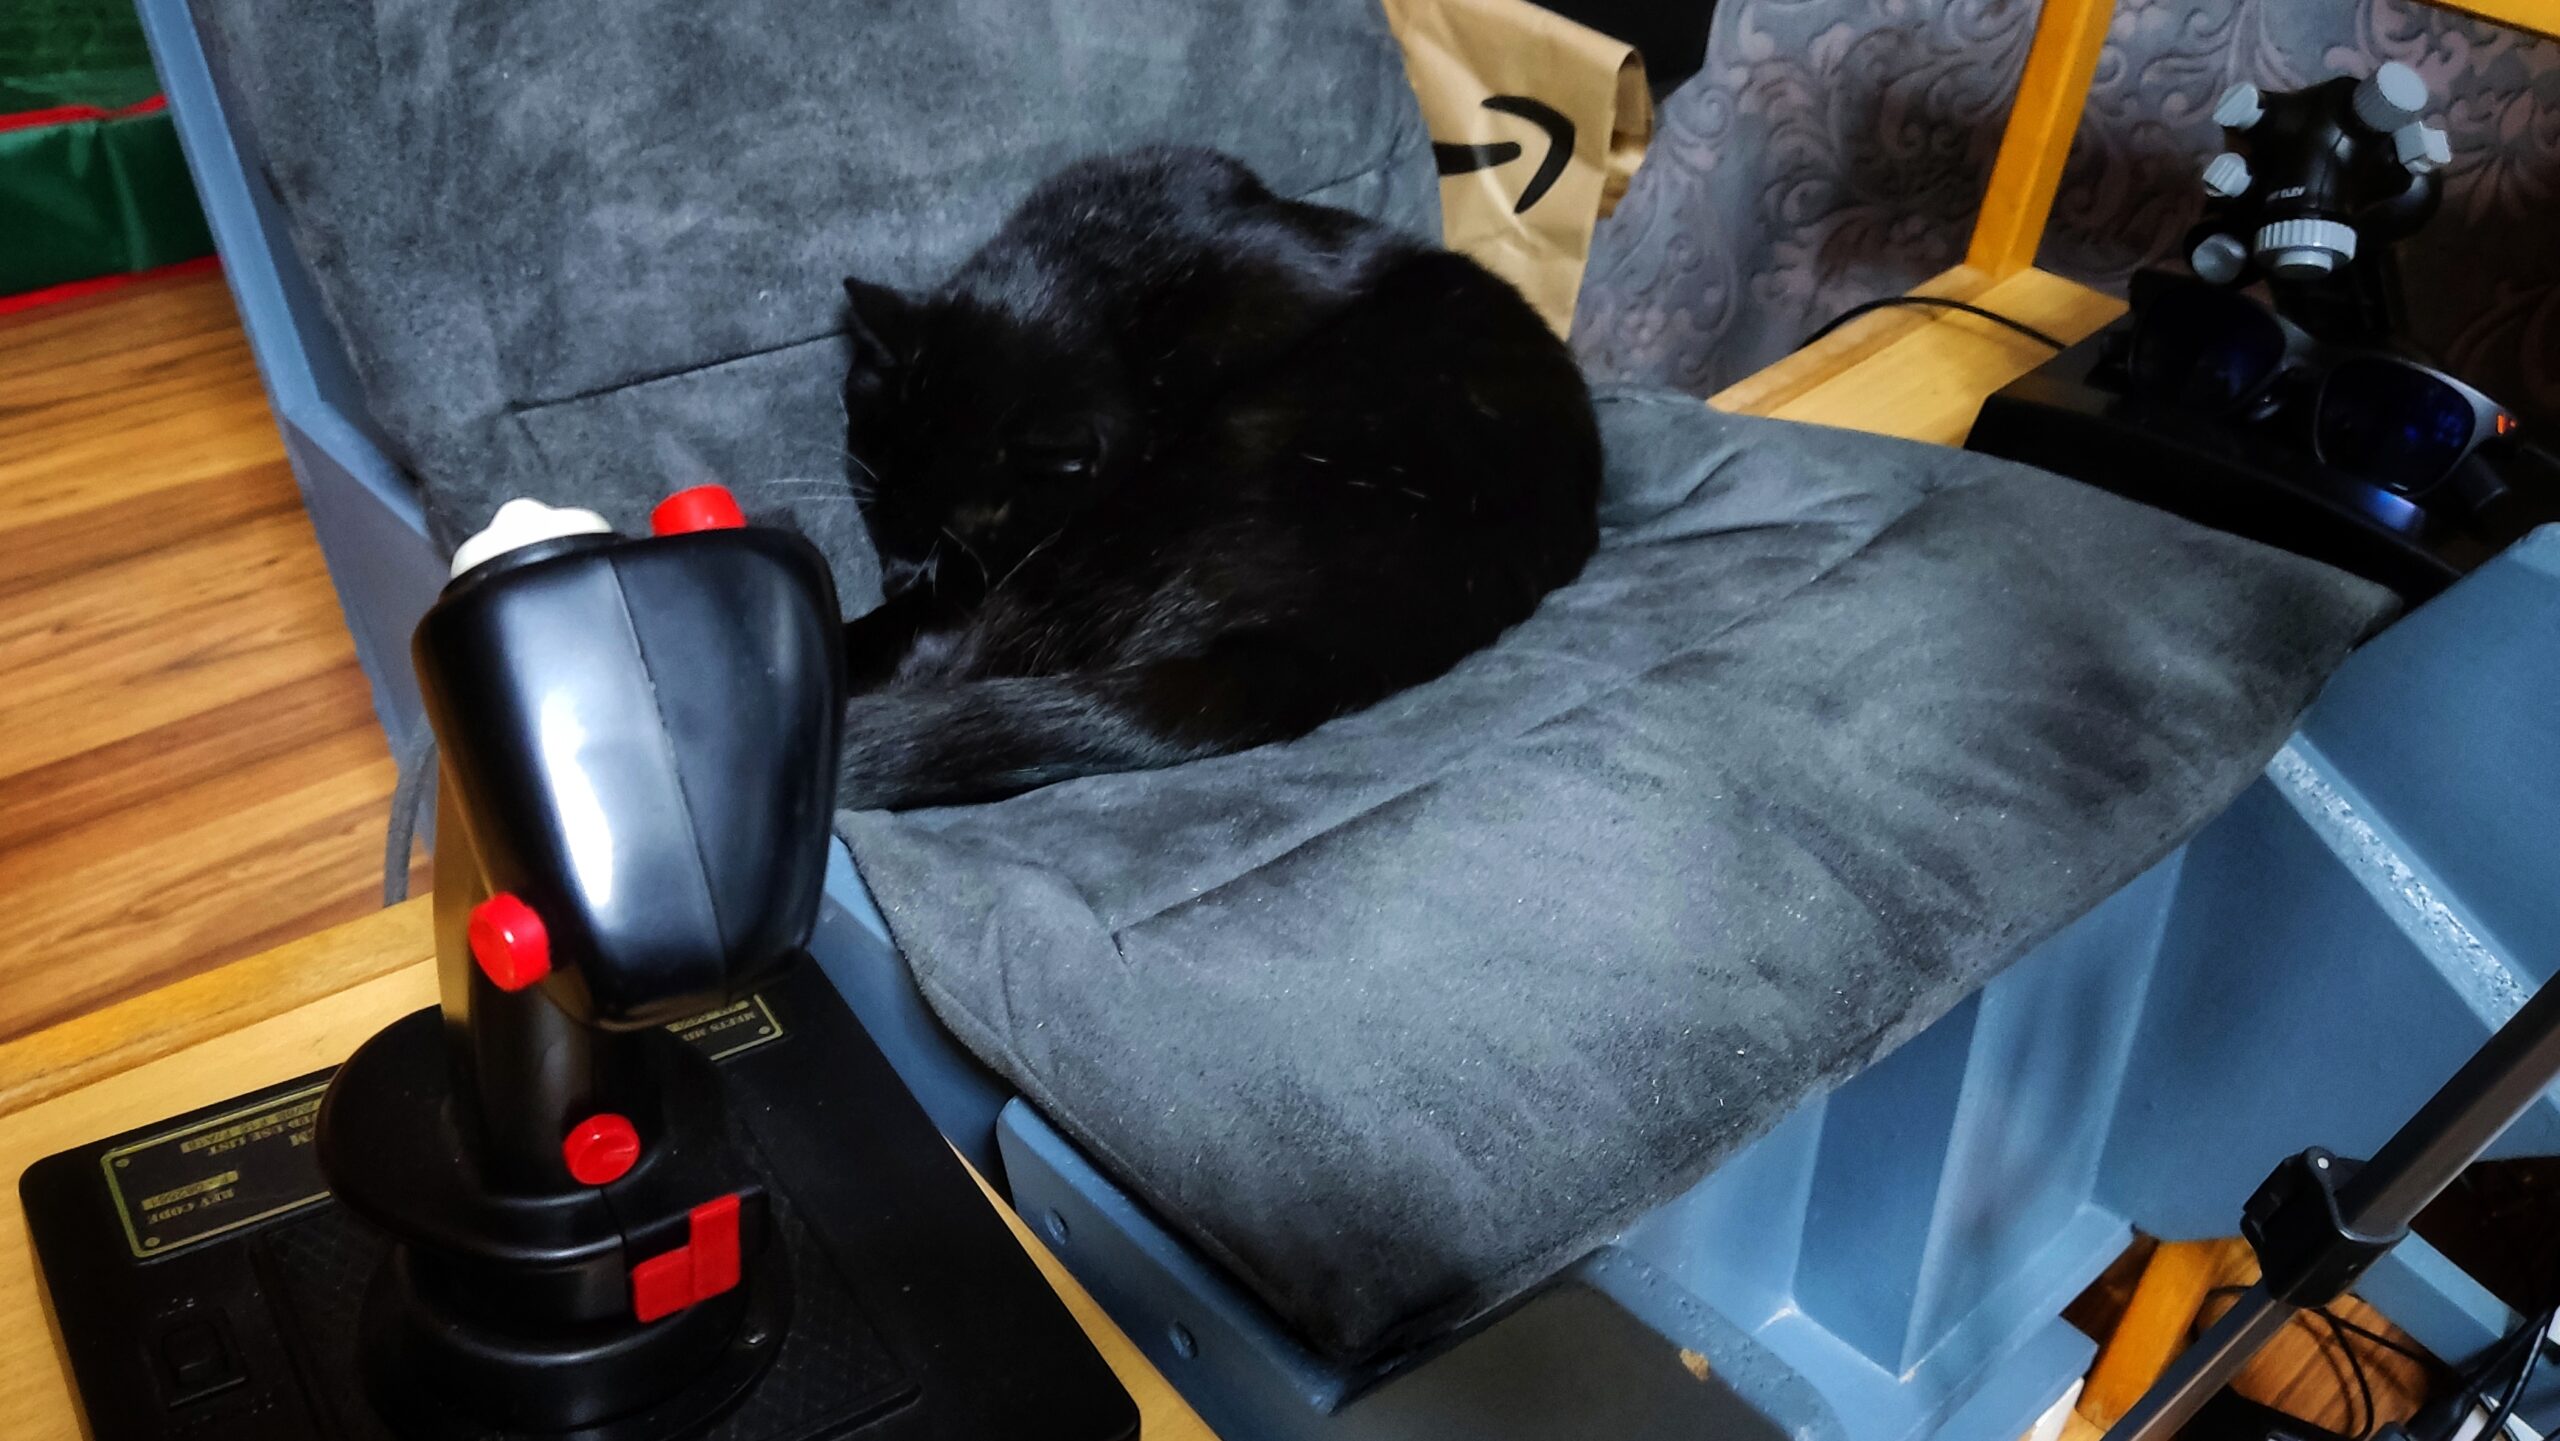
My #ViperPit got an awesome upgrade today. It’s a pressure activated heating mat for the seat usually used in cars (12V are 12V 🤷). For the record: I have to heat full power to get my cave to 18C during the wintertime wasting a lot of energy. This doesn’t make much sense so I’m really happy with my solution that I also have in use for my office chair for years now 👌
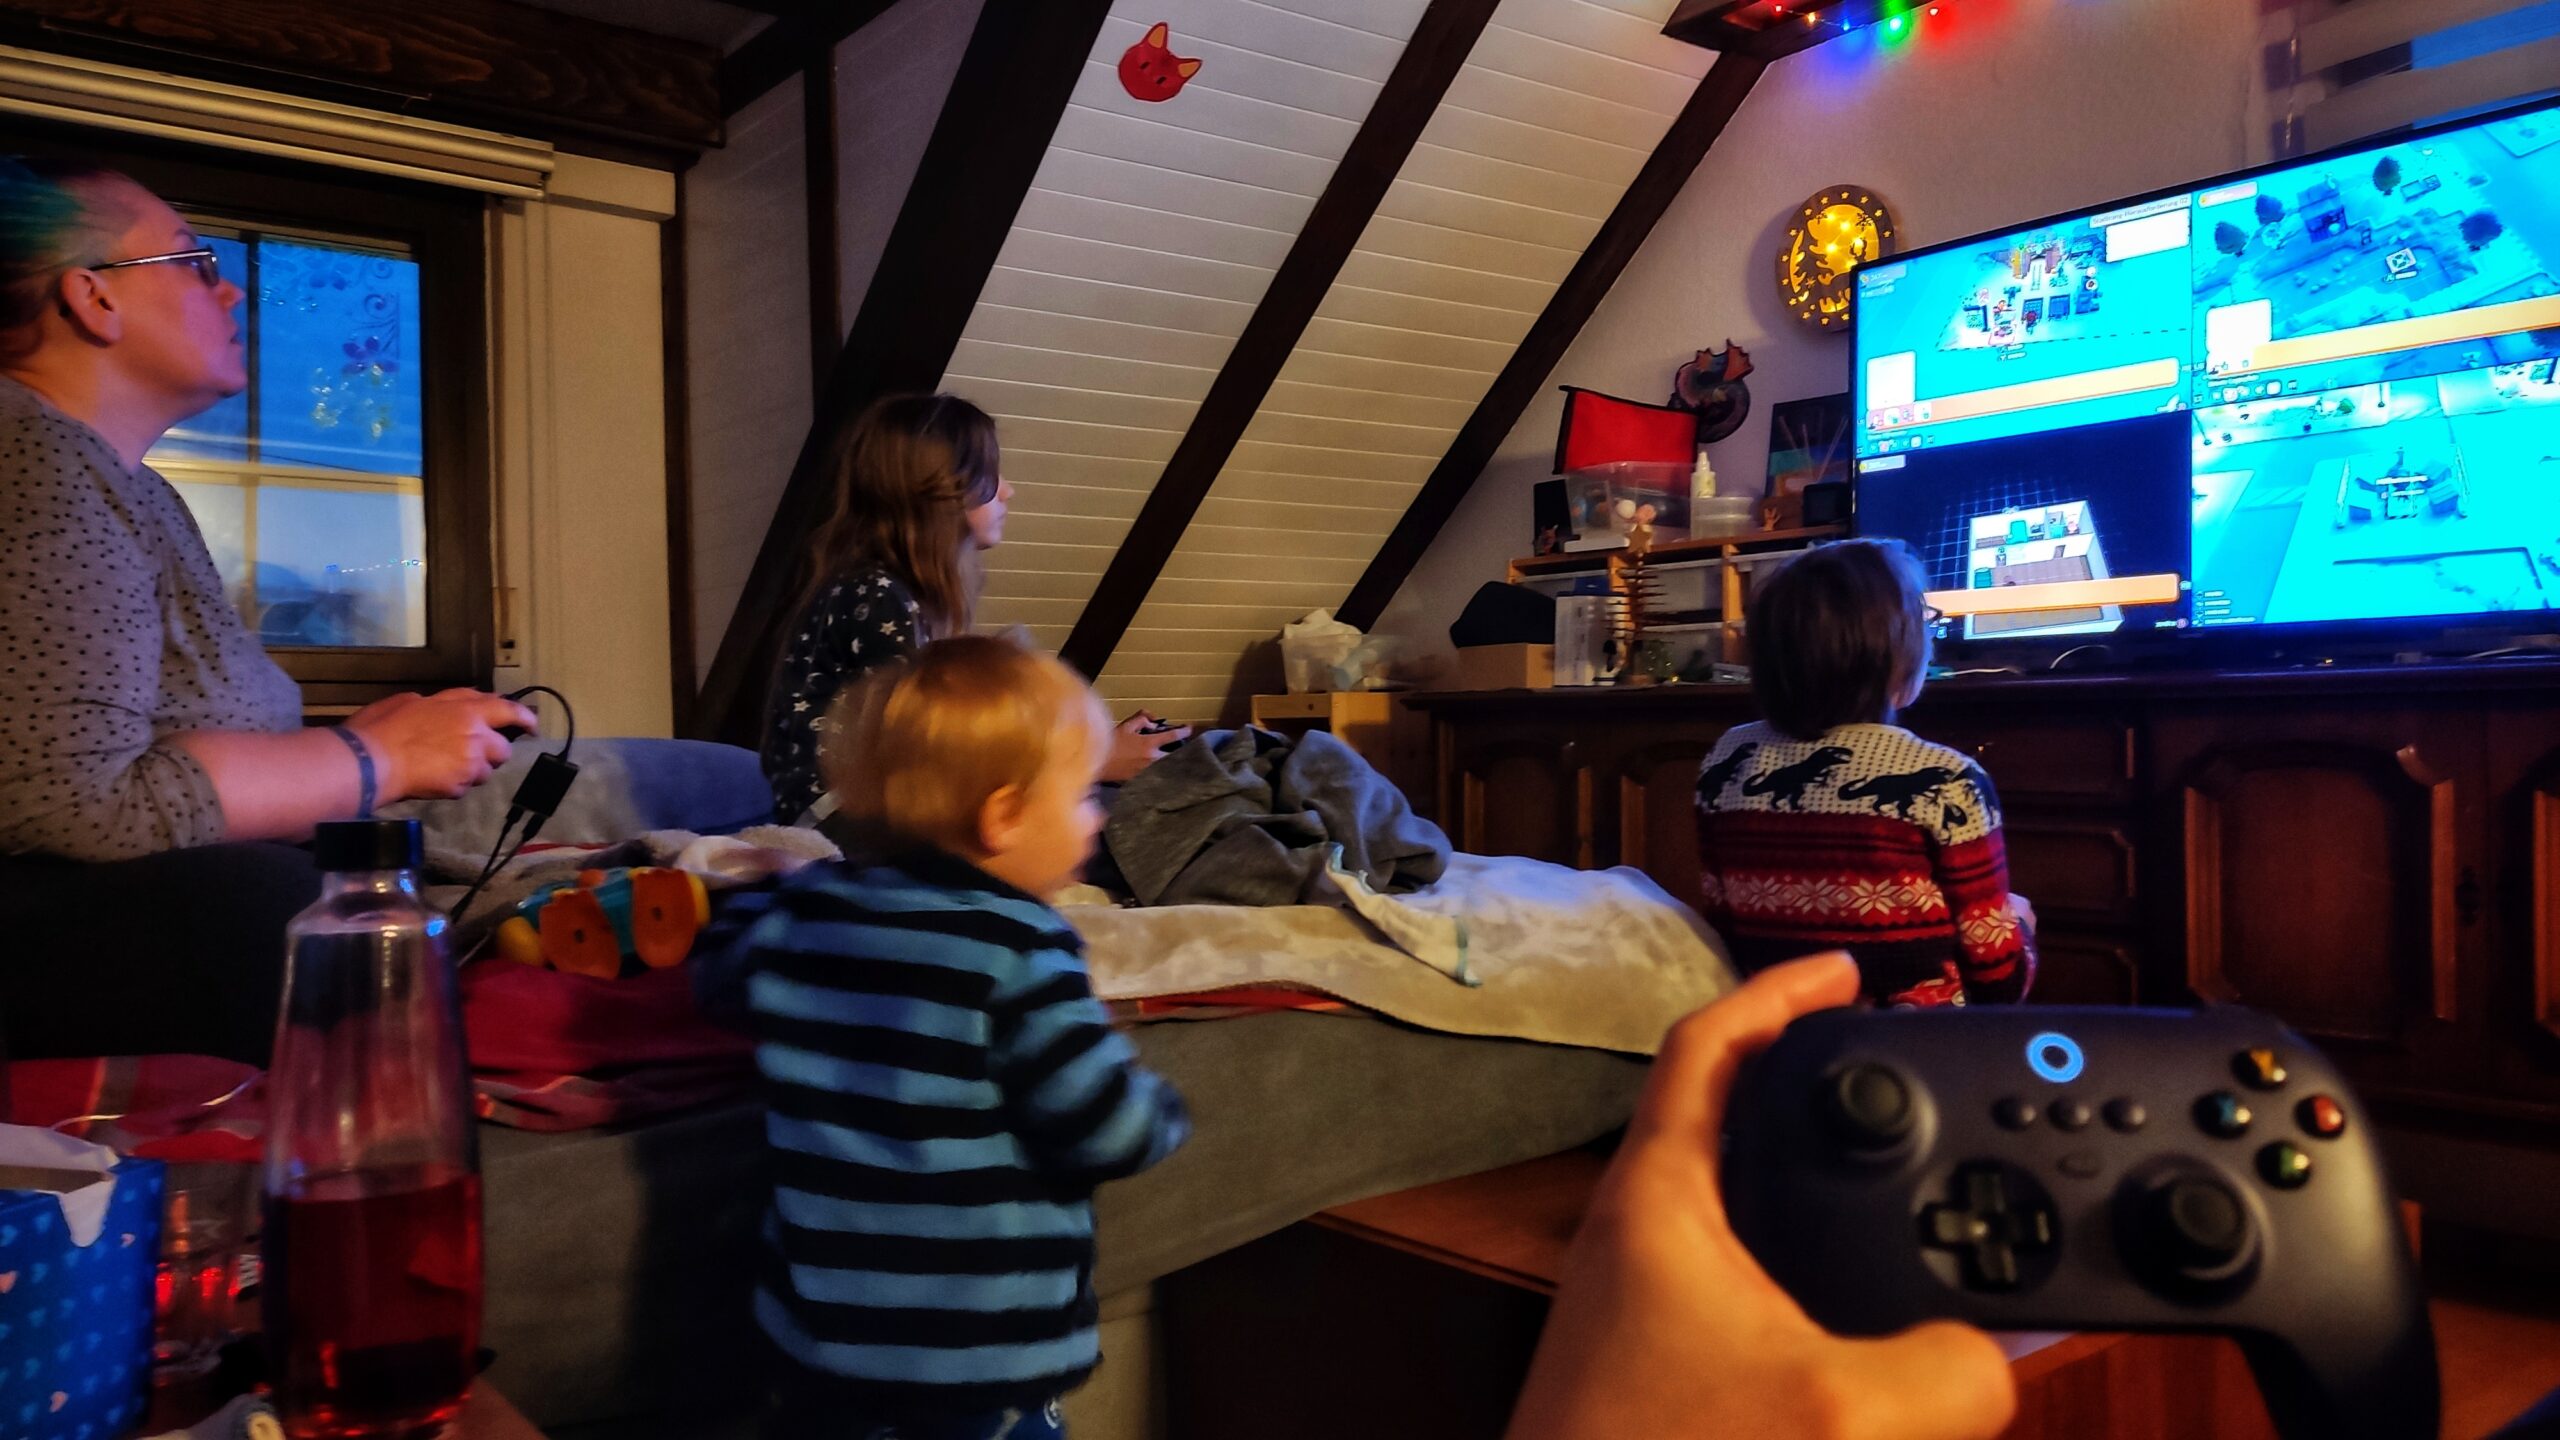
Today we player all together on the 50″ TV in the living room from the [Linux powered] Steam Deck. We used the Viture USB-C adapter, so the Steam Deck didn’t discharge, attached an OTG cable and an ancient USB hub so we could connect our zoo of accumulated controllers. This way we could all play together the Windows game GoGo Town in early access 😁
Whole family playing together over one Steam Deck
What a time to be alive.
Close
🦠 Ad-blocker not detected
Consider installing a browser extension that blocks ads and other malicious scripts in your browser to protect your privacy and security. Learn more.
Stay cool. Stay safe. Use an ad-blocker. Use protection.