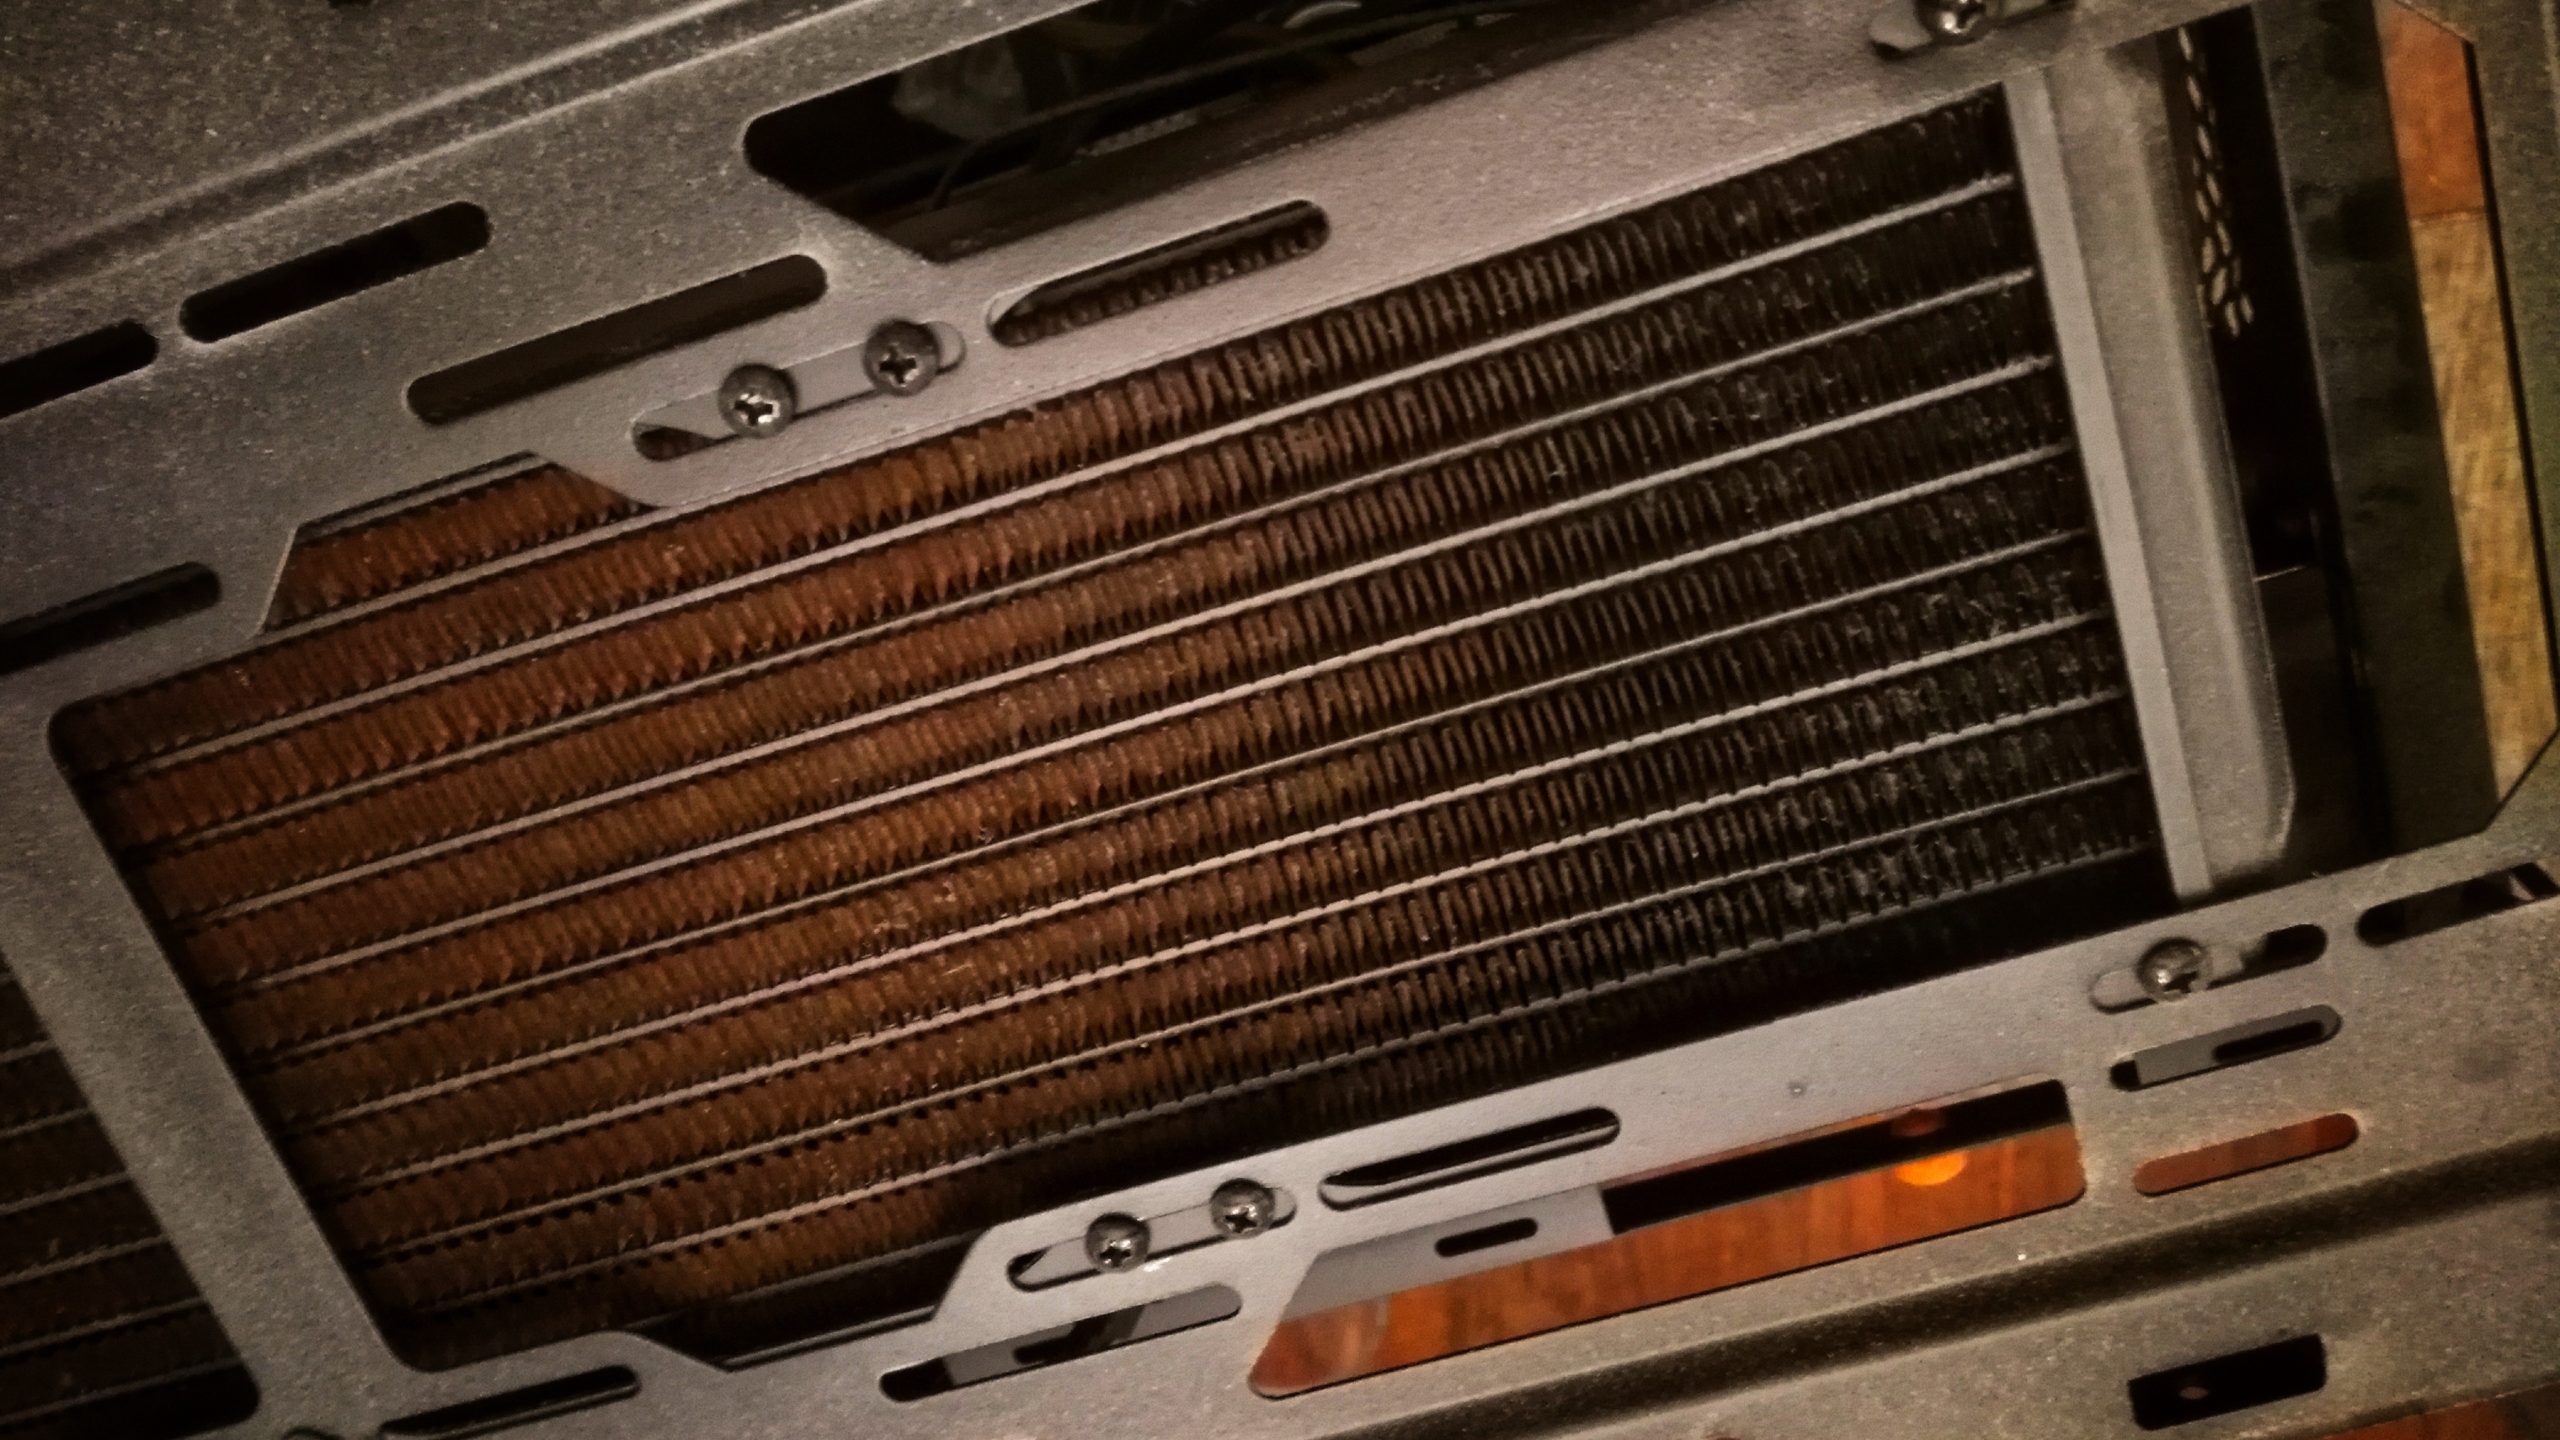
When you have a water cooled computer the last thing you want to see is a message from your CPU driver telling you that it forcefully clamps down power because this means your CPU is throttling down.
Refilling an AIO be quiet water cooling system
This may mean that there is not enough water in your cooler and the CPU starts to overheat. Time for maintenance and a refill!
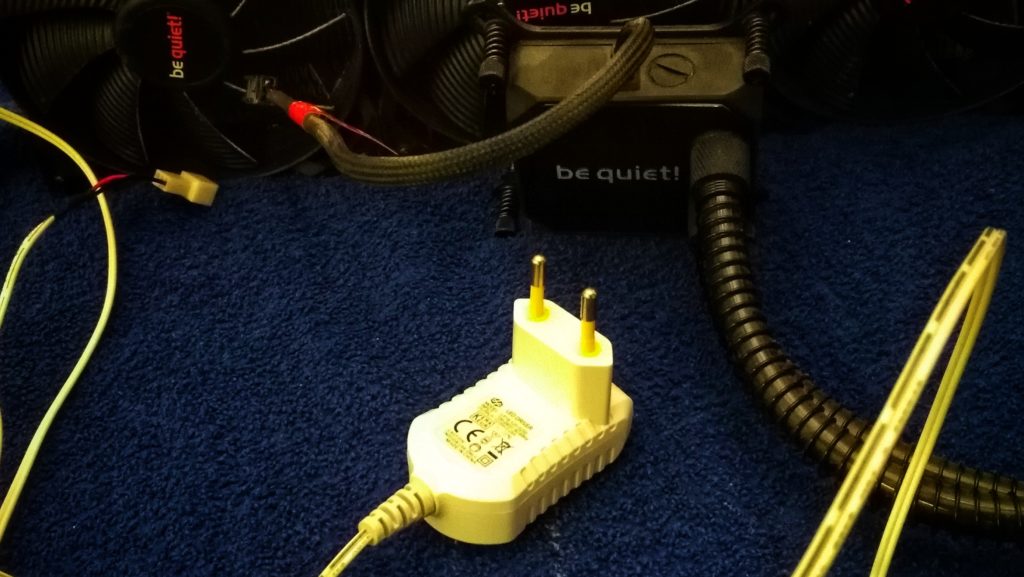
What we need for this is an external power supply or the pump, a pipe, an adapter, and some sort of filter hopper and of course water for the refill.
The pump is powered by 12V and this model should not be undervolted. Seriously, this one will break when undervolted. 12V is basically what an Ikea LED lights strip power supply will provide. You can also use another PC power supply but this is what I have anyway for a fan providing fresh air for my office.
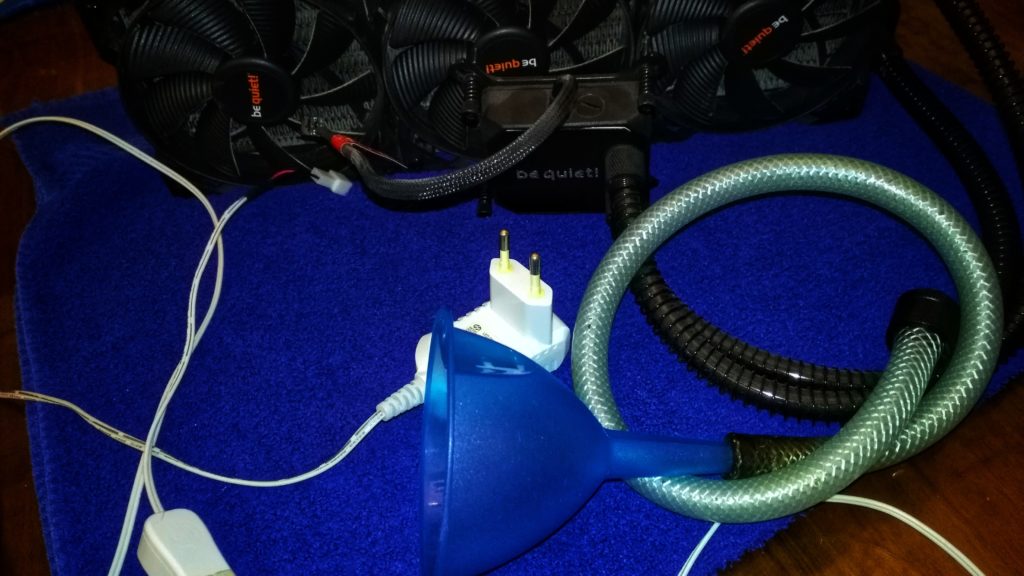
The hose I used for the pipe is a used DN9 RAUFILAM-E from REHAU that I found in the barn. It costs about ~1 EUR per meter but you can of course buy a “special” hose from your usual PC parts mafia for 10 EUR per meter.
Distilled water should be fine. You can also purchase whatever overpriced holy water you may prefer. I won’t care.
I spare you the details how to remove the water cooler, because I assume you assembled it before and if not there are plenty of other tutorials on the net.
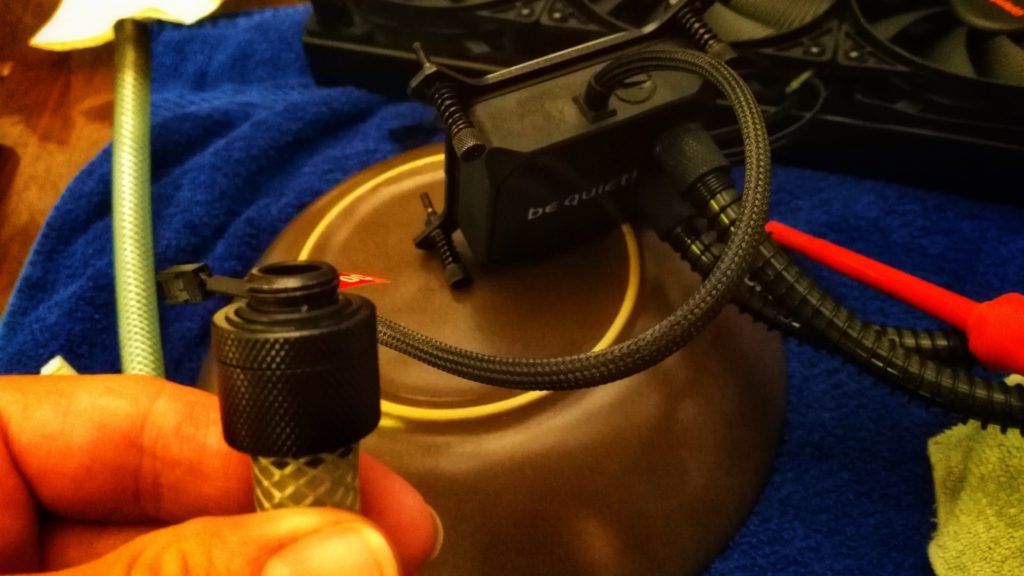
This pump was completely dry after opening the lid with a screw driver. I prepared this contraption held in place with a wire attached to the chandelier. So don’t do this at home. Now I started the pump and added water to the pipe until the pipe was filled.
Now is the time to move and shake the radiator to get all the air out. Do not shake the pump! This takes some time. You’re done when no more bubbles appear.
Don’t forget the seal and screw in the lid while there is still water standing in the hole. Do not use force on the lid, because it breaks easily.
Make sure everything is clean and tidy (and dry) in the end because you don’t want water in your PC. This also helps to see any leaks that may spring. Don’t forget the heat sink compound later or this will be a very short adventure.
When done let the pump run for a little bit to see if any water leaks out.
When everything is assembled again make sure to run a load test and see if any leak springs.
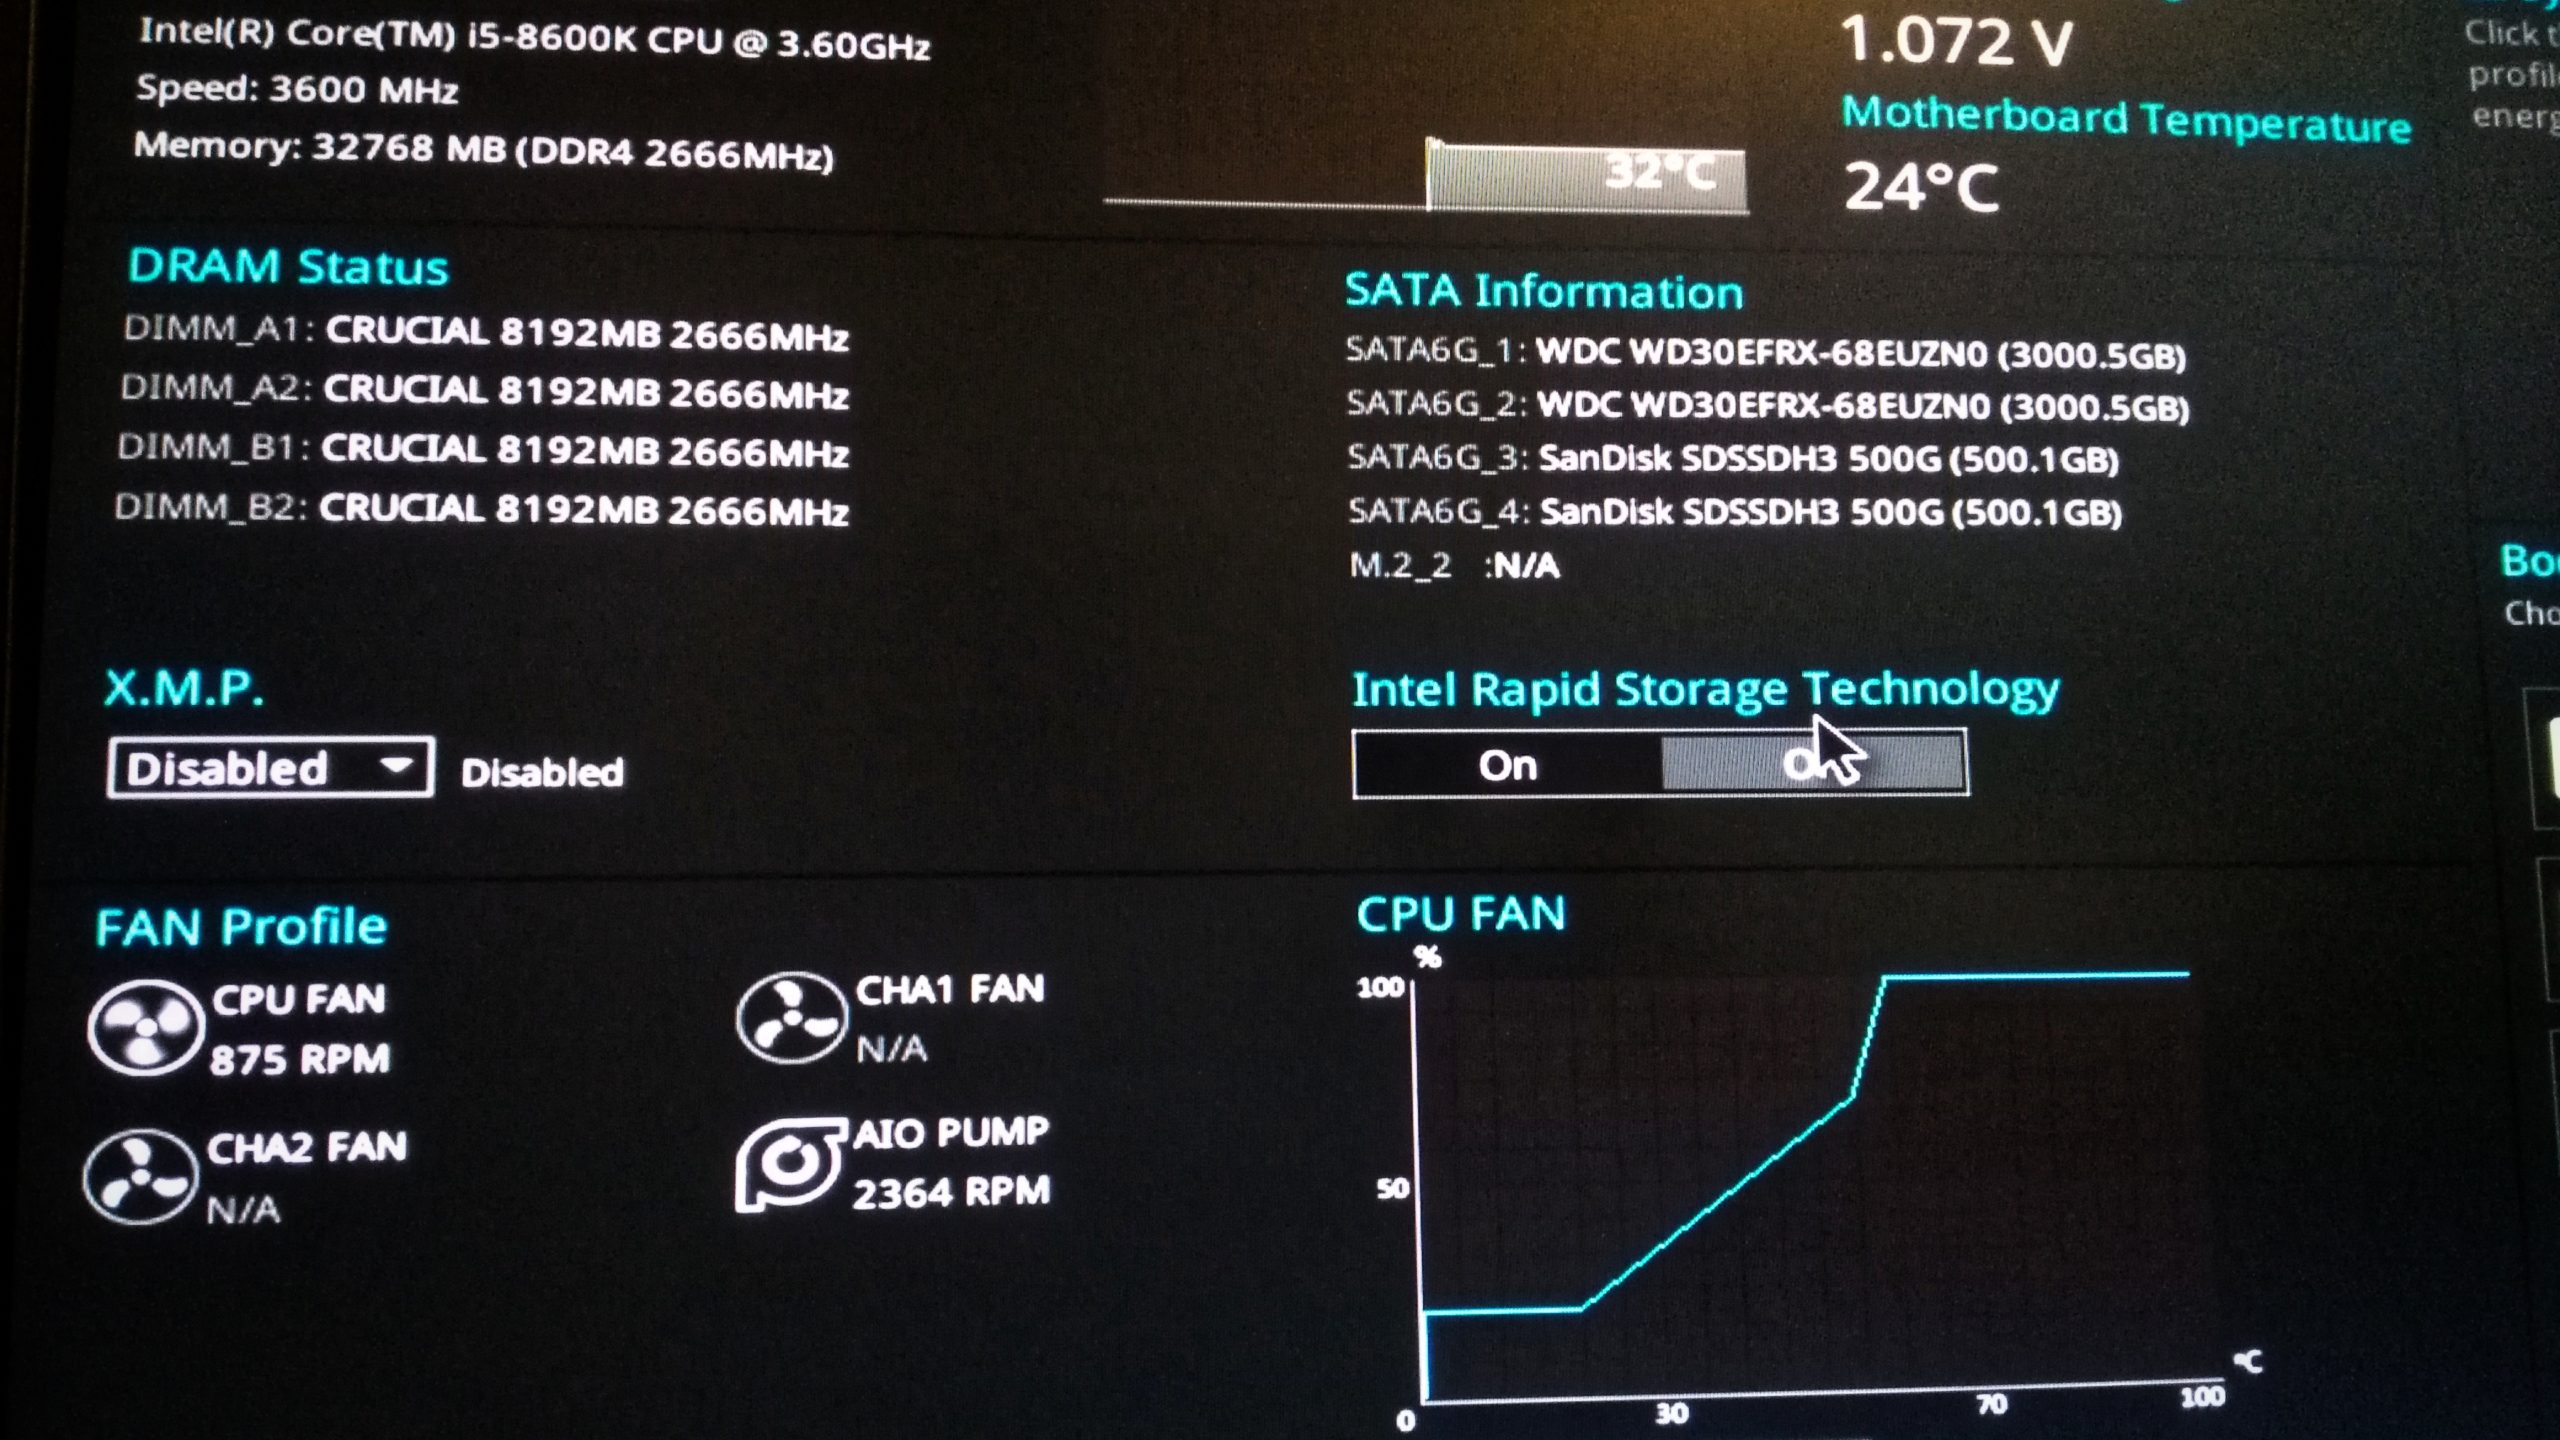
And this is it. The system is able to hold 32°C again where it was hardly able to hold 80°C before.
And as usual, if you break your system you get to keep the pieces.
I somehow never finished this little gem and since I feel somewhat nostalgic today decided to give it another spin. Interestingly this game was ported to various systems including Mac and Linux in 2013 premiering as part of the Humble Double Fine Bundle. This is probably also where I picked it up.
Anyway, uploading this will take some time but you can watch the partially muted recording elsewhere. Won’t upload it here thanks to ridiculous copyright claims.
Video of Diaspora: Shattered Armistice (on Linux PC)
Seems to work nice with my DIY headtracker on Linux PC too. Sadly I got quite some frame-drops due to recording (and probably multi-head too). It works way better without all the cameras and a life-stream going on but I think it’s enough to get a good impression. Botched emergency landing included xD
Warning: This may fuel a desire to re-watch the BSG series again 😀
I like space and science fiction. Diving into epic stories set in some distant future amazes me since elementary school.
I’m also a gamer. And a tinkerer. It’s in the family.
I keep wondering: How can I improve the immersion of my games without going full VR?
DIY Headtracker for gaming (on Linux PC)
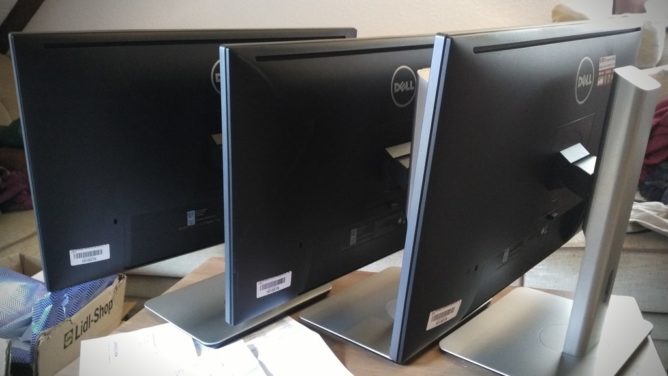
I used a triple screen set-up before. It consisted of different models in height and size. When one screen finally broke down I purchased 3 refurbished screens of the same brand and model. What a difference!
The kids love it too. Of course. Means less stick time for me. Anyway.
This is when I started to read about head tracking and went on a quest to get this working for the game X4. As a bonus on Linux PC, my preferred system also for gaming.
The thing is: “The” reference product for a headtracker is the TrackIR system. Price as of today: 220 EUR. Ouch! That’s like a cheap VR, right? And it’s Windows only. No thanks.
So I checked what’s in this thing. Apparently a cheap camera, some infra-red LED, and a filter allowing only infra-red waves. And software, of course.
Since this is for Linux I get to pick my poison for the software part, and I settled with Opentrack fast. Onwards to the hardware part. I abused my mobile phone for the testing, sending it’s Gyroscope data via wifi to my PC, and while it worked it also _sucked_. Both, phone and wifi I mean.
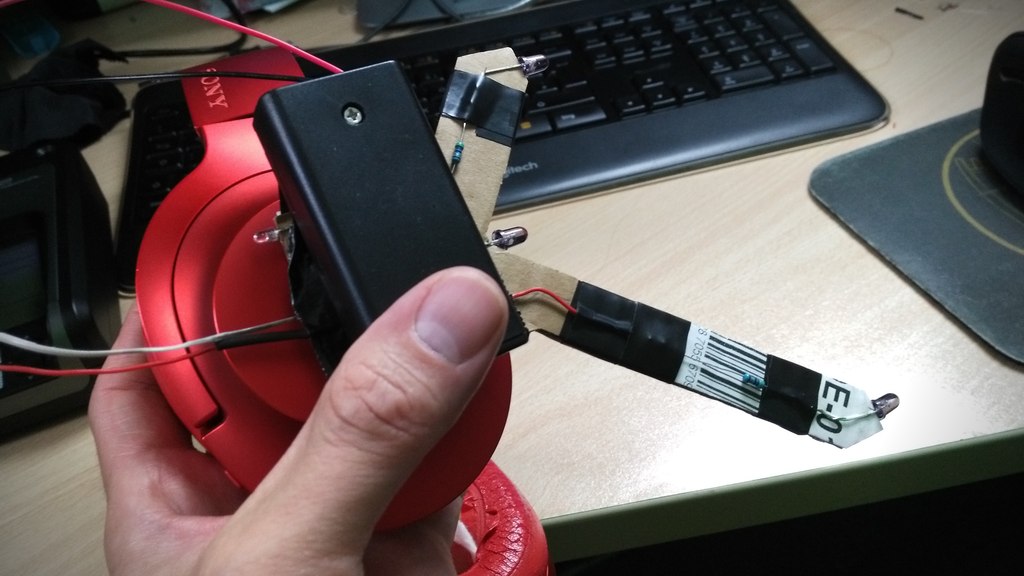
Head tracking is awesome. And I knew I want it. So I started prototyping. For this I went with a simple design that I eventually implemented on cardboard. It looks hilarious but it gets the job done.
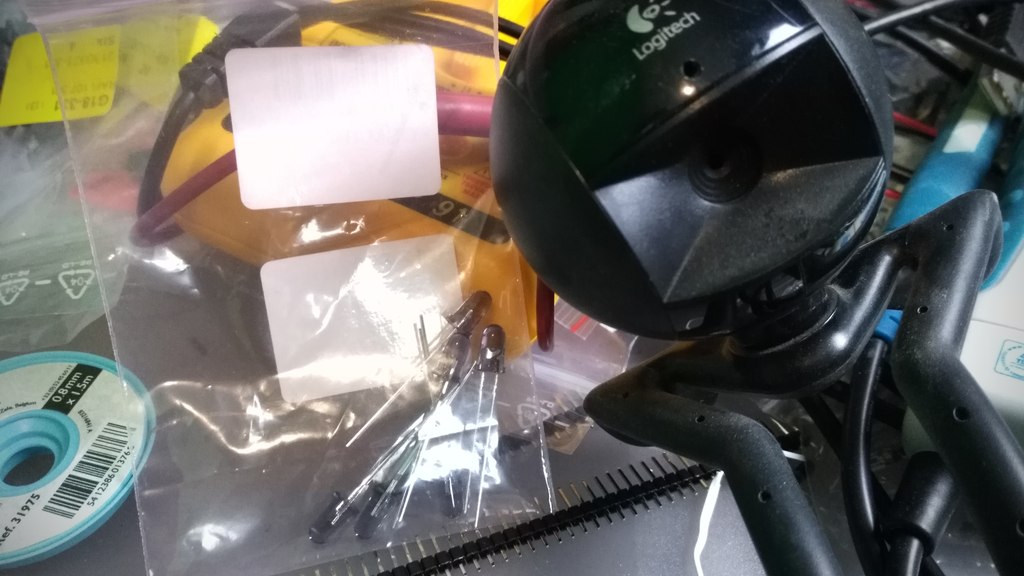
The focus was on a long life cycle so I wouldn’t have to replace the rechargables in the middle of a session. To get this right I checked with the camera that I was going to use. See (video above), this is way to bright and by trying various resistors I could get this down to 33mA per LED and still get a decent detection rate with Opentrack.
Speaking about the camera. That’s nothing special. It’s a dead cheap 480p Logitech QuickCam Communicate STX that I got from a discounter a decade ago. It was so cheap it doesn’t even _have_ an infra-red filter that I’d have to remove first.
I used tape to attach the salvaged camera cover of a dead G20 controller. That’s a Wii Remote knock-off that does basically the same thing like a headtracker. Various other foils can be used for this as well, as long as they permit infra-red. The idea is to reduce or remove all other light waves but infra-red.
The trick is to also turn off auto exposure and fiddle with the contrast and sharpness until a decent frame rate and a clear infra-red wave source by the LED can be seen.
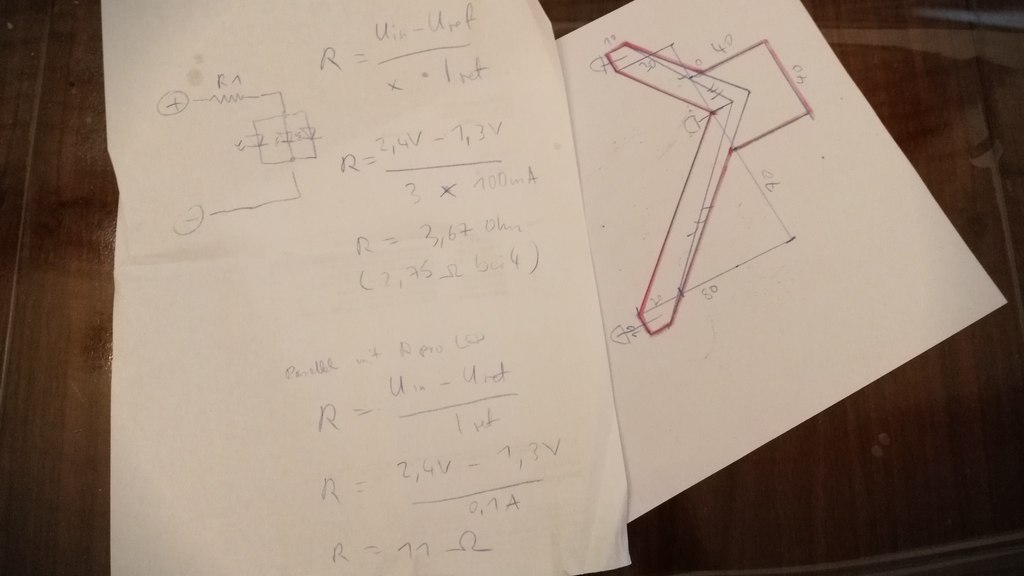
When I was satisfied with my meter readouts, and my highly professional scribbles, I started working on the prototype while streaming the whole process on the Discord channel of the awesome Fly Dangerous project. If you like racing with a space ship give it a shot.
The prototype is made of cardboard that doubles as isolation for the polarity. The rest is tape and hook-and-loop fastener to attach the headtracker to my headphones. No magic here. The whole contraption is powered by two 1.2V rechargeables. I opted for a micro switch and an additional LED as power indicator, that I dimmed down even more. I can after all not see infra-red so this seemed like a good idea to me. Spoiler: It is.
So how does it play? Over the next weeks I tried basically any game supporting head tracking that I could get my hands on. Please keep in mind that I usually play with lights off but started the studio lights for demo purposes. The tracker does still work just fine.
I quickly found out that each game needs it’s own profile for fine tuned settings. Good thing that Opentrack has me covered on this. First, my beloved X4 using Wine and the TrackIR protocol.
Sadly I came to the conclusion that my GPU is no longer up for the task and Wine would cost me too many frames. I switched Opentrack to emulate a joystick instead and mapped it to camera movements in the native X4 version. It’s not exactly the same but it’s okay-ish. I have an idea how to hack this properly into X4 using an extension and a UDP server but that’s a topic for another day.
Anyway, the same principle works with X Rebirth too, making me even happier. While dated it still has it’s charm and the verse still feels a lot more alive compared to X4. It’s also not taxing my GPU that much.
Now for something different. When Opentrack would list a “protocol” named FlightGear I became very curious. I installed this free and open source flight simulator and crashed my first Cessna into the ground minutes later. By now I’m confident that I can crash a Cessna just about anywhere. I’m not fond of flying in real-life but avionics sure are a fascinating topic.
This was the moment a Steam sale happened and I bagged various flight sims, Space Kerbal and House Of The Dying Sun. All with TrackIR support.
Little did I know what gem I bagged with House Of The Dying Sun by the way. Sadly it’s also very short but I enjoyed every minute of it and will probably play it again. The art, sound and music reminds me a lot of Battlestar Galactica. Easy win 😀
So yeah, this is my current gaming set-up. I built myself a head tracker for 5 EUR. On Linux PC.
I also may have fallen into the rabbit hole called “simpit”.
So much whining about some new Windows on my TL and the one thing that sounds really good about it, #tpm that is, people seem to go bonkers about. Said it before: TPM is there for the user. Even on #Linux. Use it! It is not some magic DRM machine.
Racing in space sims is a thing and usually done by a small and sometimes hidden community within games like Elite Dangerous or Star Citizen. What happens when this is not enough for players, or when they simply don’t want to waste time grinding the required resources in-game, is demonstrated by @jayleefaulkner at https://github.com/jukibom/FlyDangerous
I was delighted to find Linux PC binaries over at https://jukibom.itch.io/fly-dangerous as well – and this is a very early alpha even. Guess someone pestered the dev about Linux already and I so had to give this a spin, of course.
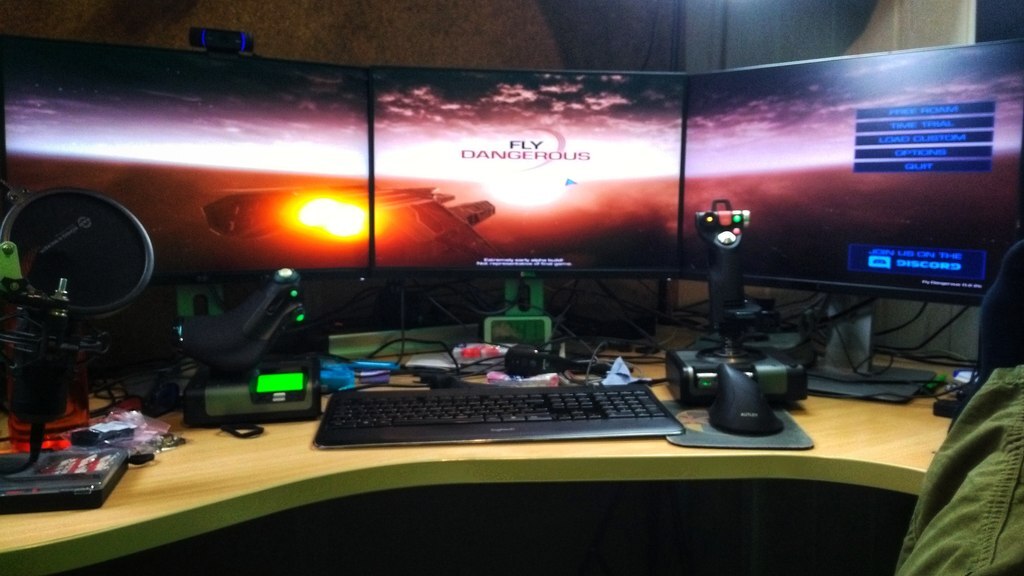
Unpacking the FlyDangerous-0.2.2b-linux.zip was a no brainer and the game itself started just fine. I do have however a very specific triple head display setup and the game started on the wrong display in fullscreen mode and could not be persuaded to go into windowed mode so I could reach the buttons to change the display resolution via hotkey or tweak the config at ~/.config/unity3d/StarGoat/FlyDangerous/prefs. It insisted of staying on defaults so once more wmctrl to my aid:
Fly Dangerous in all it’s glory over multiple screens
After this was sorted out I noticed that Unity detected “some” joystick with only an X and an Y axes. This doesn’t do my X52 Professional H.O.T.A.S justice. Usually I’d use the controller mapping in Steam now but this isn’t a Steam game and while it can be added as a foreign game to Steam I can not set any controller configs for it there so I started looking around.
Apparently (modern) Unity uses SDL2 and the modern evdev input system to detect joysticks on Linux PC and this can be indirectly configured / overridden using the environment variable SDL_GAMECONTROLLERCONFIG to provide additional input configurations like the ones listed in https://github.com/libsdl-org/SDL/blob/main/src/joystick/SDL_gamecontrollerdb.h (that somehow does not know of the X52 H.O.T.A.S?). Luckily there are various tools to create a mapping for this – for example Gamepad Tool at https://generalarcade.com/gamepadtool/ – which sure looks familiar enough from the re-mapping I’m used to by… Steam! AntiMicroX should also work for this but I didn’t try.
Gamepad Tool with my configured X52 Pro for Fly Dangerous
And since I’m on Linux and totally lazy I threw all this in the script file flydangerous.sh to start the game:
I love gaming over multiple monitors. It’s my current choice for work and games – especially simulations. Having several monitors attached to one computer (or graphic card) is not a big deal in 2021 any more. The framebuffer in recent graphic cards is insanely huge compared to some years ago, when one really had to think twice about the possible resolution when e.g. connecting a beamer to a laptop (good old SiS 630 anyone?).
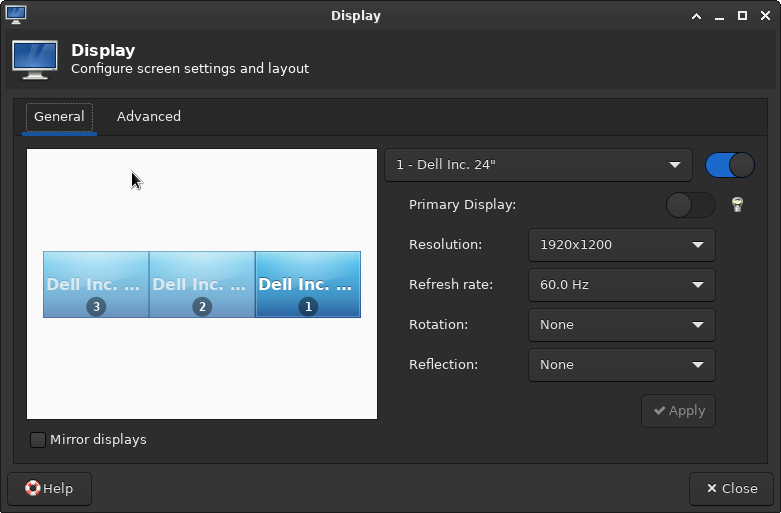
xfce4-display-settings for my refurbished “new” set of displays
This couldn’t be easier nowadays. Even mixing the integrated graphic card of a recent Intel CPU with an NVIDIA or AMD dedicated graphic card does usually “just work”. Some driver specific mode may have to be set but that’s it. The workspace easily expands over multiple displays and windows can be moved around freely.
Games do not see one huge desktop but individual displays
There is however a catch. Games tend to read the primary display only and the maximum resolution offered usually comes with the readout of this very first display – or worse – the first display connected. This sucks especially when the monitors have different resolutions, as it was the case for me for several years now, because I didn’t just purchase a set but collected discarded monitors over the time. This can often be omitted by temporary disabling the “false” ones or by force window mode.
This results in hacky scripts involving xrandr, wmctrl and xdotool. This is for example how I hammered X4: Foundations into shape _after_ it started, because it would allow me to select a single display only. Set to window mode it can be freely scaled but that comes with a disturbing window decorations so with this the X4 window gets positioned to 0x0, expanded to 5770×1210 and the window decorations purged:
That’s a pain to find out and the fun really stops when it comes to Proton or some games that would not allow resizing over their maximum detected resolution – like for example Everspace.
How about a virtual monitor?
So the idea was to introduce a completely virtual monitor to the systems with the resolution of choice. VNC servers do that all the time so it must be possible. The usual approach won’t work in this case though: When loading the dummy driver the real displays can usually no longer be used and the drivers for AMD and NVIDIA do not really offer such a feature at all.
It is perfectly possible to define virtual monitors with a recent xrand but they have to be mapped on an existing output (a real port). One can use an unused port (as in: no monitor connected) for this, add a Modeline and even force it as “online” like so: echo on > /sys/kernel/debug/dri/0/HDMI-A-1/force
I was delighted to see the display showing up briefly but the AMD driver made short work of my soaring hopes by forcing it off again in an instant. So close and yet so far. This would require some hardware hacking by creating a dummy plug for the port. That’s basically some resistors in the right place making the computer think a display is connected. I hear they can also be purchased and this may be a way for others.
Others seem to have had success by compiling the experimental DisplayLink driver that seems to offer (virtual) monitors but I really didn’t feel like fiddling with something even more alien that will probably break on the next kernel update again.
Intel to my aid!
The success for me was in the end to use of the Intel driver and it’s VirtualHeads feature. The caveat is that one probably needs an Intel CPU for this to work and has to create a X11 config file. If this is done without adding the usual driver people will experience black screens on reboot only. This may be a show stopper for inexperienced Linux users who don’t know how to recover from a broken X11 config (yet :D). For me this is an amdgpu so my file /etc/X11/xorg.conf.d/20-intel-virtual-and-amd.conf has to look like this:
Triple check that your driver is used in there instead or you will end up with a broken config without the possibility to log in to a graphical window manager. When in doubt start e.g. a new session to your liking on the next display server where you can switch back with the key combination ctrl+alt+F[1-0]: startx /usr/bin/startxfce4 :2
Once started a new provider shows up and the new output “VIRTUAL1” is available: xrandr --listproviders
Now that we have a virtual monitor we need a Modeline for it. This is usually the current screen (of the framebuffer) and can be calculated (e.g. sum of all monitors x height and Hz of one monitor) or by asking the system: xrandr | grep Screen
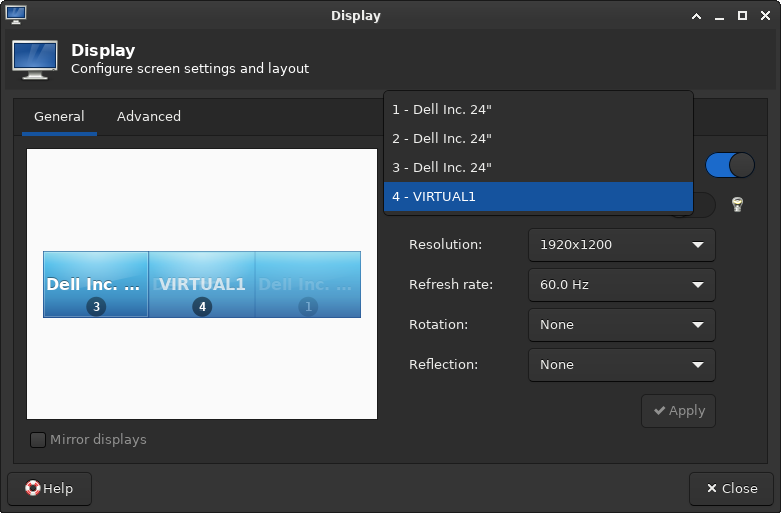
Now all information needed to finally set up the virtual display is there. I’m creating the virtual display on top of the three real displays because I also want to see what’s drawn on it. That’s not strictly required though and in fact most graphical tools to configure the monitor location will even refuse this – because this use case is simply not considered or supported. Gnome for example really didn’t like this. XFCE4 didn’t care. Ymmv:
The virtual monitor becomes visible in display settings (xfce4-display-settings here)
And it works!
After a lot of research and fiddling (and breaking my X config several times) I finally found a working solution. Games let me select the virtual monitor or see at least my primary with my “maximum” resolution. Sometimes this still requires window mode but I could care less – the decorations are optional. And it works like a charm! Here is a small selection of the games I play most at the moment:
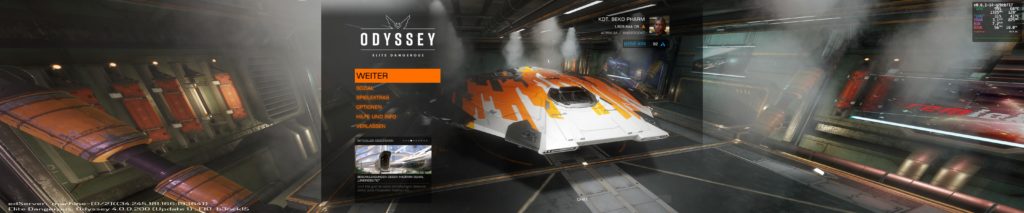
Elite Dangerous: Odyssey
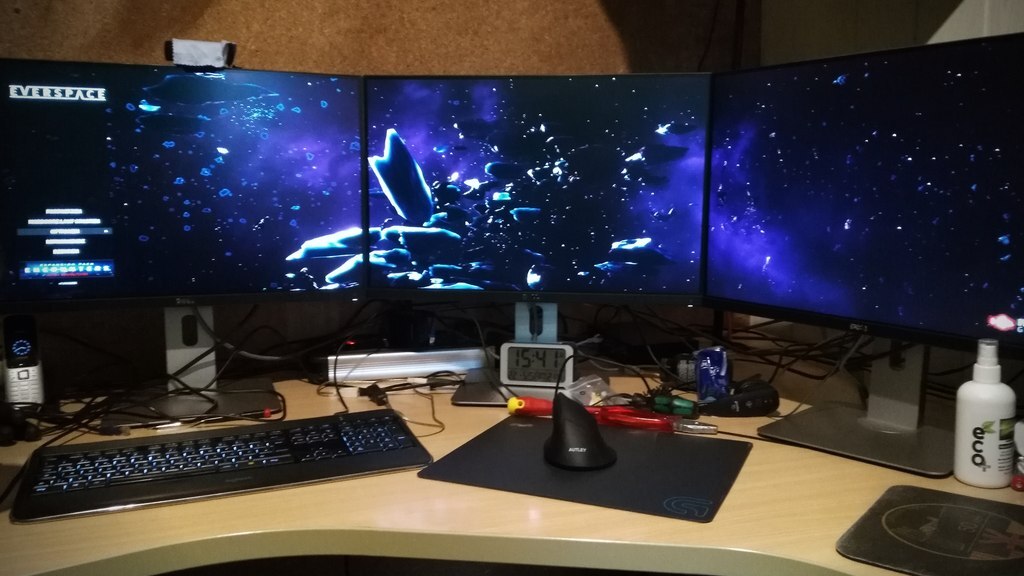
Everspace
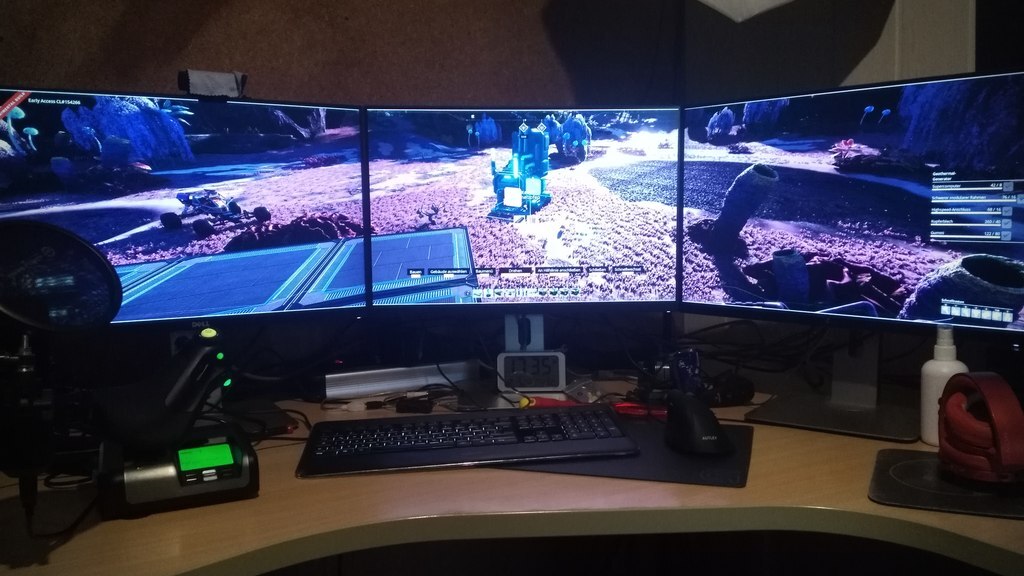
Satisfactory
X4: Foundations
No Man’s Sky
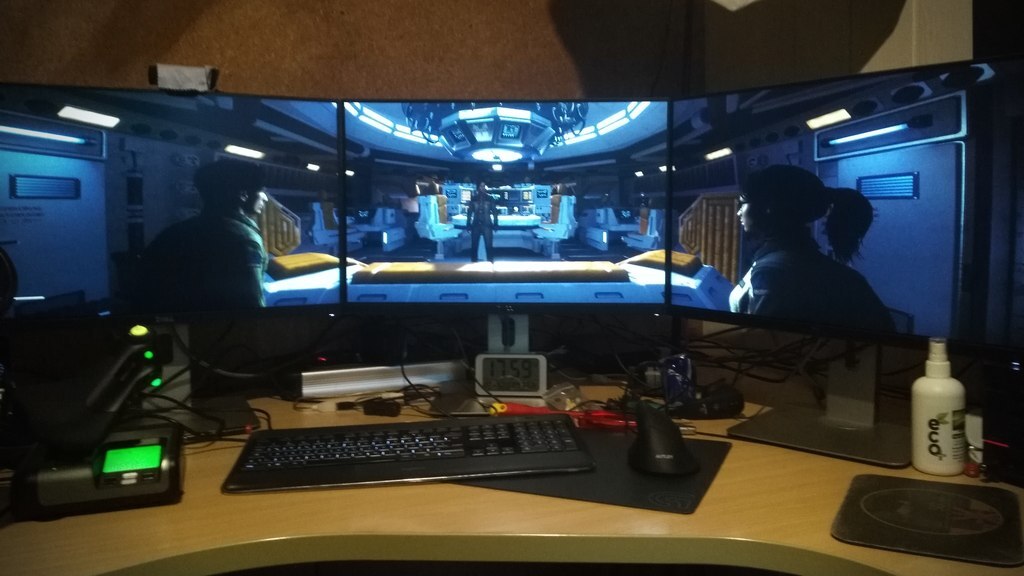
Alien: Isolation
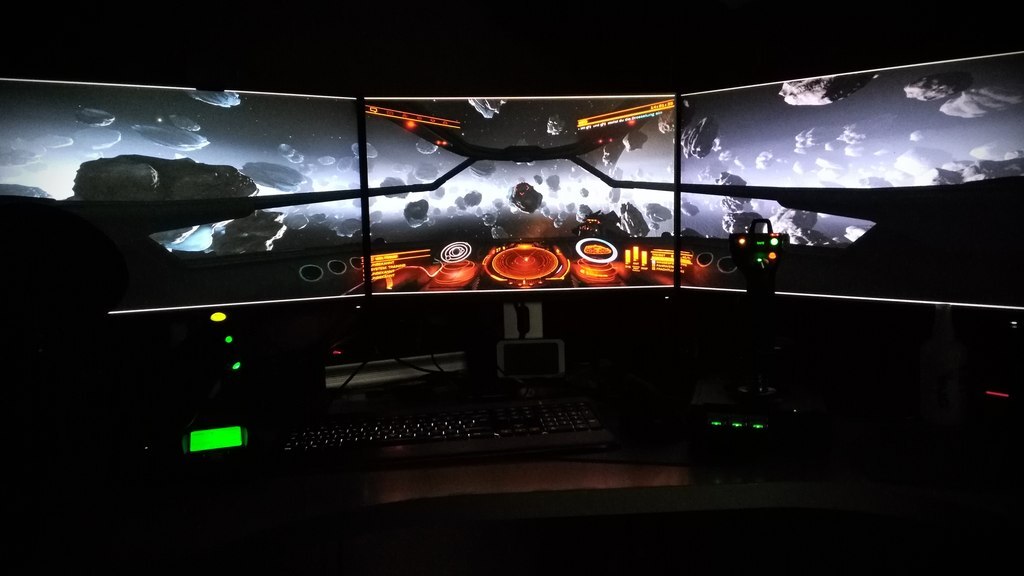
This is how my set-up looks:
Now I’ve another problem. With this my usual 1080p gaming resolution is no longer and my graphic card is simply not up for the job any more 🤣
At least gaming itself is easy as pie on Linux in 2021. Complex display set-ups? Not so much.
I recently purchased the dead cheap Sabrent USB 3 Hub for 11.99€ not expecting much. I was really just after a replacement for my DIY usb interruptor (that still does the job) and I was already laughing at the claimed USB 3 support when I bagged this. I do have some USB 2 HID devices that I only need for gaming and do not want powered up (and wasting plugs) on my computer all the time. This is the sole use case for the purchase and it did claim to have Linux support – which usually means that the xhci_hcd kernel driver recognizes the device as something usable.
tl;dr: Do not use for disks or power hungry devices to prevent data loss.
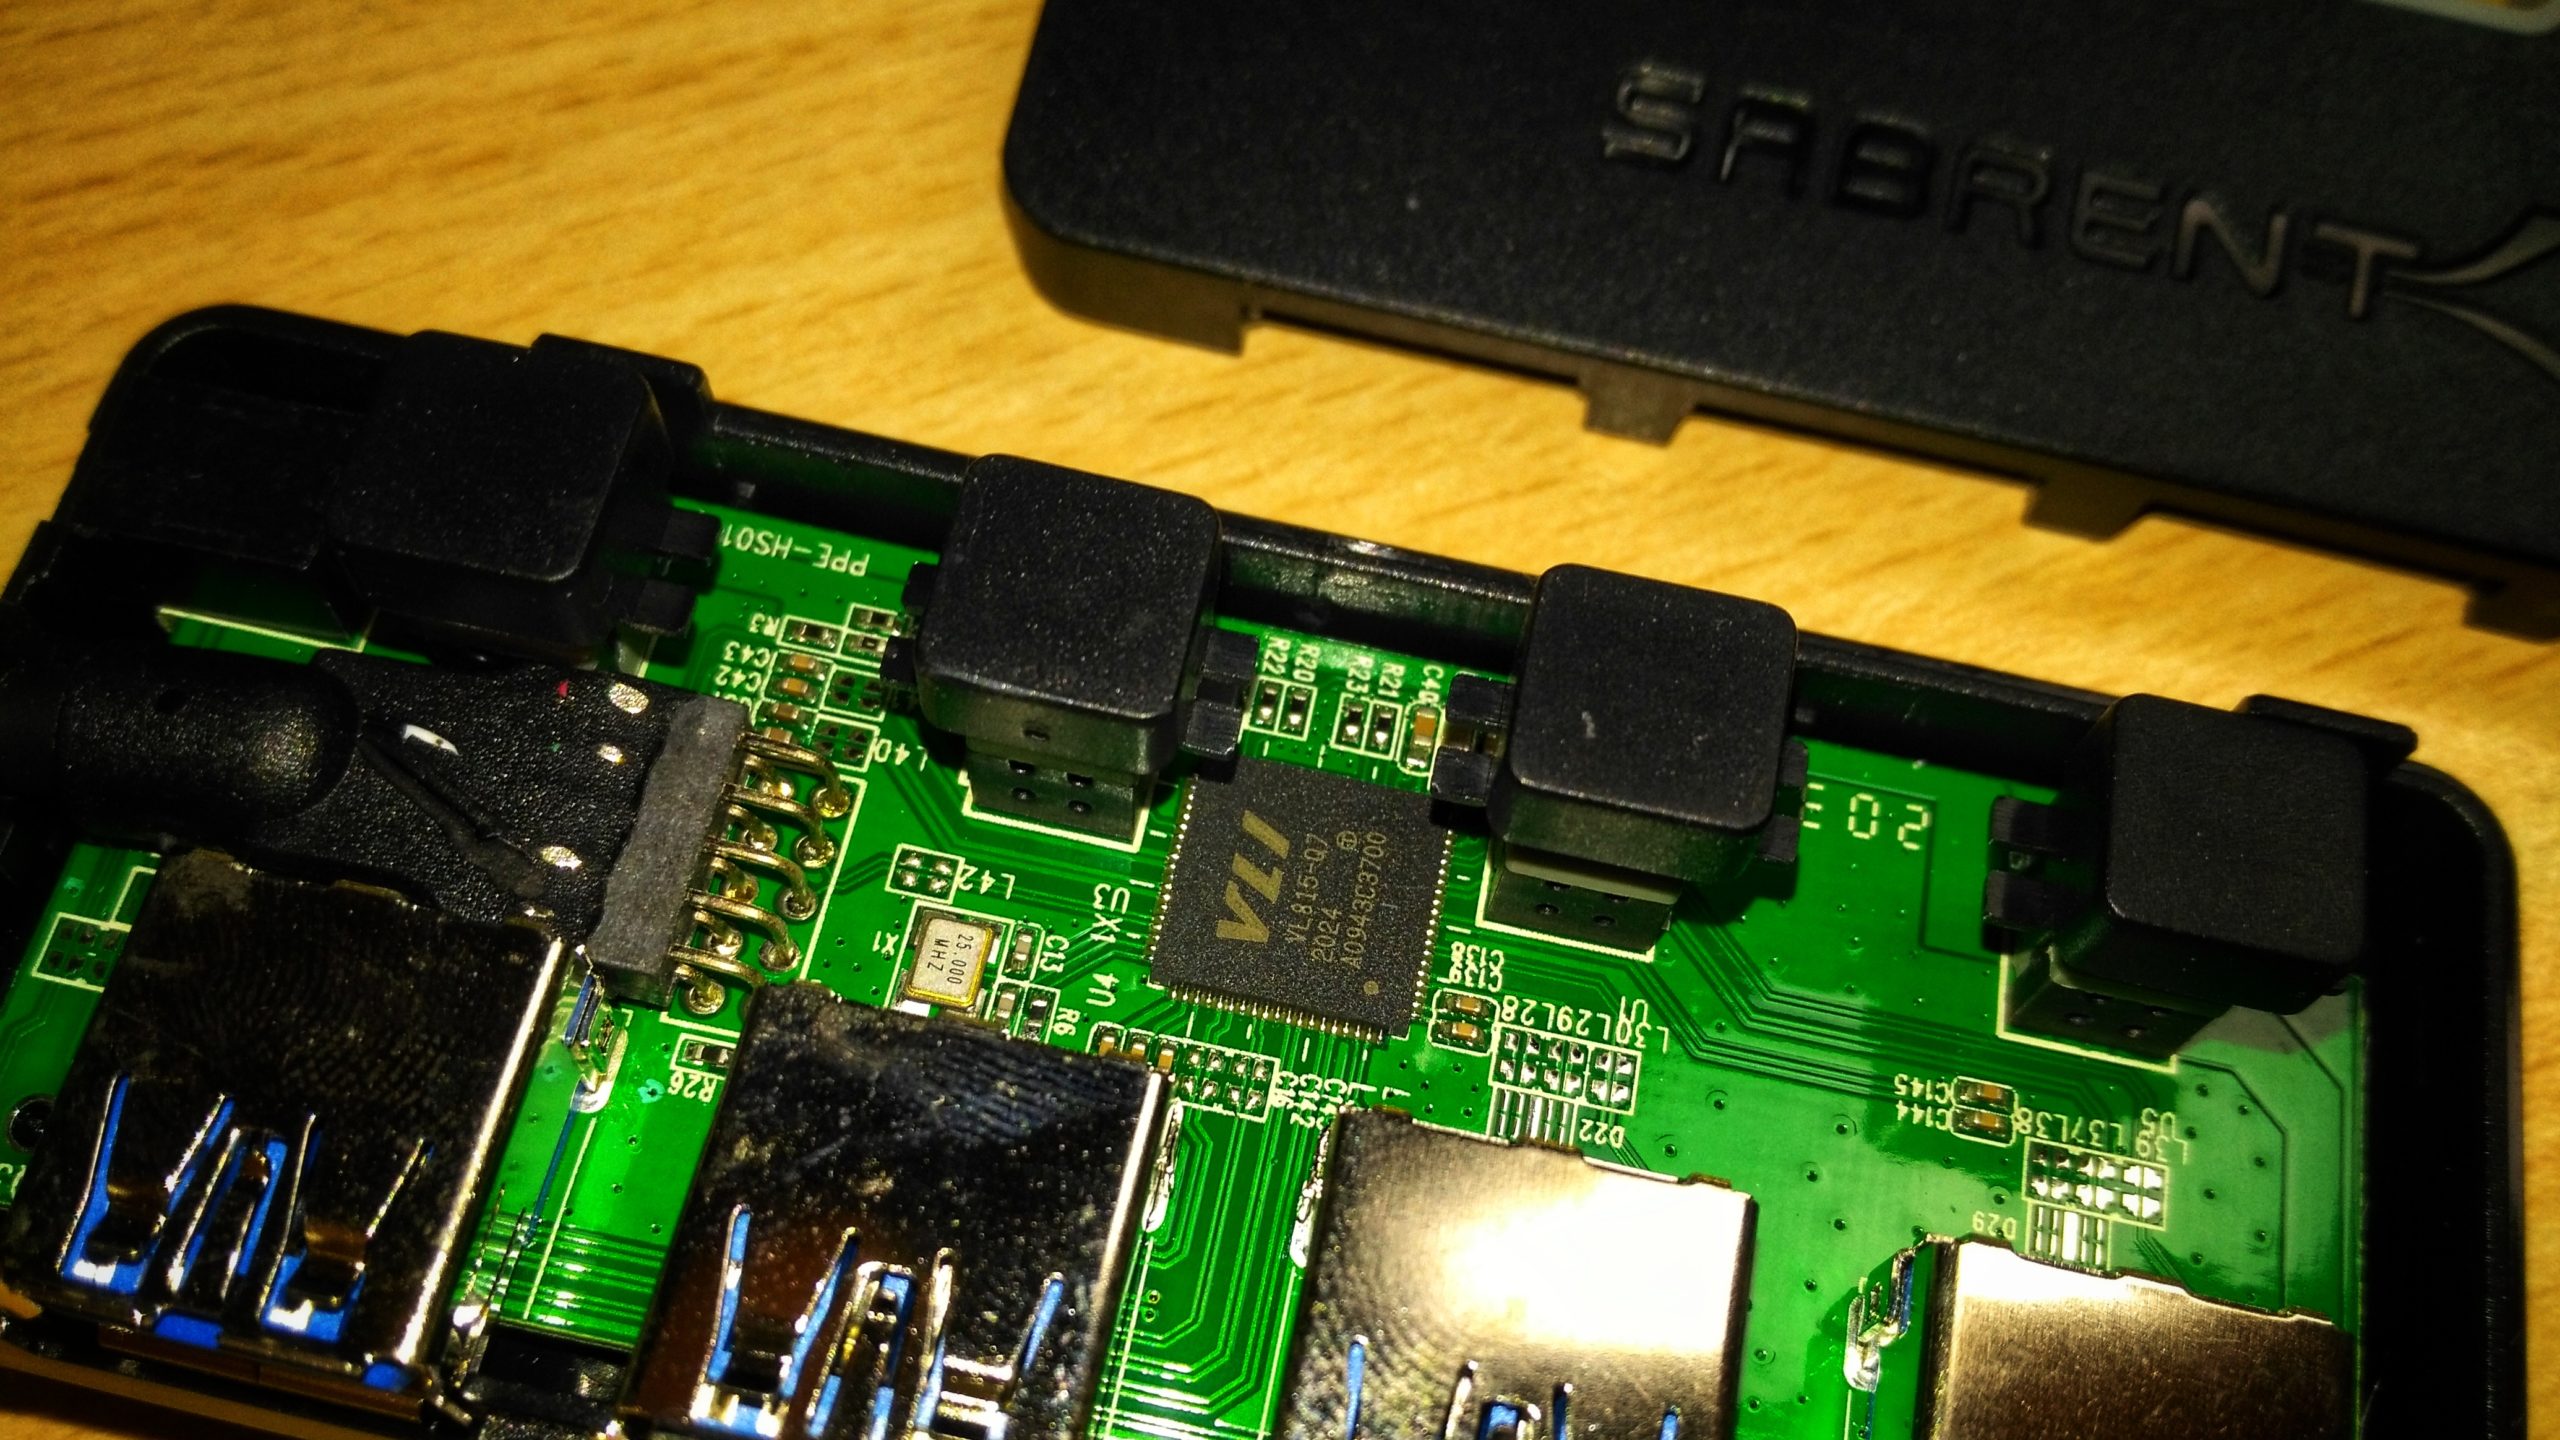
So I really wasn’t expecting much when I pried the device open. There are not even screws (but it’s not glued, too – bonus?).
Opened Sabrent USB 3.0 Hub
So the first things I noticed is an unused power connector (marked with 6.1V?) and an attached usb cable that looks like it was melted on the pin connector. Yuk. There is no stress relaxation for the cable. It just looks like there is one but the plastic piece in question can freely slide around the cable. Better don’t pull that.
I’m not sure why there is a power connector by the way. This is a completely passive hub and I didn’t feel lucky to try this without further examinations on the circuit.
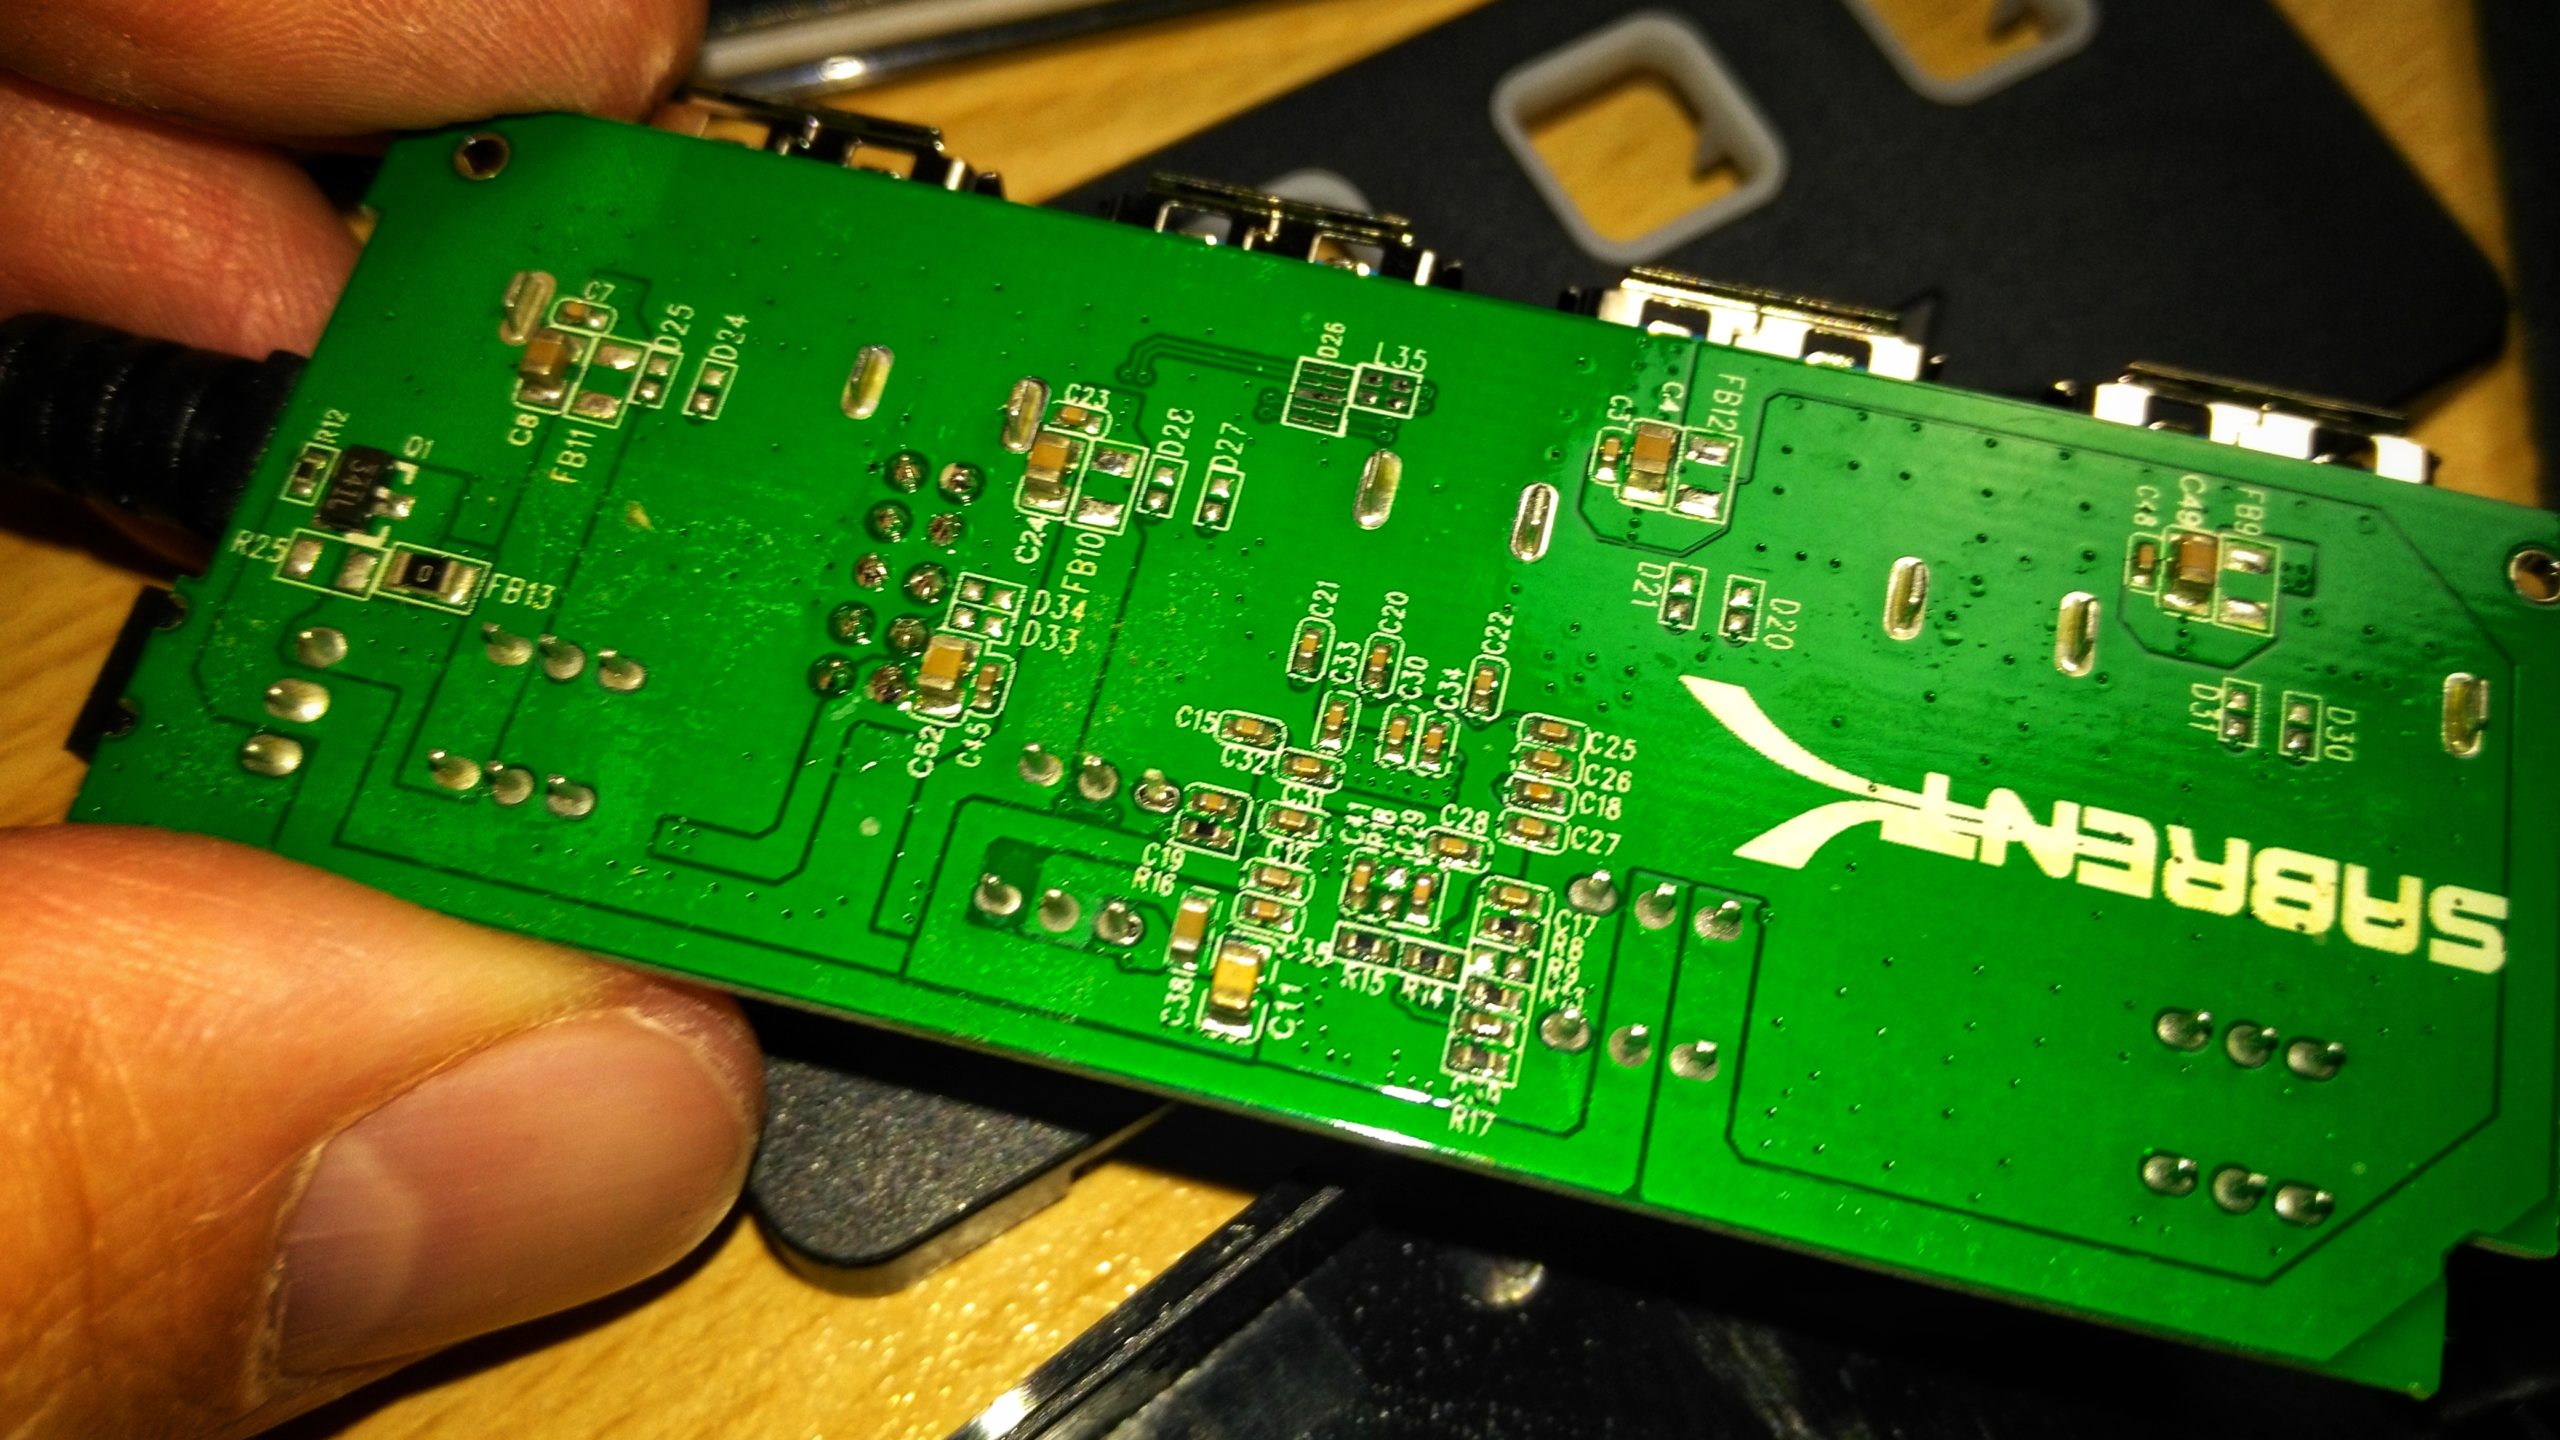
Backside of the hub
The backside is more tidy but I can spot at least two soldering points for a button that may be cold already. Too be fair it’s the backside so this may not be an issue and only affect stability of the button.
The reason I pried this open is basically that I didn’t expect this to really have USB 3 capabilities at all so I wanted to check that they didn’t just use “blue” ports. I’ve been burnt by this before. Everything looks to be in order though and the datasheet for the built in VL815-Q7 by VIA Labs, Inc. (VLI) does indeed list the chip to be capable of USB 3. VLI describes it as a “USB 3.1 Gen 1 4-Port Hub Controller” and it is known to work “under Windows, Mac OS X, and various Linux kernels without additional drivers” . So let’s plug it in:
[ 1707.347836] usb 2-5: new SuperSpeed Gen 1 USB device number 8 using xhci_hcd
[ 1707.387594] usb 2-5: New USB device found, idVendor=2109, idProduct=0815, bcdDevice= 7.04
[ 1707.387599] usb 2-5: New USB device strings: Mfr=1, Product=2, SerialNumber=0
[ 1707.387601] usb 2-5: Product: USB3.0 Hub
[ 1707.387602] usb 2-5: Manufacturer: VIA Labs, Inc.
Shiny. That was easy. Let’s ask lsusb -t
/:  Bus 02.Port 1: Dev 1, Class=root_hub, Driver=xhci_hcd/10p, 5000M
    |__ Port 5: Dev 8, If 0, Class=Hub, Driver=hub/4p, 5000M
/:  Bus 01.Port 1: Dev 1, Class=root_hub, Driver=xhci_hcd/16p, 480M
    |__ Port 5: Dev 12, If 0, Class=Hub, Driver=hub/4p, 480M
And sure enough it claims to be up for the task of both, USB2 and USB3 indicated by the 480M and 5000M. So let’s plug an USB3 mass storage device and check some readouts (no write tests made because I had no empty usb3 stick around). I used the good old dd command for all: dd if=/dev/sde2 of=/dev/null bs=4k
Connected to the hub:
3727616+0 records in
3727616+0 records out
15268315136 bytes (15 GB, 14 GiB) copied, 190.052 s, 80.3 MB/s
Connected to the motherboard directly:
3727616+0 records in
3727616+0 records out
15268315136 bytes (15 GB, 14 GiB) copied, 188.997 s, 80.8 MB/s
Connected to the computer case ports on the front:
3727616+0 records in
3727616+0 records out
15268315136 bytes (15 GB, 14 GiB) copied, 188.327 s, 81.1 MB/s
So while this is not stellar it definitely is not just USB 2 speeds and probably limited by the USB stick itself, since I get similar readings on all ports. Speed wise it’s at least not in the way or limiting the device and my use case are joysticks, gamepads and maybe a gaming keyboard. Nothing that would require such speed anyway.
But.
During my first tests I played around with the power button for an empty outlet and I really didn’t expect this to affect other outlets but it does. It looks like the power breaks down shortly and the error log is filled with I/O errors for the mass storage device.
[ 1706.292620] usb 2-5.4: Failed to set U1 timeout to 0x0,error code -19
[ 1706.296089] usb 2-5.4: Set SEL for device-initiated U1 failed.
[ 1706.299672] usb 2-5.4: Set SEL for device-initiated U2 failed.
[ 1706.299680] usb 2-5.4: usb_reset_and_verify_device Failed to disable LPM
[ 1706.339639] blk_update_request: I/O error, dev sde, sector 2468080 op 0x0:(READ) flags 0x0 phys_seg 1 prio class 0
[ 1706.339641] Buffer I/O error on dev sde2, logical block 247326, async page read
[ 1706.395683] sde: detected capacity change from 30310400 to 0
This will result in data loss during write operations. While this is not a problem for HID devices, I mean who cares if a click doesn’t make it, one should definitely not use this for disks or at least not touch it while it’s writing until it’s indeed “save to unplug the device now”.
Also it must be kept in mind that this is a passive hub. USB 3.0 is specified with 5V and 900mAh. This does not magically multiply for this model – it’s 900mAh _total_ for all 4 plugs and to be fair that is clearly stated in it’s description.
It does suck that it may be fine speed wise but does exactly the one thing I bought it for poorly: Disable one and only one plug at will. Keeping this in mind it does (surprisingly) work as advertised.
Oh yeah, and don’t watch out for a CE sign on that one xD