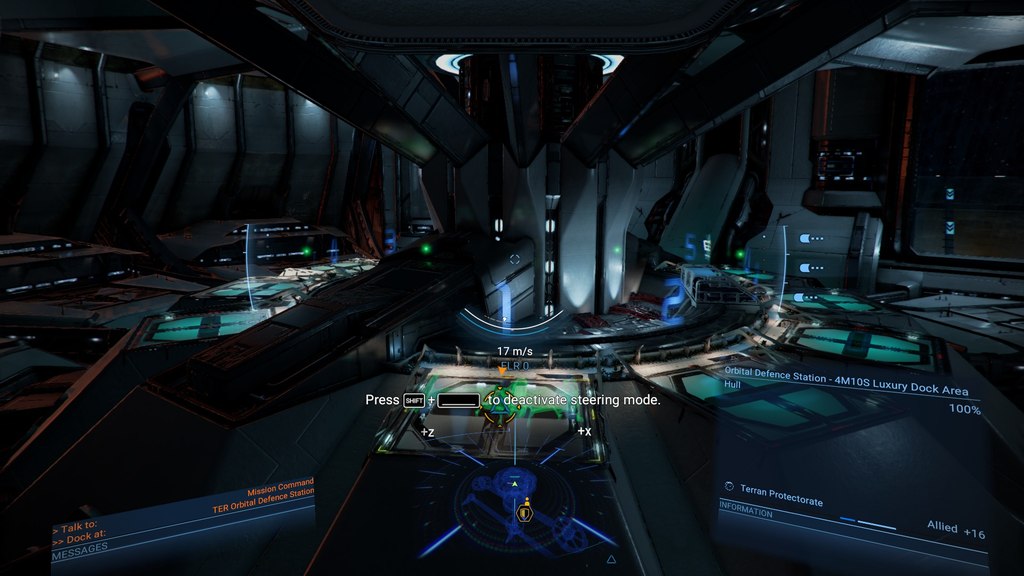
Video of Diaspora: Shattered Armistice (on Linux PC)
Seems to work nice with my DIY headtracker on Linux PC too. Sadly I got quite some frame-drops due to recording (and probably multi-head too). It works way better without all the cameras and a life-stream going on but I think it’s enough to get a good impression. Botched emergency landing included xD
Warning: This may fuel a desire to re-watch the BSG series again 😀
I like space and science fiction. Diving into epic stories set in some distant future amazes me since elementary school.
I’m also a gamer. And a tinkerer. It’s in the family.
I keep wondering: How can I improve the immersion of my games without going full VR?
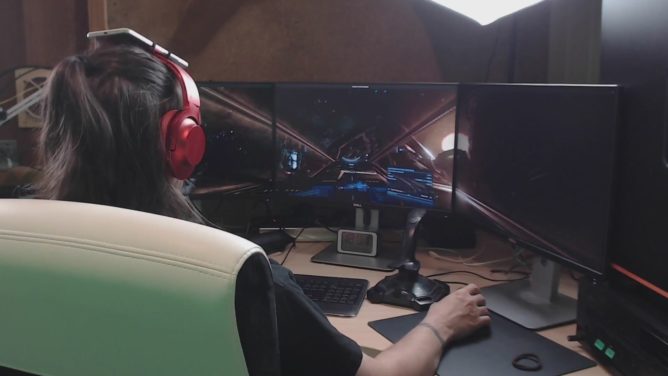
DIY Headtracker for gaming (on Linux PC)
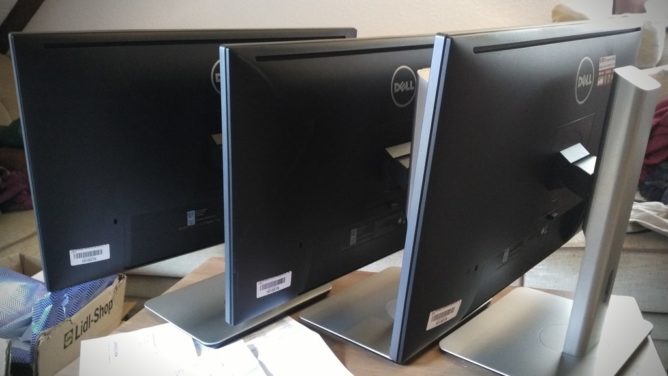
I used a triple screen set-up before. It consisted of different models in height and size. When one screen finally broke down I purchased 3 refurbished screens of the same brand and model. What a difference!
The kids love it too. Of course. Means less stick time for me. Anyway.
This is when I started to read about head tracking and went on a quest to get this working for the game X4. As a bonus on Linux PC, my preferred system also for gaming.
The thing is: “The” reference product for a headtracker is the TrackIR system. Price as of today: 220 EUR. Ouch! That’s like a cheap VR, right? And it’s Windows only. No thanks.
So I checked what’s in this thing. Apparently a cheap camera, some infra-red LED, and a filter allowing only infra-red waves. And software, of course.
Since this is for Linux I get to pick my poison for the software part, and I settled with Opentrack fast. Onwards to the hardware part. I abused my mobile phone for the testing, sending it’s Gyroscope data via wifi to my PC, and while it worked it also _sucked_. Both, phone and wifi I mean.
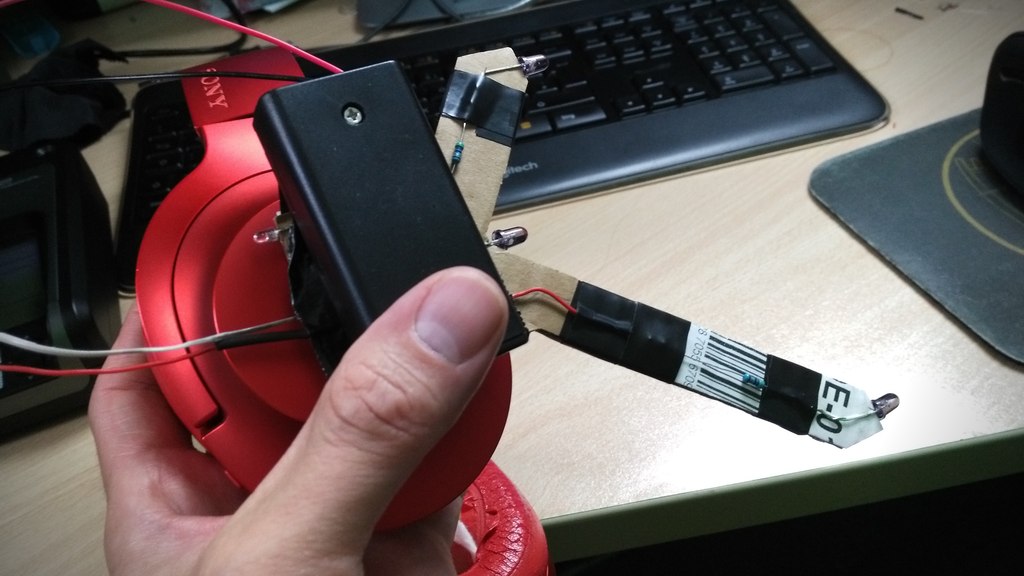
Head tracking is awesome. And I knew I want it. So I started prototyping. For this I went with a simple design that I eventually implemented on cardboard. It looks hilarious but it gets the job done.
The focus was on a long life cycle so I wouldn’t have to replace the rechargables in the middle of a session. To get this right I checked with the camera that I was going to use. See (video above), this is way to bright and by trying various resistors I could get this down to 33mA per LED and still get a decent detection rate with Opentrack.
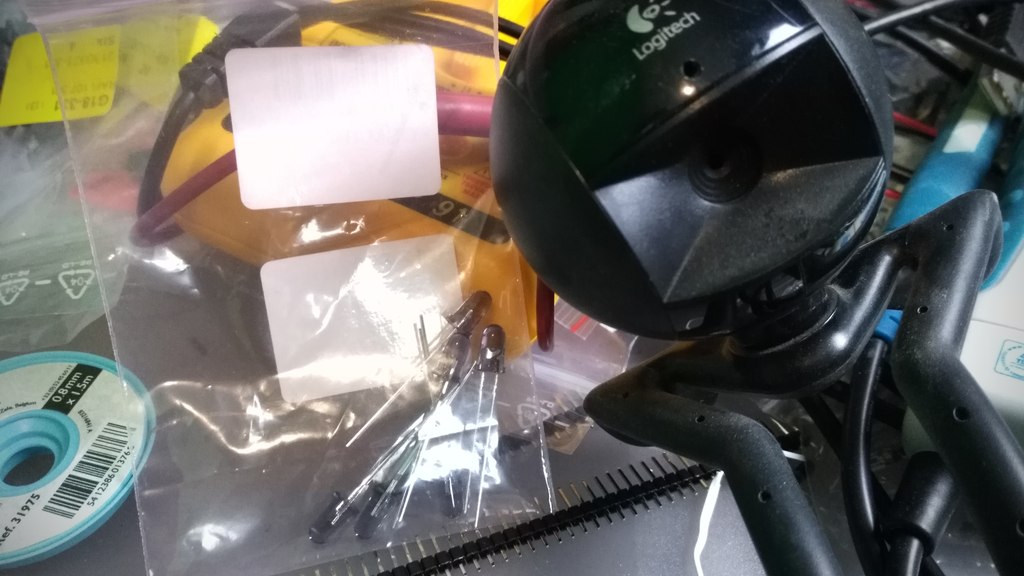
Speaking about the camera. That’s nothing special. It’s a dead cheap 480p Logitech QuickCam Communicate STX that I got from a discounter a decade ago. It was so cheap it doesn’t even _have_ an infra-red filter that I’d have to remove first.
I used tape to attach the salvaged camera cover of a dead G20 controller. That’s a Wii Remote knock-off that does basically the same thing like a headtracker. Various other foils can be used for this as well, as long as they permit infra-red. The idea is to reduce or remove all other light waves but infra-red.
The trick is to also turn off auto exposure and fiddle with the contrast and sharpness until a decent frame rate and a clear infra-red wave source by the LED can be seen.
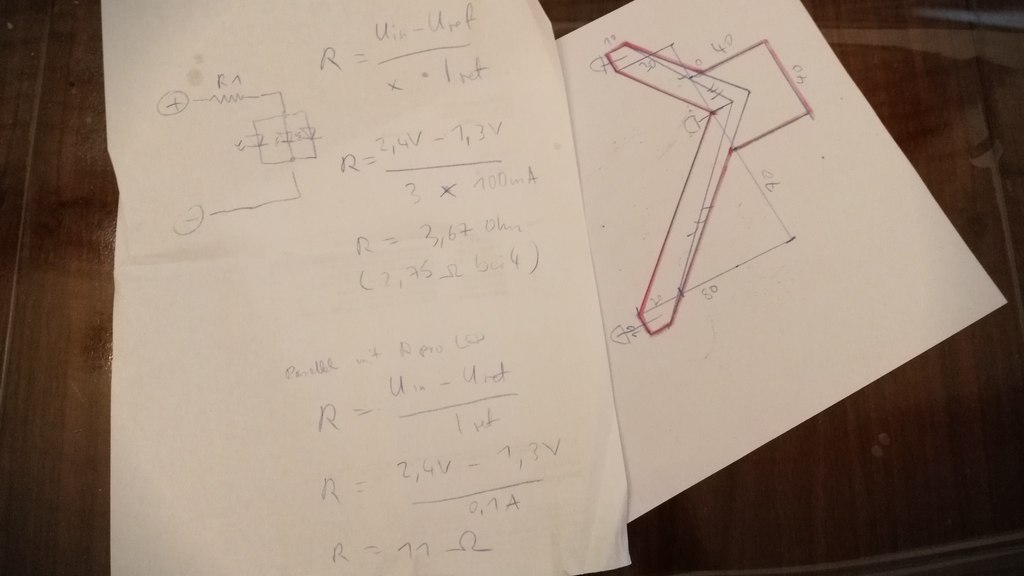
When I was satisfied with my meter readouts, and my highly professional scribbles, I started working on the prototype while streaming the whole process on the Discord channel of the awesome Fly Dangerous project. If you like racing with a space ship give it a shot.
The prototype is made of cardboard that doubles as isolation for the polarity. The rest is tape and hook-and-loop fastener to attach the headtracker to my headphones. No magic here. The whole contraption is powered by two 1.2V rechargeables. I opted for a micro switch and an additional LED as power indicator, that I dimmed down even more. I can after all not see infra-red so this seemed like a good idea to me. Spoiler: It is.
So how does it play? Over the next weeks I tried basically any game supporting head tracking that I could get my hands on. Please keep in mind that I usually play with lights off but started the studio lights for demo purposes. The tracker does still work just fine.
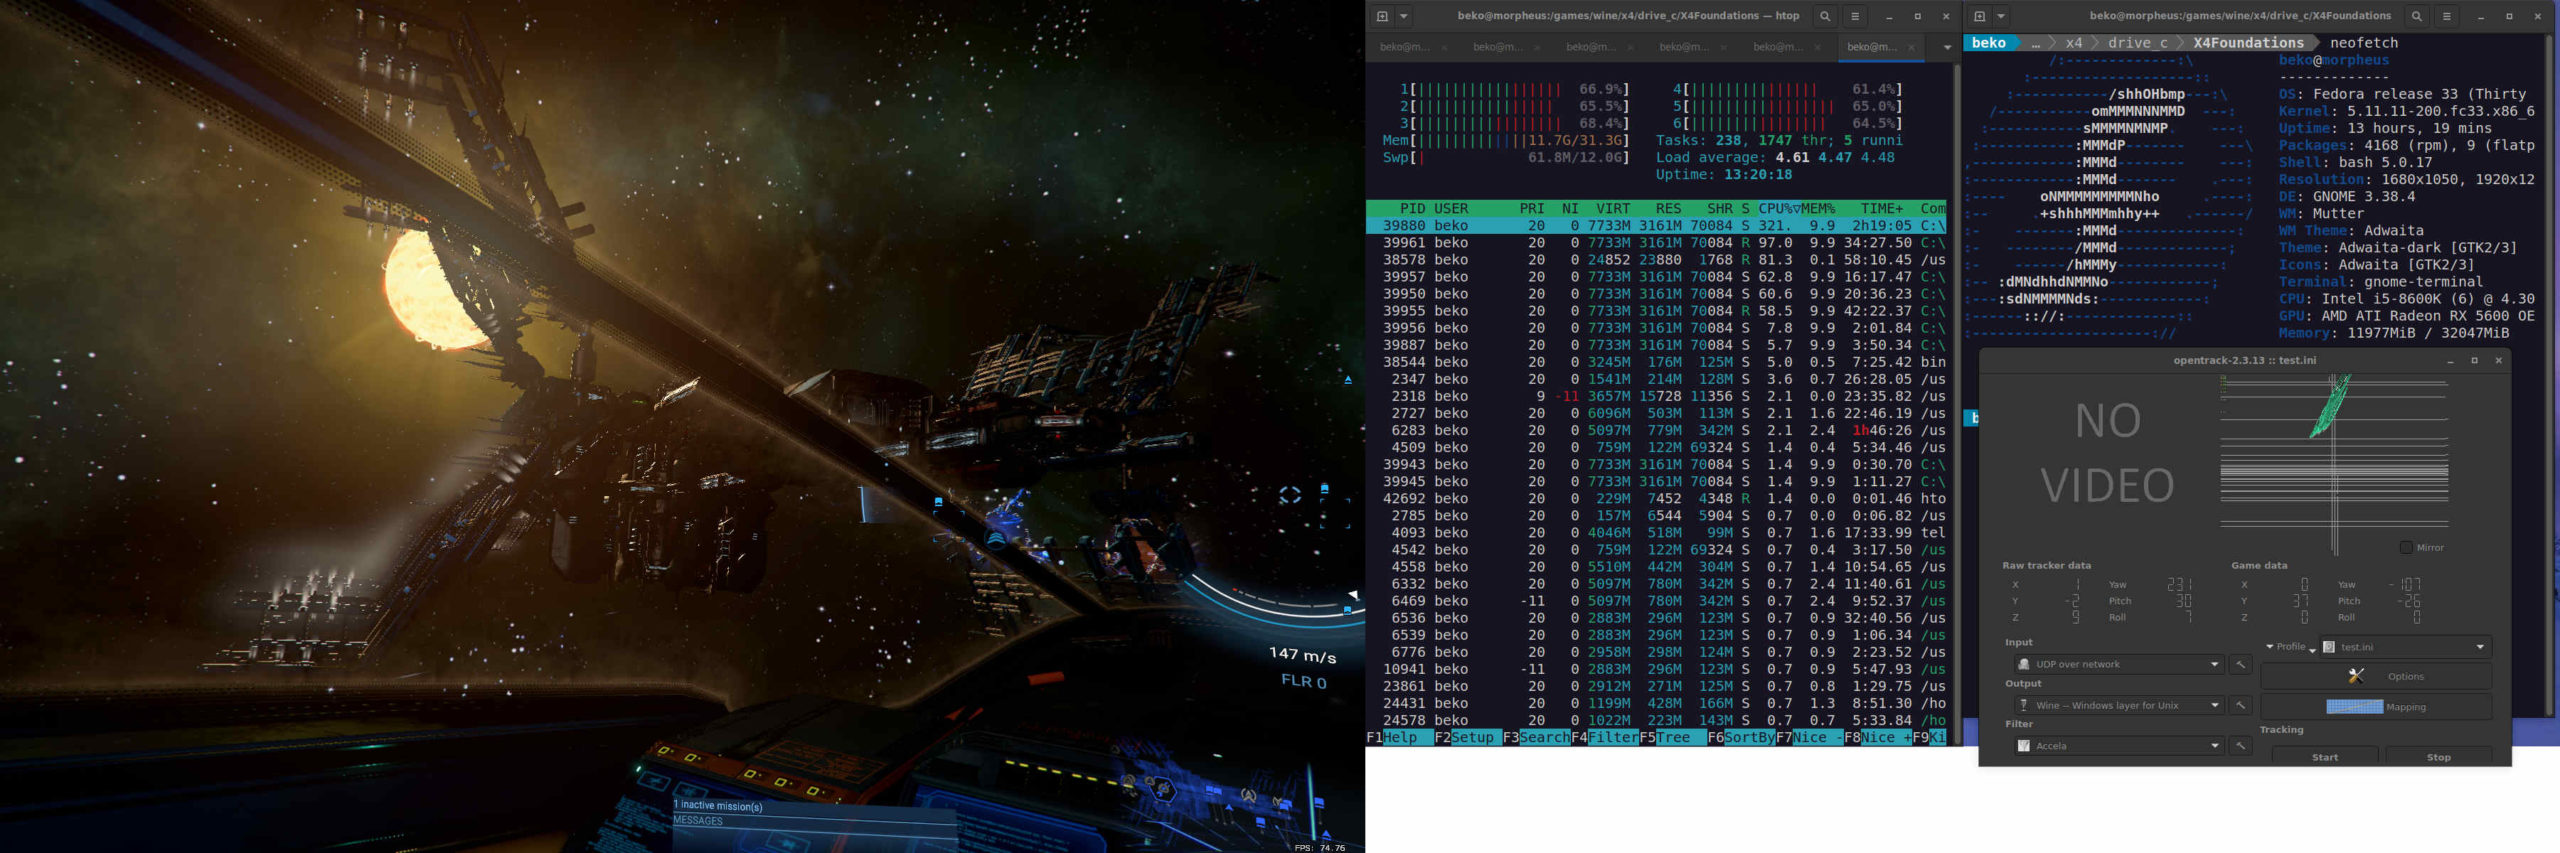
I quickly found out that each game needs it’s own profile for fine tuned settings. Good thing that Opentrack has me covered on this. First, my beloved X4 using Wine and the TrackIR protocol.
Sadly I came to the conclusion that my GPU is no longer up for the task and Wine would cost me too many frames. I switched Opentrack to emulate a joystick instead and mapped it to camera movements in the native X4 version. It’s not exactly the same but it’s okay-ish. I have an idea how to hack this properly into X4 using an extension and a UDP server but that’s a topic for another day.
Anyway, the same principle works with X Rebirth too, making me even happier. While dated it still has it’s charm and the verse still feels a lot more alive compared to X4. It’s also not taxing my GPU that much.
Now for something different. When Opentrack would list a “protocol” named FlightGear I became very curious. I installed this free and open source flight simulator and crashed my first Cessna into the ground minutes later. By now I’m confident that I can crash a Cessna just about anywhere. I’m not fond of flying in real-life but avionics sure are a fascinating topic.
This was the moment a Steam sale happened and I bagged various flight sims, Space Kerbal and House Of The Dying Sun. All with TrackIR support.
Little did I know what gem I bagged with House Of The Dying Sun by the way. Sadly it’s also very short but I enjoyed every minute of it and will probably play it again. The art, sound and music reminds me a lot of Battlestar Galactica. Easy win 😀
So yeah, this is my current gaming set-up. I built myself a head tracker for 5 EUR. On Linux PC.
I also may have fallen into the rabbit hole called “simpit”.
So much whining about some new Windows on my TL and the one thing that sounds really good about it, #tpm that is, people seem to go bonkers about. Said it before: TPM is there for the user. Even on #Linux. Use it! It is not some magic DRM machine.
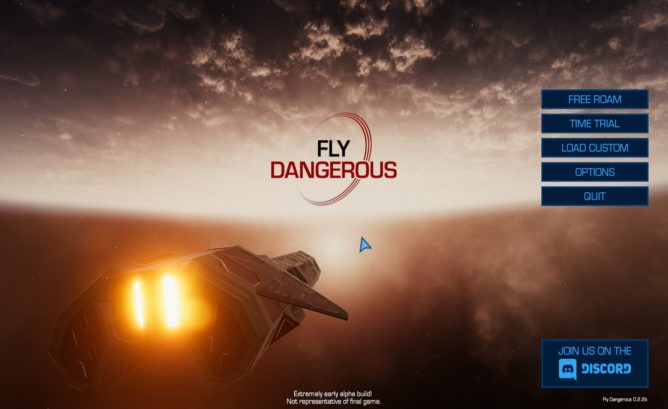
Racing in space sims is a thing and usually done by a small and sometimes hidden community within games like Elite Dangerous or Star Citizen. What happens when this is not enough for players, or when they simply don’t want to waste time grinding the required resources in-game, is demonstrated by @jayleefaulkner at https://github.com/jukibom/FlyDangerous
I was delighted to find Linux PC binaries over at https://jukibom.itch.io/fly-dangerous as well – and this is a very early alpha even. Guess someone pestered the dev about Linux already and I so had to give this a spin, of course.
Unpacking the FlyDangerous-0.2.2b-linux.zip was a no brainer and the game itself started just fine. I do have however a very specific triple head display setup and the game started on the wrong display in fullscreen mode and could not be persuaded to go into windowed mode so I could reach the buttons to change the display resolution via hotkey or tweak the config at ~/.config/unity3d/StarGoat/FlyDangerous/prefs. It insisted of staying on defaults so once more wmctrl to my aid:
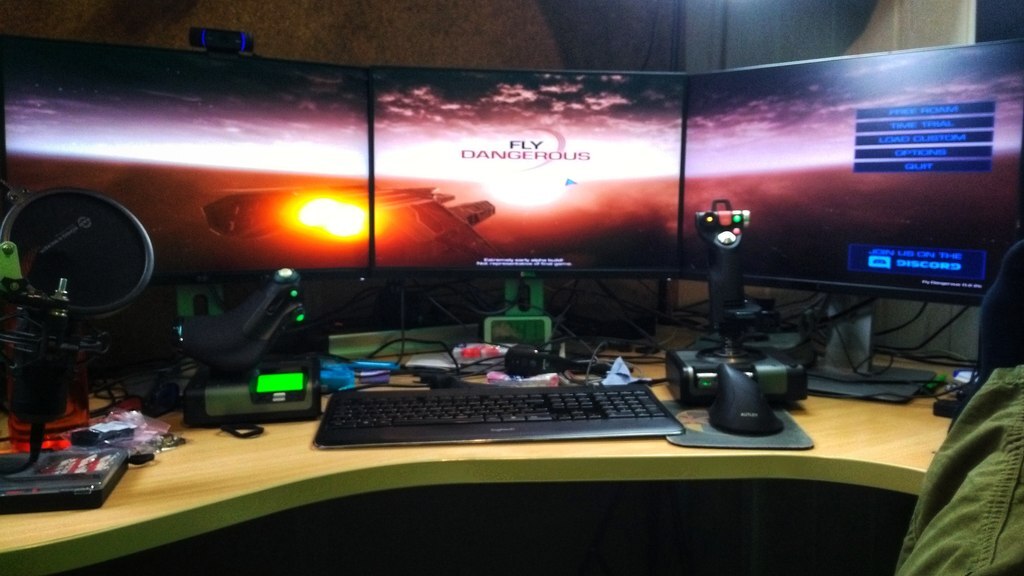
Fly Dangerous in all it’s glory over multiple screens
After this was sorted out I noticed that Unity detected “some” joystick with only an X and an Y axes. This doesn’t do my X52 Professional H.O.T.A.S justice. Usually I’d use the controller mapping in Steam now but this isn’t a Steam game and while it can be added as a foreign game to Steam I can not set any controller configs for it there so I started looking around.
Apparently (modern) Unity uses SDL2 and the modern evdev input system to detect joysticks on Linux PC and this can be indirectly configured / overridden using the environment variable SDL_GAMECONTROLLERCONFIG to provide additional input configurations like the ones listed in https://github.com/libsdl-org/SDL/blob/main/src/joystick/SDL_gamecontrollerdb.h (that somehow does not know of the X52 H.O.T.A.S?). Luckily there are various tools to create a mapping for this – for example Gamepad Tool at https://generalarcade.com/gamepadtool/ – which sure looks familiar enough from the re-mapping I’m used to by… Steam! AntiMicroX should also work for this but I didn’t try.
Gamepad Tool with my configured X52 Pro for Fly Dangerous
And since I’m on Linux and totally lazy I threw all this in the script file flydangerous.sh to start the game:
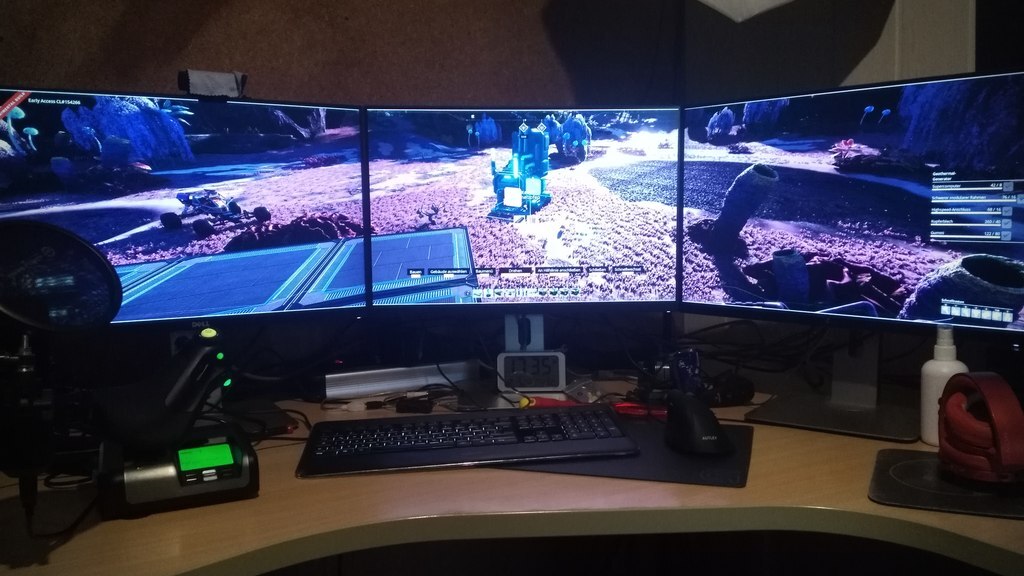
I love gaming over multiple monitors. It’s my current choice for work and games – especially simulations. Having several monitors attached to one computer (or graphic card) is not a big deal in 2021 any more. The framebuffer in recent graphic cards is insanely huge compared to some years ago, when one really had to think twice about the possible resolution when e.g. connecting a beamer to a laptop (good old SiS 630 anyone?).
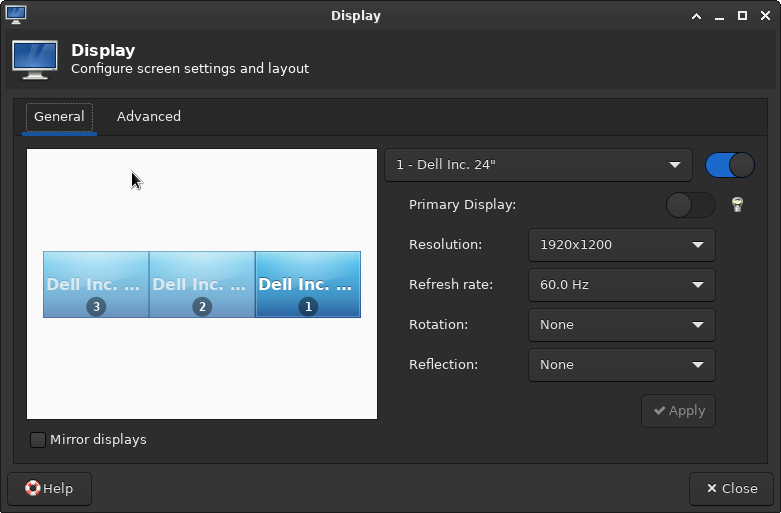
xfce4-display-settings for my refurbished “new” set of displays
This couldn’t be easier nowadays. Even mixing the integrated graphic card of a recent Intel CPU with an NVIDIA or AMD dedicated graphic card does usually “just work”. Some driver specific mode may have to be set but that’s it. The workspace easily expands over multiple displays and windows can be moved around freely.
Games do not see one huge desktop but individual displays
There is however a catch. Games tend to read the primary display only and the maximum resolution offered usually comes with the readout of this very first display – or worse – the first display connected. This sucks especially when the monitors have different resolutions, as it was the case for me for several years now, because I didn’t just purchase a set but collected discarded monitors over the time. This can often be omitted by temporary disabling the “false” ones or by force window mode.
This results in hacky scripts involving xrandr, wmctrl and xdotool. This is for example how I hammered X4: Foundations into shape _after_ it started, because it would allow me to select a single display only. Set to window mode it can be freely scaled but that comes with a disturbing window decorations so with this the X4 window gets positioned to 0x0, expanded to 5770×1210 and the window decorations purged:
That’s a pain to find out and the fun really stops when it comes to Proton or some games that would not allow resizing over their maximum detected resolution – like for example Everspace.
How about a virtual monitor?
So the idea was to introduce a completely virtual monitor to the systems with the resolution of choice. VNC servers do that all the time so it must be possible. The usual approach won’t work in this case though: When loading the dummy driver the real displays can usually no longer be used and the drivers for AMD and NVIDIA do not really offer such a feature at all.
It is perfectly possible to define virtual monitors with a recent xrand but they have to be mapped on an existing output (a real port). One can use an unused port (as in: no monitor connected) for this, add a Modeline and even force it as “online” like so: echo on > /sys/kernel/debug/dri/0/HDMI-A-1/force
I was delighted to see the display showing up briefly but the AMD driver made short work of my soaring hopes by forcing it off again in an instant. So close and yet so far. This would require some hardware hacking by creating a dummy plug for the port. That’s basically some resistors in the right place making the computer think a display is connected. I hear they can also be purchased and this may be a way for others.
Others seem to have had success by compiling the experimental DisplayLink driver that seems to offer (virtual) monitors but I really didn’t feel like fiddling with something even more alien that will probably break on the next kernel update again.
Intel to my aid!
The success for me was in the end to use of the Intel driver and it’s VirtualHeads feature. The caveat is that one probably needs an Intel CPU for this to work and has to create a X11 config file. If this is done without adding the usual driver people will experience black screens on reboot only. This may be a show stopper for inexperienced Linux users who don’t know how to recover from a broken X11 config (yet :D). For me this is an amdgpu so my file /etc/X11/xorg.conf.d/20-intel-virtual-and-amd.conf has to look like this:
Triple check that your driver is used in there instead or you will end up with a broken config without the possibility to log in to a graphical window manager. When in doubt start e.g. a new session to your liking on the next display server where you can switch back with the key combination ctrl+alt+F[1-0]: startx /usr/bin/startxfce4 :2
Once started a new provider shows up and the new output “VIRTUAL1” is available: xrandr --listproviders
Now that we have a virtual monitor we need a Modeline for it. This is usually the current screen (of the framebuffer) and can be calculated (e.g. sum of all monitors x height and Hz of one monitor) or by asking the system: xrandr | grep Screen
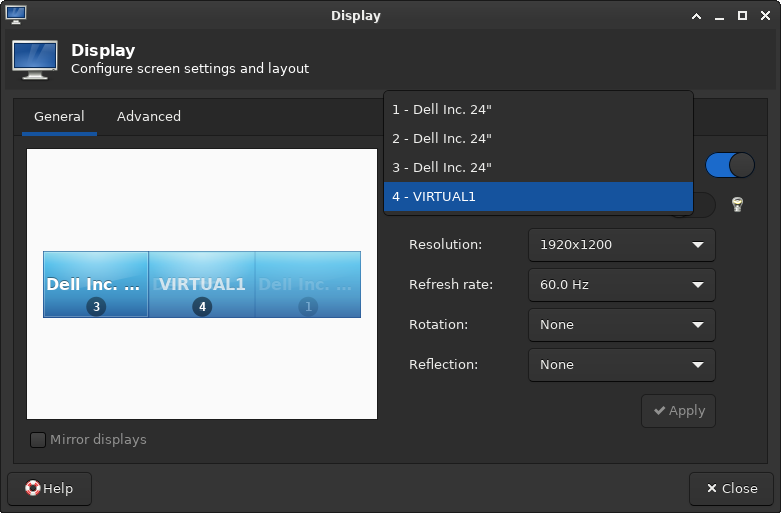
Now all information needed to finally set up the virtual display is there. I’m creating the virtual display on top of the three real displays because I also want to see what’s drawn on it. That’s not strictly required though and in fact most graphical tools to configure the monitor location will even refuse this – because this use case is simply not considered or supported. Gnome for example really didn’t like this. XFCE4 didn’t care. Ymmv:
The virtual monitor becomes visible in display settings (xfce4-display-settings here)
And it works!
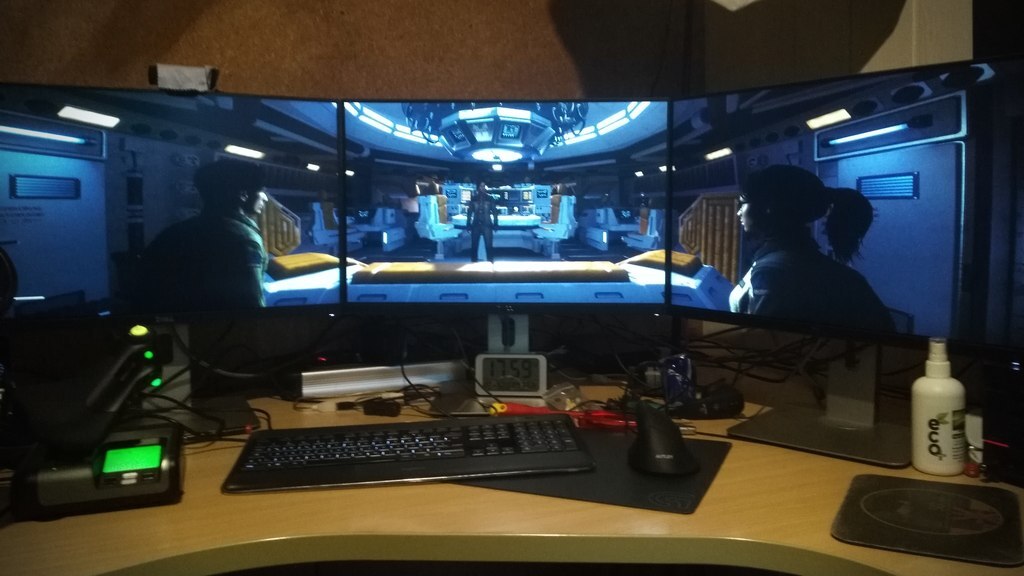
After a lot of research and fiddling (and breaking my X config several times) I finally found a working solution. Games let me select the virtual monitor or see at least my primary with my “maximum” resolution. Sometimes this still requires window mode but I could care less – the decorations are optional. And it works like a charm! Here is a small selection of the games I play most at the moment:
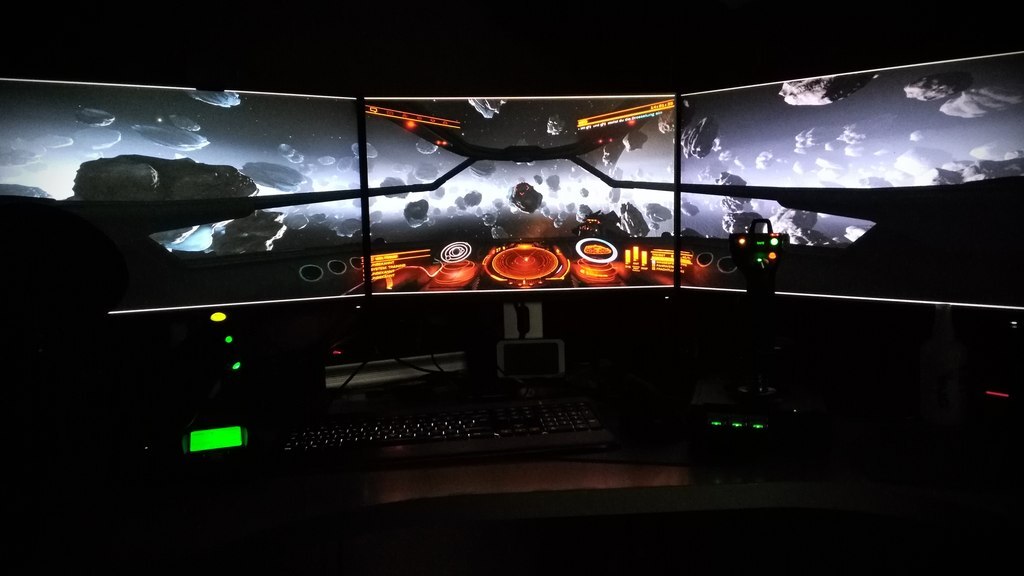
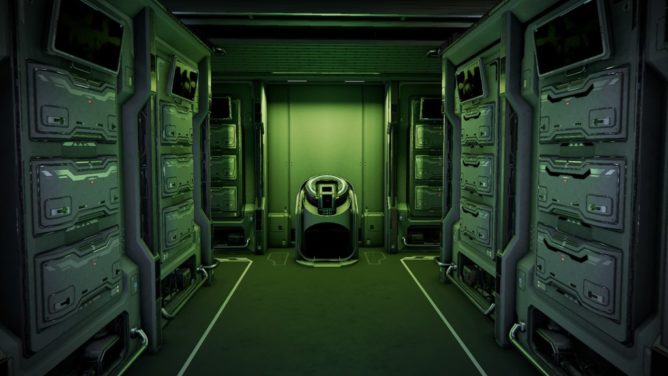
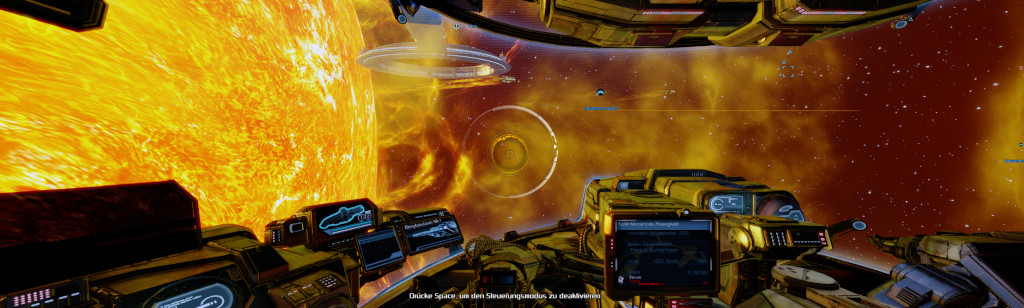
Elite Dangerous: Odyssey
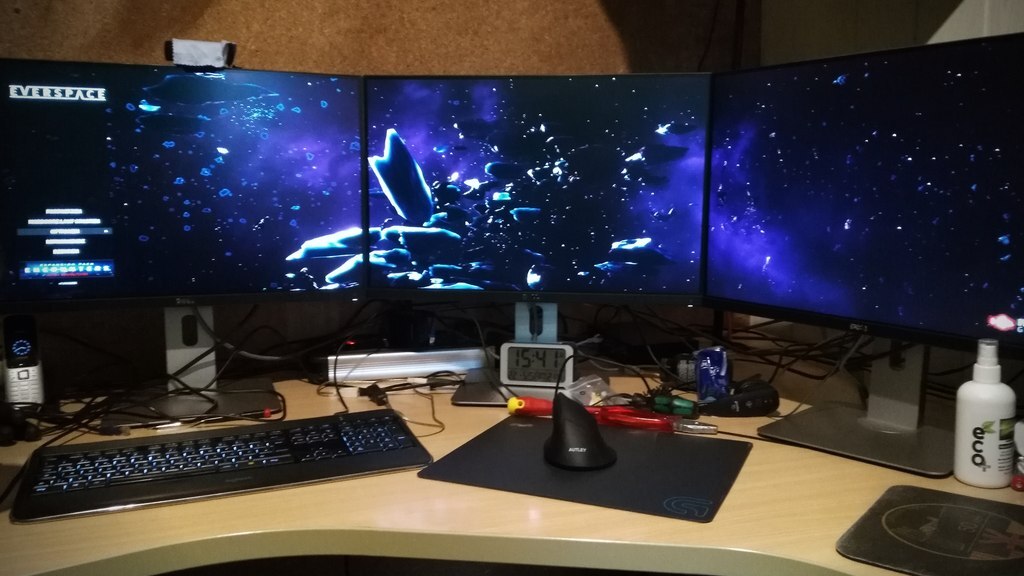
Everspace
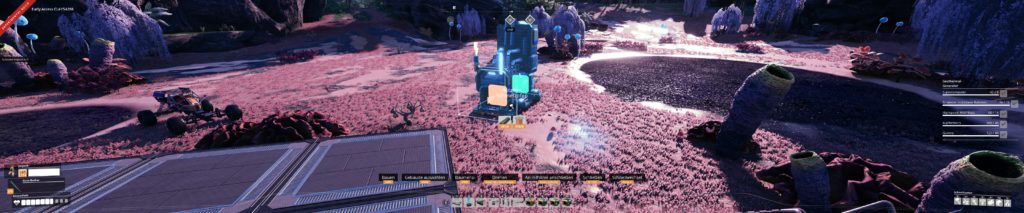
Satisfactory
X4: Foundations
No Man’s Sky
Alien: Isolation
This is how my set-up looks:
Now I’ve another problem. With this my usual 1080p gaming resolution is no longer and my graphic card is simply not up for the job any more 🤣
At least gaming itself is easy as pie on Linux in 2021. Complex display set-ups? Not so much.
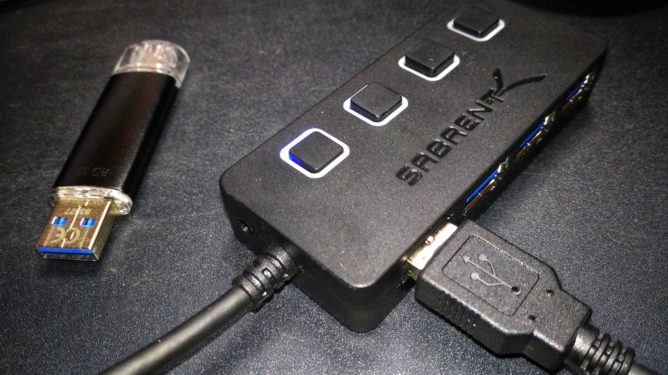
I recently purchased the dead cheap Sabrent USB 3 Hub for 11.99€ not expecting much. I was really just after a replacement for my DIY usb interruptor (that still does the job) and I was already laughing at the claimed USB 3 support when I bagged this. I do have some USB 2 HID devices that I only need for gaming and do not want powered up (and wasting plugs) on my computer all the time. This is the sole use case for the purchase and it did claim to have Linux support – which usually means that the xhci_hcd kernel driver recognizes the device as something usable.
tl;dr: Do not use for disks or power hungry devices to prevent data loss.
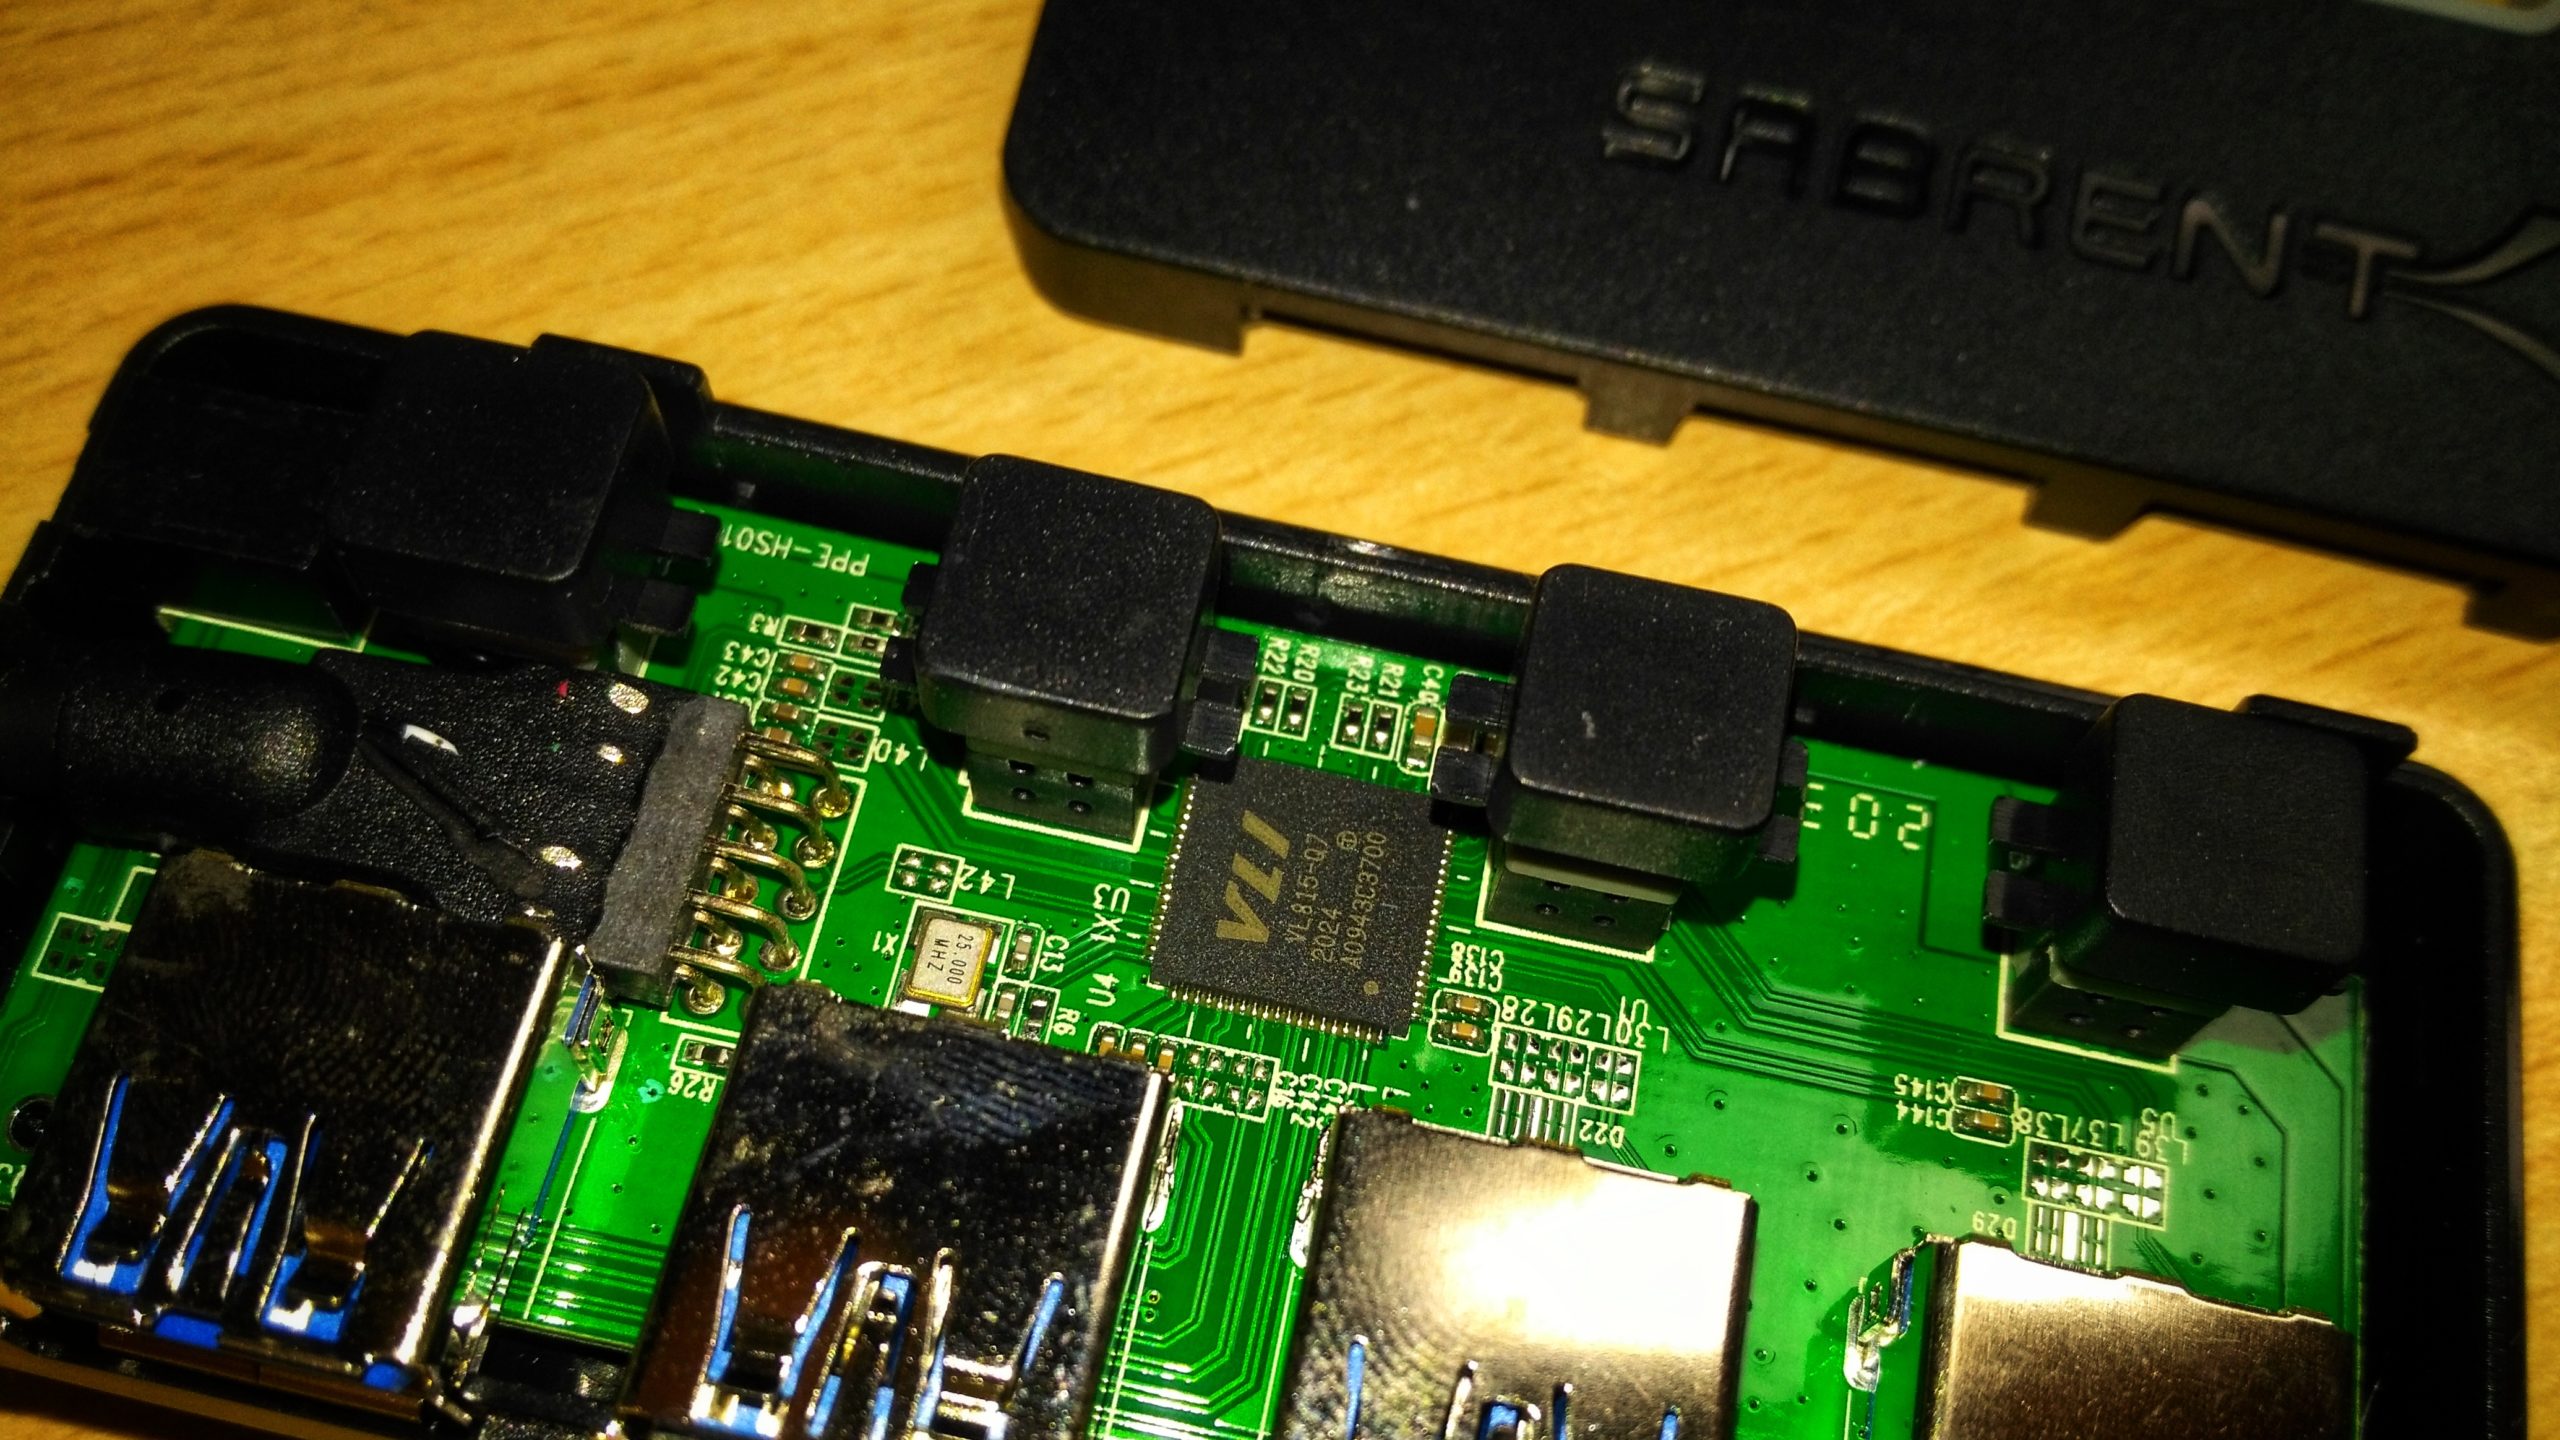
So I really wasn’t expecting much when I pried the device open. There are not even screws (but it’s not glued, too – bonus?).
Opened Sabrent USB 3.0 Hub
So the first things I noticed is an unused power connector (marked with 6.1V?) and an attached usb cable that looks like it was melted on the pin connector. Yuk. There is no stress relaxation for the cable. It just looks like there is one but the plastic piece in question can freely slide around the cable. Better don’t pull that.
I’m not sure why there is a power connector by the way. This is a completely passive hub and I didn’t feel lucky to try this without further examinations on the circuit.
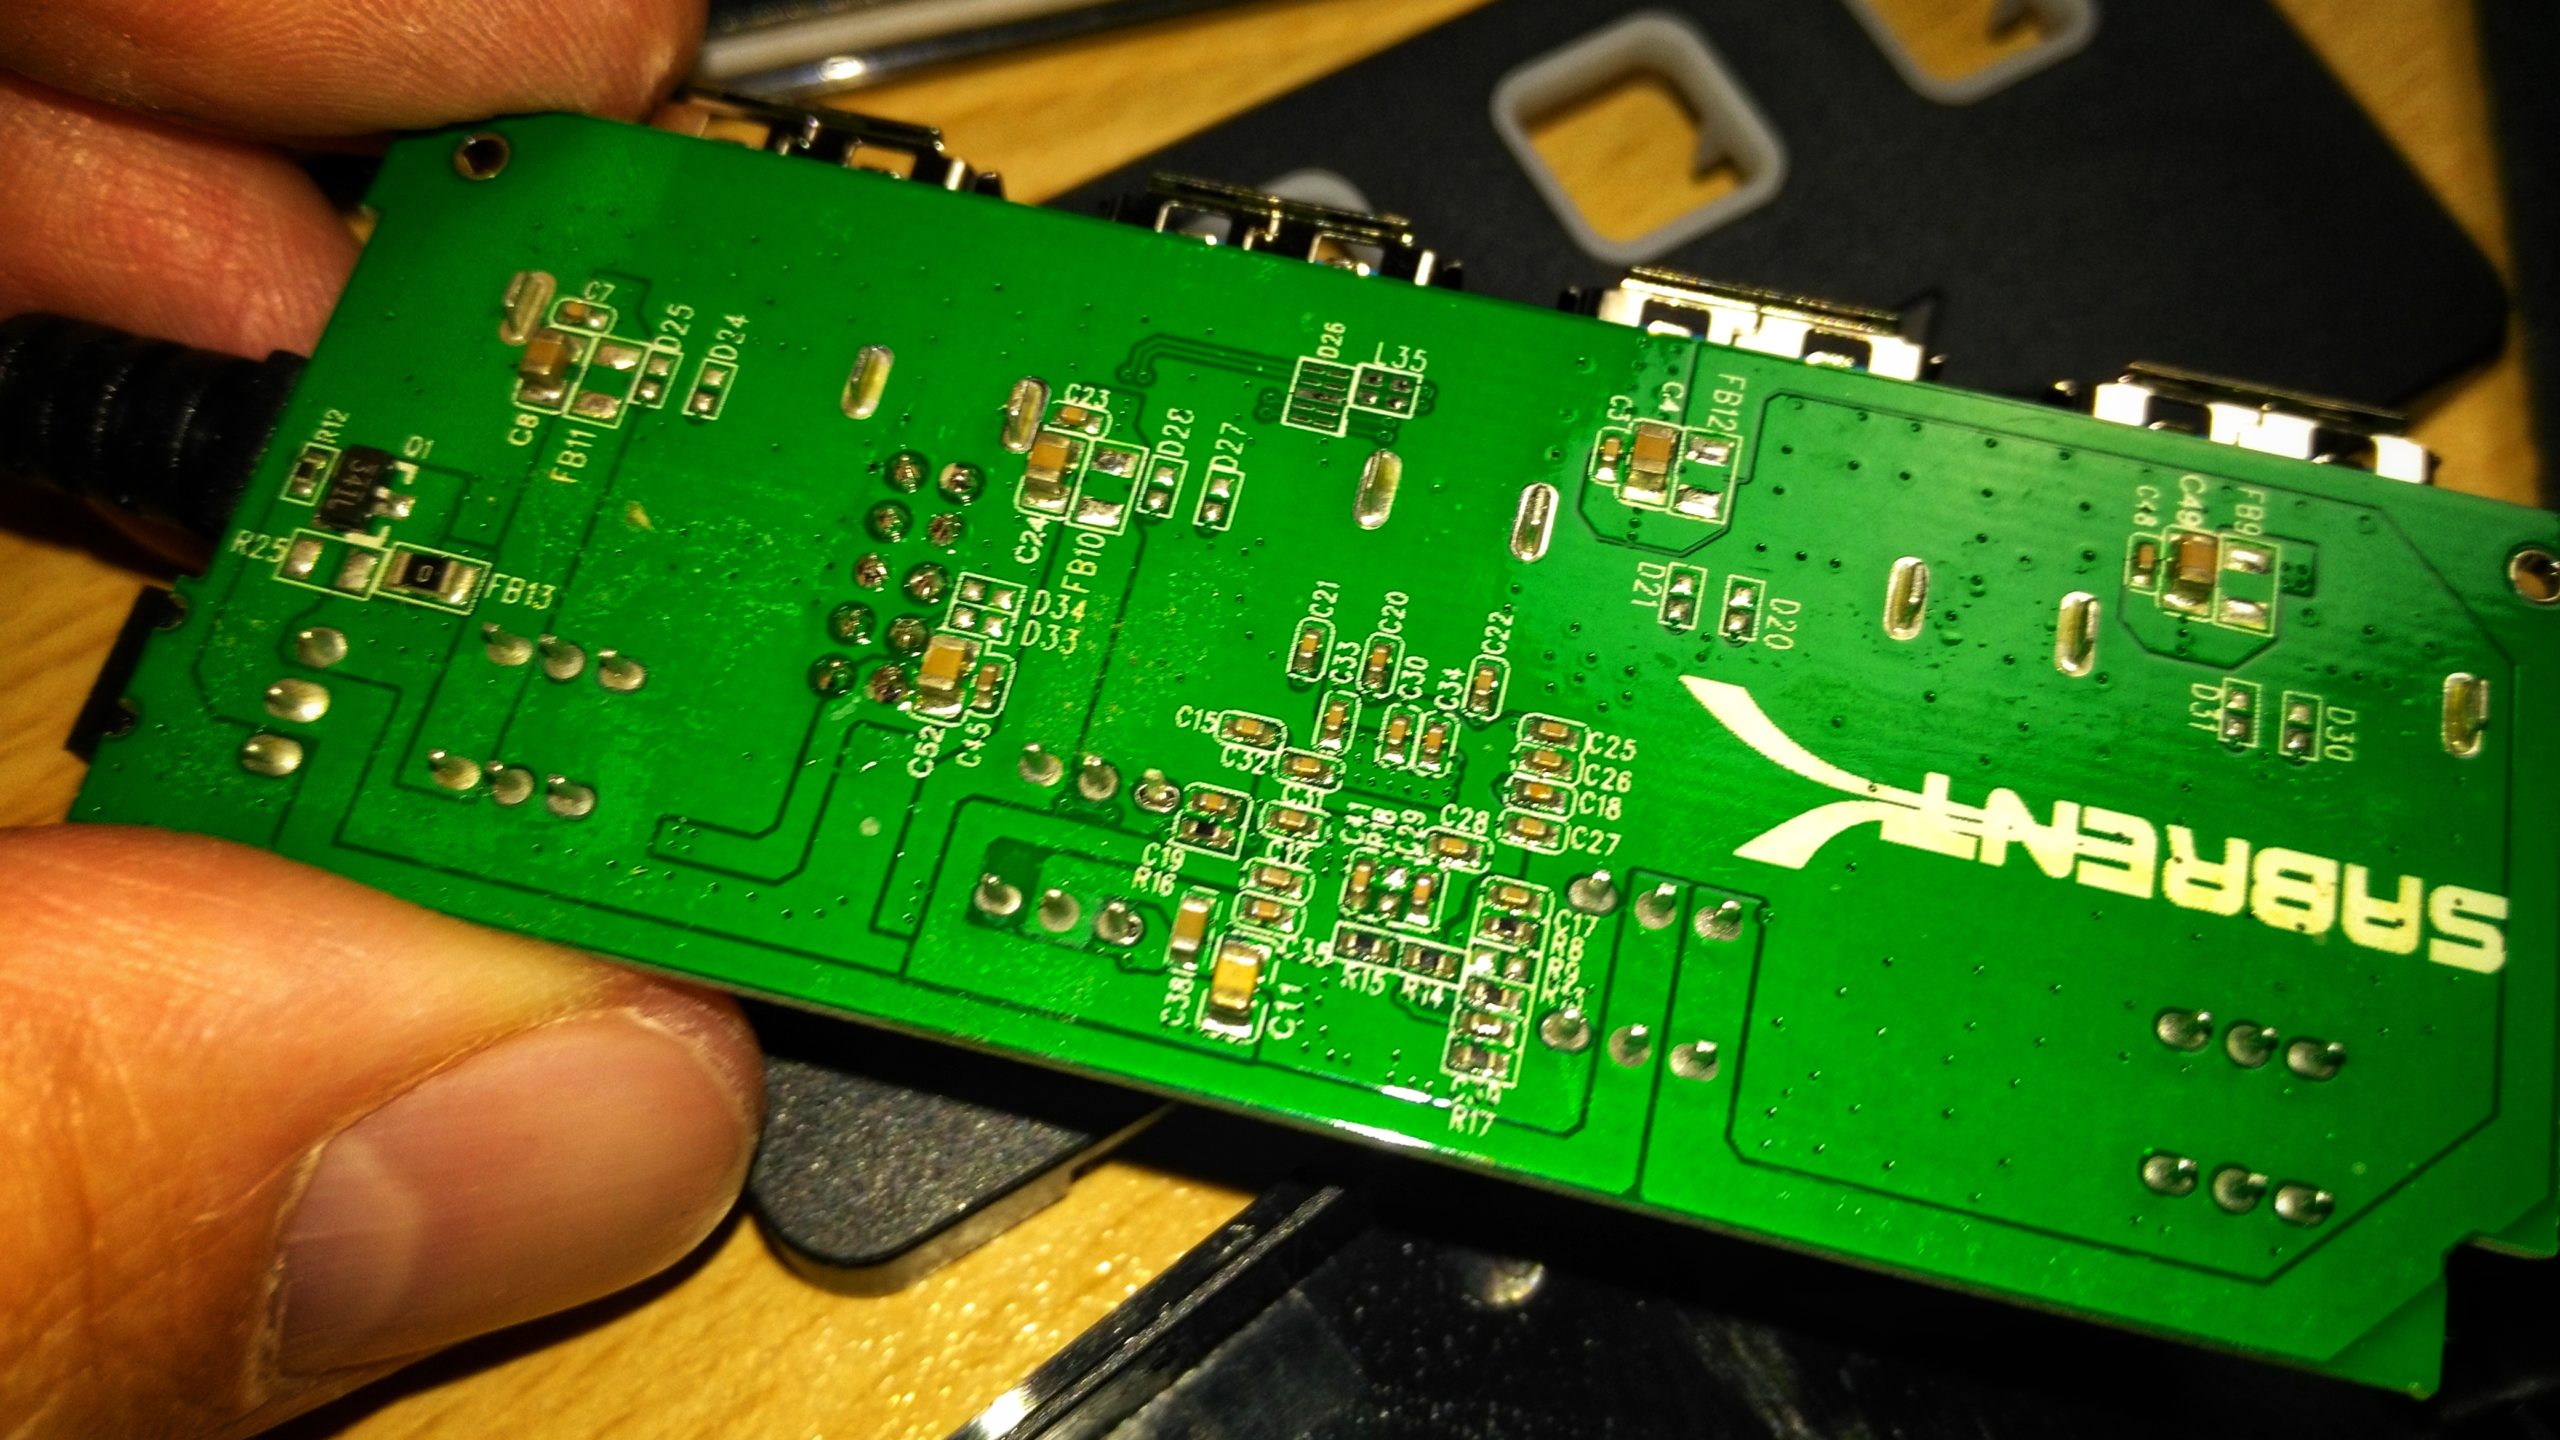
Backside of the hub
The backside is more tidy but I can spot at least two soldering points for a button that may be cold already. Too be fair it’s the backside so this may not be an issue and only affect stability of the button.
The reason I pried this open is basically that I didn’t expect this to really have USB 3 capabilities at all so I wanted to check that they didn’t just use “blue” ports. I’ve been burnt by this before. Everything looks to be in order though and the datasheet for the built in VL815-Q7 by VIA Labs, Inc. (VLI) does indeed list the chip to be capable of USB 3. VLI describes it as a “USB 3.1 Gen 1 4-Port Hub Controller” and it is known to work “under Windows, Mac OS X, and various Linux kernels without additional drivers” . So let’s plug it in:
[ 1707.347836] usb 2-5: new SuperSpeed Gen 1 USB device number 8 using xhci_hcd
[ 1707.387594] usb 2-5: New USB device found, idVendor=2109, idProduct=0815, bcdDevice= 7.04
[ 1707.387599] usb 2-5: New USB device strings: Mfr=1, Product=2, SerialNumber=0
[ 1707.387601] usb 2-5: Product: USB3.0 Hub
[ 1707.387602] usb 2-5: Manufacturer: VIA Labs, Inc.
Shiny. That was easy. Let’s ask lsusb -t
/:  Bus 02.Port 1: Dev 1, Class=root_hub, Driver=xhci_hcd/10p, 5000M
    |__ Port 5: Dev 8, If 0, Class=Hub, Driver=hub/4p, 5000M
/:  Bus 01.Port 1: Dev 1, Class=root_hub, Driver=xhci_hcd/16p, 480M
    |__ Port 5: Dev 12, If 0, Class=Hub, Driver=hub/4p, 480M
And sure enough it claims to be up for the task of both, USB2 and USB3 indicated by the 480M and 5000M. So let’s plug an USB3 mass storage device and check some readouts (no write tests made because I had no empty usb3 stick around). I used the good old dd command for all: dd if=/dev/sde2 of=/dev/null bs=4k
Connected to the hub:
3727616+0 records in
3727616+0 records out
15268315136 bytes (15 GB, 14 GiB) copied, 190.052 s, 80.3 MB/s
Connected to the motherboard directly:
3727616+0 records in
3727616+0 records out
15268315136 bytes (15 GB, 14 GiB) copied, 188.997 s, 80.8 MB/s
Connected to the computer case ports on the front:
3727616+0 records in
3727616+0 records out
15268315136 bytes (15 GB, 14 GiB) copied, 188.327 s, 81.1 MB/s
So while this is not stellar it definitely is not just USB 2 speeds and probably limited by the USB stick itself, since I get similar readings on all ports. Speed wise it’s at least not in the way or limiting the device and my use case are joysticks, gamepads and maybe a gaming keyboard. Nothing that would require such speed anyway.
But.
During my first tests I played around with the power button for an empty outlet and I really didn’t expect this to affect other outlets but it does. It looks like the power breaks down shortly and the error log is filled with I/O errors for the mass storage device.
[ 1706.292620] usb 2-5.4: Failed to set U1 timeout to 0x0,error code -19
[ 1706.296089] usb 2-5.4: Set SEL for device-initiated U1 failed.
[ 1706.299672] usb 2-5.4: Set SEL for device-initiated U2 failed.
[ 1706.299680] usb 2-5.4: usb_reset_and_verify_device Failed to disable LPM
[ 1706.339639] blk_update_request: I/O error, dev sde, sector 2468080 op 0x0:(READ) flags 0x0 phys_seg 1 prio class 0
[ 1706.339641] Buffer I/O error on dev sde2, logical block 247326, async page read
[ 1706.395683] sde: detected capacity change from 30310400 to 0
This will result in data loss during write operations. While this is not a problem for HID devices, I mean who cares if a click doesn’t make it, one should definitely not use this for disks or at least not touch it while it’s writing until it’s indeed “save to unplug the device now”.
Also it must be kept in mind that this is a passive hub. USB 3.0 is specified with 5V and 900mAh. This does not magically multiply for this model – it’s 900mAh _total_ for all 4 plugs and to be fair that is clearly stated in it’s description.
It does suck that it may be fine speed wise but does exactly the one thing I bought it for poorly: Disable one and only one plug at will. Keeping this in mind it does (surprisingly) work as advertised.
Oh yeah, and don’t watch out for a CE sign on that one xD
This is the journey of getting head tracking for X4 Foundations on Linux. Browsing the in-game options I found key bindings to enable and reset a head tracker so I got my hopes high for head tracking for X4 on Linux and started reading.
tl;dr: The native build of X4 does not support this at all. It even lacks the symbols in the executable. There is hope with Wine though.
While seeking through the patch notes two things catched my eye (harhar). The notes suggest support for Tobi Eyetracker and somewhat earlier TrackIR. The Tobi one was marked as “Windows only” so I hoped for TrackIR and tried to understand what is involved into getting this particular head tracking to work.
Please do keep in mind that I never touched any head tracking before so I had to grasp the theory behind all this first.
So apparently there are not many possibilities to configure anything in-game. There is the additional start parameter -forcehmd that may have some effect here but that’s about it. So everything related must come from the outside, right?
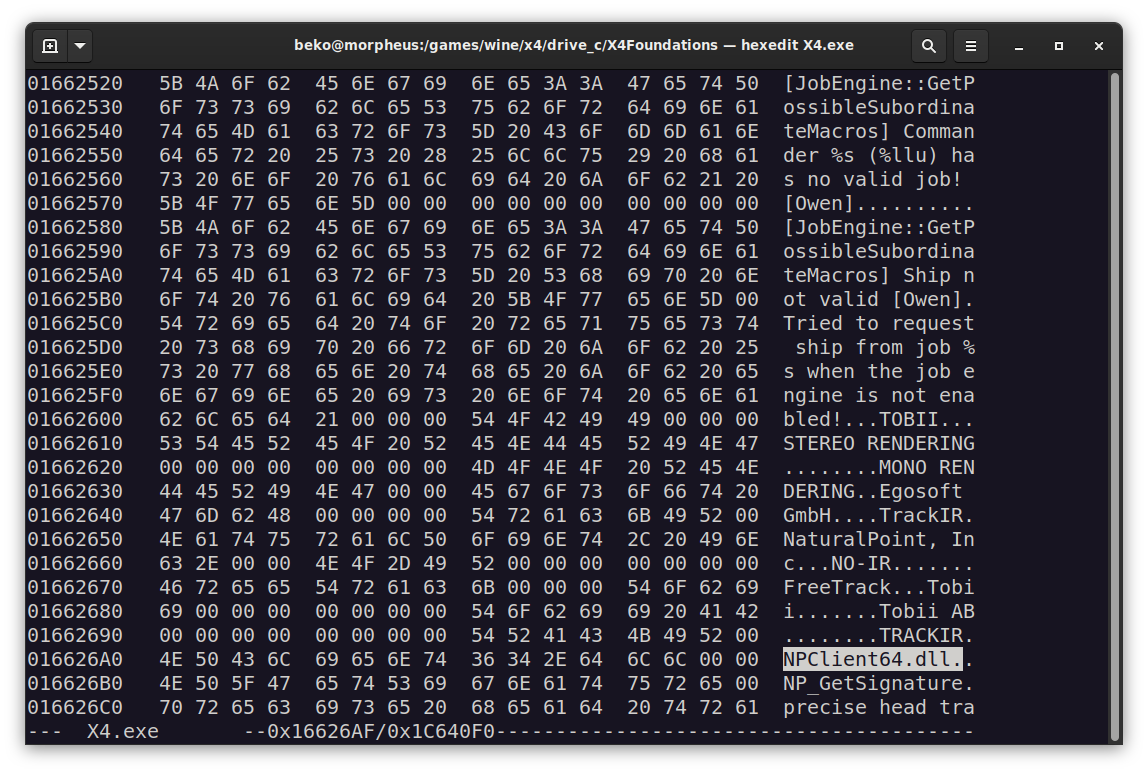
Funny enough a Kerbal Space Program extension on GitHub provided me with the idea how TrackIR is supposed to function: https://github.com/pizzaoverhead/KerbTrack/blob/master/KerbTrack/TrackIRClient.cs#L45 so let’s clear that one up: The code looks for the registry entry “Software\\NaturalPoint\\NATURALPOINT\\NPClient Location” that points to the NPClient.dll (or NPClient64.dll) which in turn in loaded by the executable if found and accessed. And sure enough I found the same pattern by using the good old hexeditor on X4.exe as well:
You may suspect this already but none of that can be found in the X4 binary for Linux and this is the end of the story.
Appendix: It might be possible that a joystick look-around thingy may be abused for this but since I do not own such a joystick (yet) I wouldn’t know how to fake such signals.
A new hope
During my research on head tracking on Linux I stumbled over the website https://tkoletivrijedi.in.rs/node/219?language=en that mentioned the OpenTrack project https://github.com/opentrack/opentrack to play Windows games with Wine on Linux. How cool is that? A quick check suggests that OpenTrack features (also) the output protocol “freetrack” for Windows and a “Wine freetrack glue protocol” for Linux and OSX.
Freetrack seems to be a implementation of what TrackIR does up to version 4. Looks like the company didn’t like that or was afraid that some tinkerers use self built head tracking devices and not buy their ~200$ hardware any more so they added encryption to their devices with version 5 leaving freetrack dead in the water. Or whatever. So if a game would only support protocol 5… it’ll probably no longer work. Anyway, let’s jump into OpenTrack and give it a try. Once all required developer packages are installed, that includes the wine-devel packages for i686 (and libevdev if you want virtual joystick support), this can be compiled:
git clone https://github.com/opentrack/opentrack
cd opentrack
mkdir build
cd build
ccmake ../
make -j4
make install
./install/bin/opentrack
The important part is to tick the SDK_WINE option or we don’t get the precious Wine Glue. Here, have a video:
And sure enough we find the following already familiar files in install/libexec/opentrack/
NPClient.dll
NPClient64.dll
TrackIR.exe
opentrack-wrapper-wine.exe.so
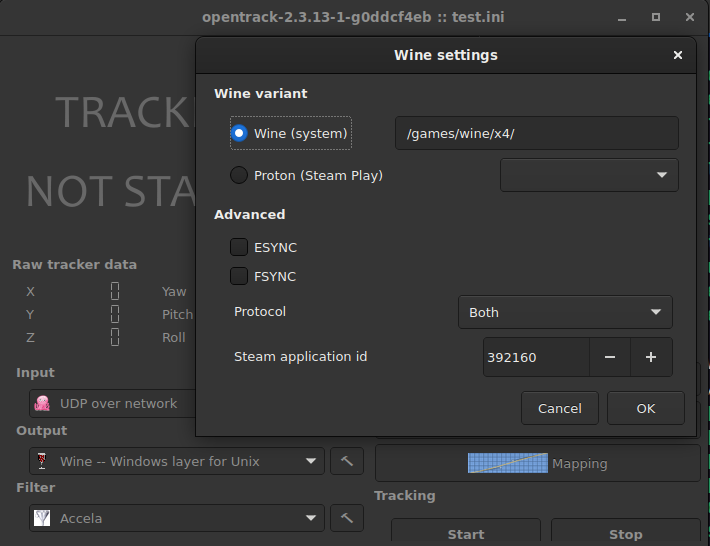
So what OpenTrack does is once it’s started and configured to use “Wine — Windows layer for Unix” as Output: It “injects” the key [Software\NaturalPoint\NATURALPOINT\NPClient Location] to the user.reg of the configured Wine/Proton prefix on start while the also started opentrack-wrapper-wine.exe.so is used for the shared memory mapping – means from my understanding from the OpenTrack binary to some Wine process. TrackIR.exe is just a dummy that may also be run with Wine but does nothing. It’s apparently for games that check for a process with that name before they initialize head tracking features. Neat, huh?
For this to work you have to click on the little hammer symbol next to Output so make sure that your Wine Prefix is properly configured or OpenTrack may insert the registry key to the wrong Wine prefix. Sure enough it seems to come Steam and Proton ready as well but I did not try this because I made the mistake of buying X4 on GOG (I know this is getting old).
So what’s next? Oh yes, a Head Tracking device. Well bite me, I don’t even have any. Why did I go through all this trouble at all?
The head tracking device
Well why should I purchase such a device without knowing if I can even use it? Do you know what kind of device has a gyroscope built in however? Yes, every average smart phone has one and some are even really good (I hear.) So here comes the fun part: I strapped my mobile phone to my headphones while an app sends the tracking information via wifi and the UDP protocol to OpenTrack as input source.
So I will not bore you with the details how I configured and mapped this in Opentrack. It will be of no use for you anyway since this depends totally on your device and system but I can tell you that this is a lot of fiddling with the settings. Also know that a 3-point device can indeed be built for ~10$ with some LED and a webcam – there are various people demonstrating this on the net and you will find plenty on the usual video platforms.
Finally
I don’t like to have to install the game twice now, once native and once with Wine, but… it’s for science! Or so.
Yes, it’s a little clunky. This is probably because:
my phone sucks
my phone really sucks (seriously)
it’s UDP – order of packages is not guaranteed
it’s wireless and the access point is two walls away
…and I probably also messed up with the mapping and filter options 🙂
I even read that it’s not any better on Windows xD
So that’s it. Head tracking on Linux for X4 Foundations. Jumped the hoops 🙂
Getting into #x4foundations modding is a painful experience for a newcomer especially when on a clock (as in: Ain’t no time for this) so here is what I understood so far.
Finding resources
EgoSoft is one of the few companies that still hold on to a forum. They may be on social media but that’s just as news outlet. This is somehow also where the modding community resides, when it usually would find a place on it’s own “elsewhere”. Clever move and I applaud – at least I don’t have to join some private group on Facebook.
Sadly the forum has no search function to speak of especially not for a technical search or, gasp, a code search. So most mod developers usually host their stuff elsewhere – like scattered on GitHub, and only talk about their mods here and there. Connecting the dots (and users) is up to the initiate. In fact it helps slightly to utilize an external search engine that does a better job compared to the forum search itself. Go figure.
Eventually I stumbled by accident or luck over a Confluence installation that seems to act as some sort of Wiki and has indeed some pointers on modding for various X titles at https://www.egosoft.com:8444/confluence/ – and I am still uncertain if this is intended to be public or not. Sadly the X4 modding articles in there are short and of course available in English only. That wouldn’t be an issue if Confluence wouldn’t stubbornly insist in trying to render a page in my native language first, informing me helpful every time that no such entry exists and makes me switch the language every single time back to English. Well, I guess it is a community driven documentation system so I could scratch my own itch and translate stuff. Thing is I should understand what I’d be talking about in the first place, no?
Turns out that most know-how for X4 modding can in fact be learnt from X3 and X Rebirth in particular. Both are precursors and partially sandboxes for X4, from my understanding, so a lot of the information does also apply to X4. Sometimes with slight differences.
The most helpful place however is an unofficial Discord channel where many of the mod developers hang out and they do seem to be really friendly to newcomers asking the same old questions over and over again. I won’t bother with the invite link as this one is subject to change all the time but it can indeed be found with the dreaded forum search.
The extension file formats (and formatting)
Anyway, let’s dive into some details. Mods, or as it should be called nowadays “extensions”, consist usually of so called MD Scripts, that’s short for Mission Director (and not Markdown) written in well formed XML Syntax, and LUA scripts (that seems to be the gaming industry standard – at least I keep hearing that). LUA itself is explained in great detail in the online documentation of LUA while game specifics are listed in varying detail on the Confluence mentioned above but that’s subject for another article. Also various assets may be floating around in the extension folders.
Now in theory XML and LUA are completely system independent so modding with different systems in mind should be a no brainer, right? Right?
Well, of course nothing is ever that easy. Thankfully the user CulunTse took the burden and wrote an article on all the caveats encountered so far: https://forum.egosoft.com/viewtopic.php?t=380912 (Steps to make your mod work on Linux+Mac) – it’s for X-Rebirth but the gist applies for X4 as well. So when writing mods make sure to use lower case only and don’t use special characters at all. Best not even use a white-space just to be sure.
<rant>Again Windows f****s us all over being the only system that is fine with "A==a" being true. Not even JavaScript manages this. And since X4 is a game and the majority of gamers (and mod devs) play on Windows we have to suffer from this yet again. The average mod is simply not compatible and broken for e.g. Linux users. Guess who gets the blame. The worst part is that another generation of developers will not see any problem with this behaviour.</rant>
So now we learnt that an extension consists mostly of XML and LUA files, so how comes that mods downloaded from Steam, e.g. to learn from, are riddled with various TXT files instead rendering your linter of choice useless because it won’t automatically parse a text file? Well that seems to be a Steam Workshop limitation not allowing certain file… extensions. So developers started to rename their files when uploaded to Steam. Yay, more confusion for man and machine (as in mankind – c’mon, it’s a lame allusion!).
Why I mentioned Steam now? Well, learning from existing extensions is the way to go. Also since some simply don’t work for Not-Windows users it’s up to myself to debug. The places to get extensions is usually from NexusMods (no thanks, still angry that they lost my user data years ago – still used by scammers) and Steam. Avid readers of my ramblings may know my especially sour spot of having purchased X4 on GOG (https://beko.famkos.net/2021/03/17/x4-cradle-of-humanity-for-linux-and-gog/) so downloading from the Steam Workshop is not as straight forward as it is for others. There are various so called “steam workshop downloader” that easy the pain somewhat.
But wait. The Steam Workshop file comes as DAT file. What is that again when I just talked about TXT files? Well, this is from my understanding a format by EgoSoft designed for Steam Workshop files for X Rebirth – also called a XRWS file. At least from https://github.com/Lighting/XRWSunpack – a tiny little project that helps unpacking the DAT files but has to be compiled before use. That’s usually a matter of issuing the make command after checking out the repository (or download the release file if you’re feeling lucky). Fair warning: It is somewhat rigid in the way the DAT file has to be named so you may have to adjust that by renaming. Ymmv.
Armed with that knowledge I was able to download and extract the awesome extensions_fireandsmoke_v107.dat extension that really spices up space fights with the effects we know and love from X Rebirth (or not). This one I could also drop in my user space folder under ~/.config/EgoSoft/X4/extensions/x4_fireandsmoke/ (again: case sensitive, important). The folder name matters because it is also hardcoded into the extension files itself and will fail to load various assets if changed. Interesting design choice.
Why this is noteworthy? Well apparently this does not work for all kinds of extensions. Some seem to work only when put in the game path /path/to/X4_Foundations/game/extensions/ where the game also stores official DLCs. Better keep that in mind. The gist seems to be that user space extensions are limited in functionality to prevent nefarious mods. Or so I hear. Maybe EgoSoft simply never got it working properly. There is more (conflicting) info hidden deep in that Confluence mentioned above.
One extension to rule them all (and a pipe)
So why go through all that trouble when an extension can simply be downloaded from e.g. GitHub? Well, I learnt the hard way: Also not as simple. For example many mods rely on one very important extension that can be found in the repository https://github.com/bvbohnen/x4-projects – a wild mix of various extensions and even a Pipe Server (more on that later). It’s the indeed impressive extension sn_mod_support_apis featuring a clever way to work around some UI modding limitations in X4, allowing lazy loading of further LUA scripts and even introduces a Pipe Server to interact with the game from the outer world – mostly used for more complex hot keys. A dream coming true and used by many other extensions as well.
Sadly it didn’t really work out of the box when checked out from GitHub and put in place at /path/to/X4_Foundations/game/extensions/sn_mod_support_apis/. There were various reasons for this. First of all: Case sensitive again. The XML files in the md/ folder must be lower case or X4 will simply ignore the files. Easily fixed though.
The next problem wasn’t that easy to identify and the reason for this is hidden in plain sight in this titbit of information from the synopsis:
A workaround is to load in custom lua files alongside the egosoft lua. This is done by editing one of a handful of ui.xml files in the ui/addons folders, adding the path to the custom lua file. These ui.xml files cannot be diff patched. The lua file must be given an xpl extension, and this xpl and the ui.xml must be packed in a “subst” cat/dat.
Where this arcane know-how was acquired from in the first place I do not know. The gist is that some XML files are happily read by X4 (and can even be hot reloaded) while some can not. The ui.xml falls into the not so much category and since I have no idea how to create a cat/dat file (yet) I had to scrape the “subst” files from a release (Steam Workshop, NexusMod, GitHub release, you name it). Without it’s simply not read and ignored and this is also why no single debug line will ever be logged to give the (weary) initiate a hint what may be wrong.
After that mods relying on sn_mod_support_apis started working (or throwing traces at least). Awesome! Onwards to Pipes! Or Not! Because this part is Windows only. Why? Well, the Pipe Server uses a LUA feature to load a library from disk providing that pipe feature. And that project is written in C, compiled as a separate DLL and relying on Windows, of course. That makes even sense and I really can not blame the author for scratching the own itch only here. See https://github.com/bvbohnen/x4-projects/blob/master/extensions/sn_mod_support_apis/lua/c_library/winpipe.lua for details and to be fair the extension is written in a way that other features do still work so it’s not a total roadblock and in theory I can go back to be a happy gamer at this point.
Alas I want that Pipe feature, of course, so I have to come up with my own library at this point. It’s not a complex file but my C days are long past. So to spice this up I needed a crash course on how LUA is supposed to work. Script wise and all and I don’t think I was prepared for all this.
Diving into the unknown (What is LUA/JIT anyway?)
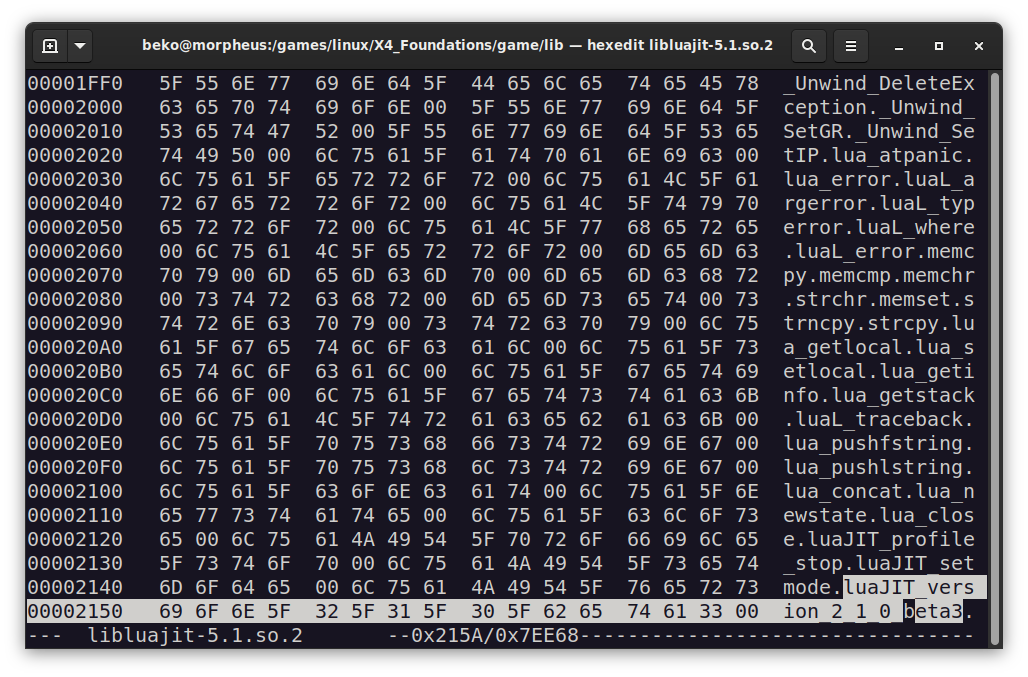
LUA is basically… ah frell, go and look it up yourself. In the end LUA scripts are interpreted by a VM. That would be LuaJIT (JIT – Just In Time) on Linux and this is why X4 is shipped with a file named libluajit-5.1.so.2. Sadly this is not the particular version of LuaJIT. It stands for an ABI compatibility version. In theory at least. My first goal to get the idea was to grab the source and compile my own libluajit. Should be a no brainer, right? Little did I know when I checked out the project from https://github.com/LuaJIT/LuaJIT.
I run a hexedit on the distributed library to get an idea what version is used and came up with 2_1_0_beta3. The commit 8271c643c21d1b2f344e339f559f2de6f3663191 of the LuaJIT project is tagged with that version so I went with that first.
Compile went smooth, beside some warnings, but X4 would stop dead throwing a Fatal Error at me that I’ve never seen before. Well, let’s fast forward to HEAD and try again and this time the game started but became stuck in main menu with unresponsive entries and missing labels (some said “Processing…”). So obviously X4 is not running vanilla LuaJIT and since this is under MIT licence I don’t think they even have to provide modifications. What now?
Thankfully some fellow gamer on Telegram, who doesn’t want to be named, pointed me in the right directions due to experience with LUA. An article over at https://developer.x-plane.com/article/luajit/ explains some major caveats with this and sure enough once I knew what I was looking for I found evidence here and here and here. (Yes, they have Jira as well – who would have guessed).
Lua engine was upgraded to LuaJIT 2.1 which comes with performance improvements as well as new language features (incl. some added Lua 5.2-specific features as well as some Lua 5.3 ones.
Just looking at the number of forks of LuaJIT on GitHub makes me dizzy so I went with the first recommendation https://github.com/openresty/luajit2 that also addresses the memory issue and also edited the file src/Makefile enabling some LUA 5.2 features by commenting in the line: XCFLAGS+= -DLUAJIT_ENABLE_LUA52COMPAT
And guess what, X4 launched with this and also started an older save game of mine just fine. I guess this works so I’ll keep that in mind in case I need some monkey patching to try stuff.
Next on that list? Find out how to write a loadable C library for LUA and adapt that Pipe Server.
At least gaming itself is easy as pie on Linux in 2021. Modding? Now so much.
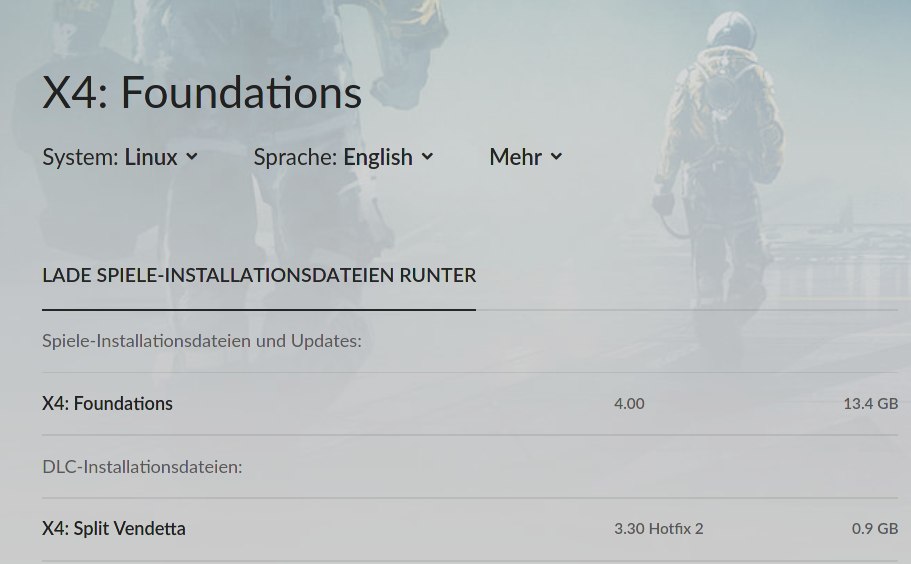
I was eager for the second expansion set of #x4foundations “Cradle Of Humanity” since I enjoyed the Split Vendetta expansion a lot. Sunk many nights into this sandbox so I pre-ordered the DLC on GOG (Good Old Games) and watched that countdown to release ticking down. Oh boy, was I disappointed when the timer reached zero and I got nothing while people who bought on Steam already enjoyed the DLC. As usual GOG leaves Linux players standing in the rain so I called it a day and checked again on the next day when I was presented with this:
X4: Foundations patched, Split Vendetta was not, Cradle Of Humanity nowhere to be seen.
So apparently they finally managed to roll out version 4.0 of the main game but missed the first DLC Split Vendetta. What could possibly go wrong. Cradle Of Humanity is still nowhere to be seen. This didn’t change until now, one day after release and the time of writing of this article. Oh GOG, I am so done with this. And I even expected this, joking around weeks before the release date that this will be two weeks later for GOG users. Again.
Curiously I checked the Downloads for Windows next and guess what: The DLCs were all there and also on version 4.0!
So I did what every Linux tinkerer would do. I checked out what is really in the DLC files by extracting the contents using innoextract. To my delight I could not find anything operating system related in there so I threw all the Windows DLCs into my version 4.0 base game folder and extracted both DLCs.
cd /games/linux/X4_Foundations/game
innoextract --exclude-temp --extract setup_x4_split_vendetta_4.00_\(64bit\)_\(45636\).exe
innoextract --exclude-temp --extract setup_x4_cradle_of_humanity_4.00_\(64bit\)_\(45636\).exe
When I run the game now I found both DLCs registered in the Extensions menu and could start a new game as Terrain fraction. Whop whop, here we go.
No, I will never buy a recent game on GOG again. Especially not as pre-order. I wish I could migrate this to my Steam account. This is the DRM free revolution. As usual, the joke is on the paying customer.
Close
🦠 Ad-blocker not detected
Consider installing a browser extension that blocks ads and other malicious scripts in your browser to protect your privacy and security. Learn more.
Stay cool. Stay safe. Use an ad-blocker. Use protection.