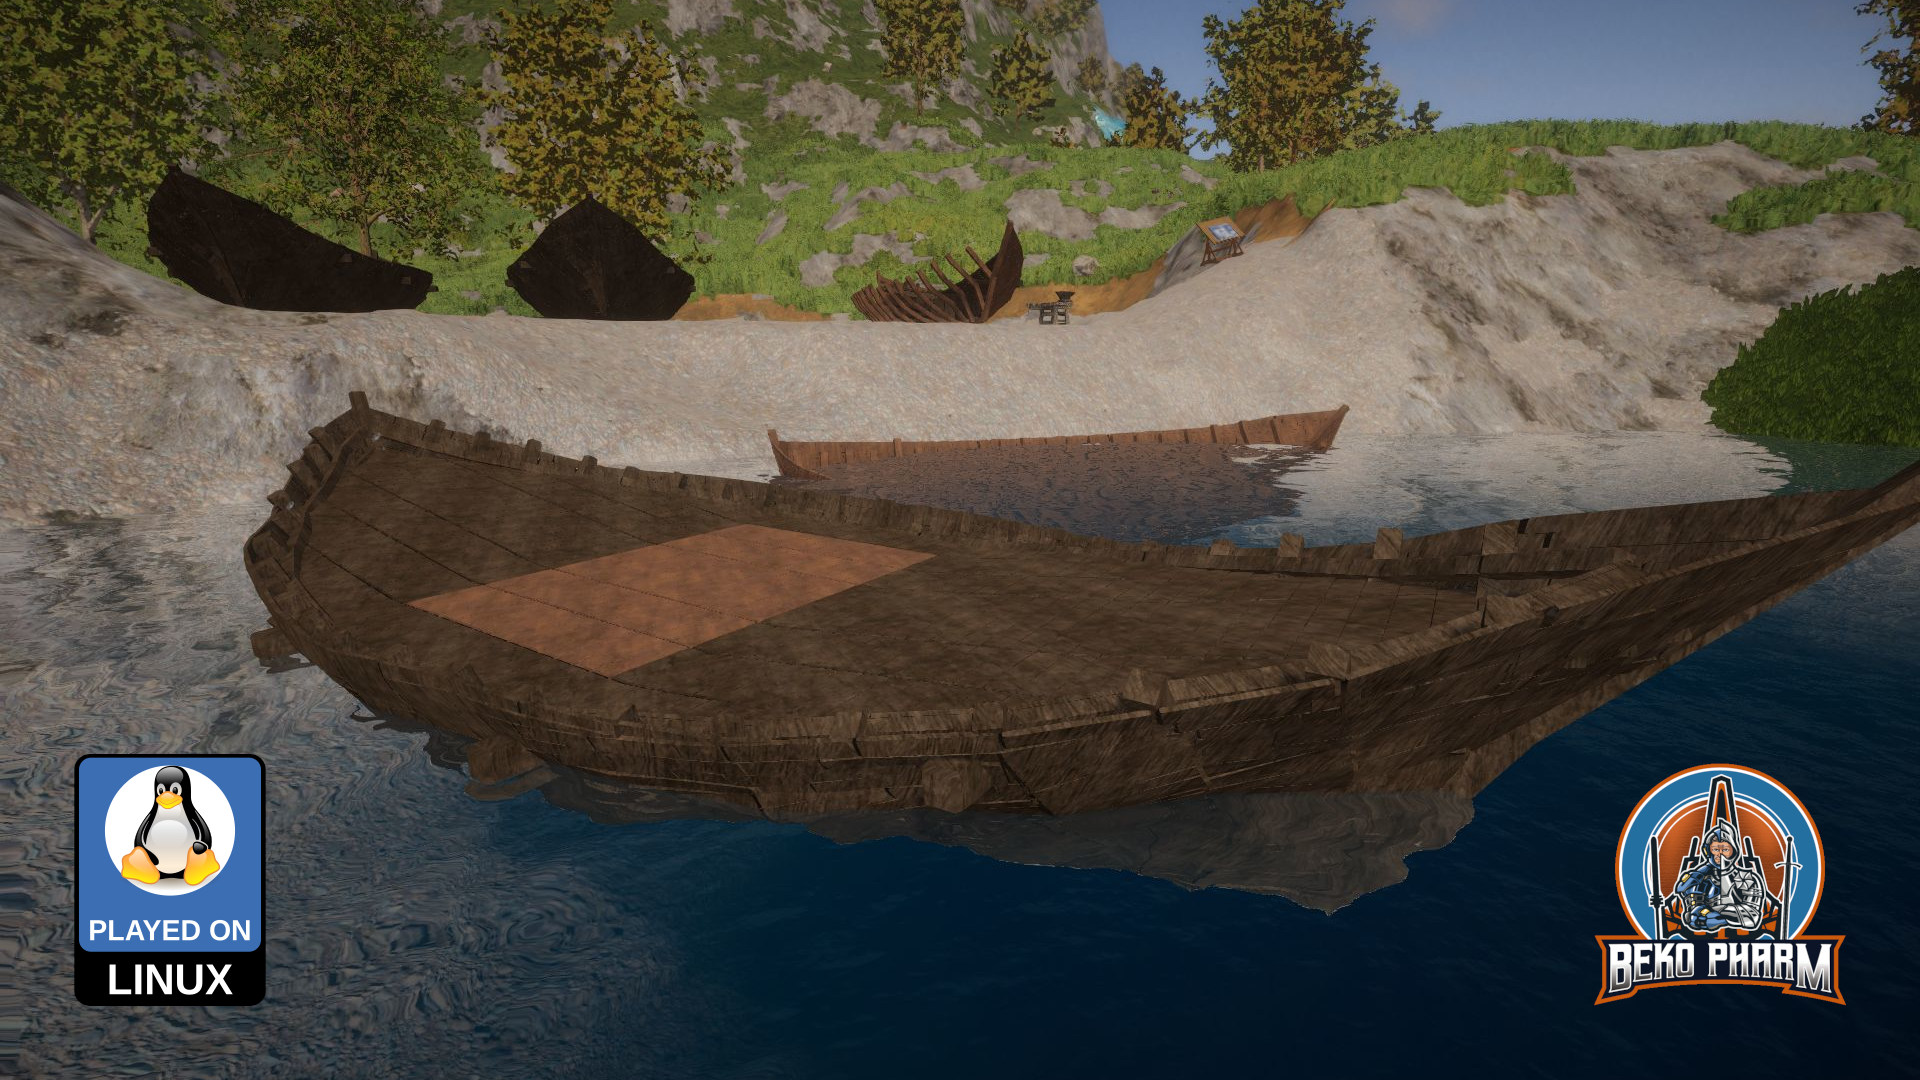
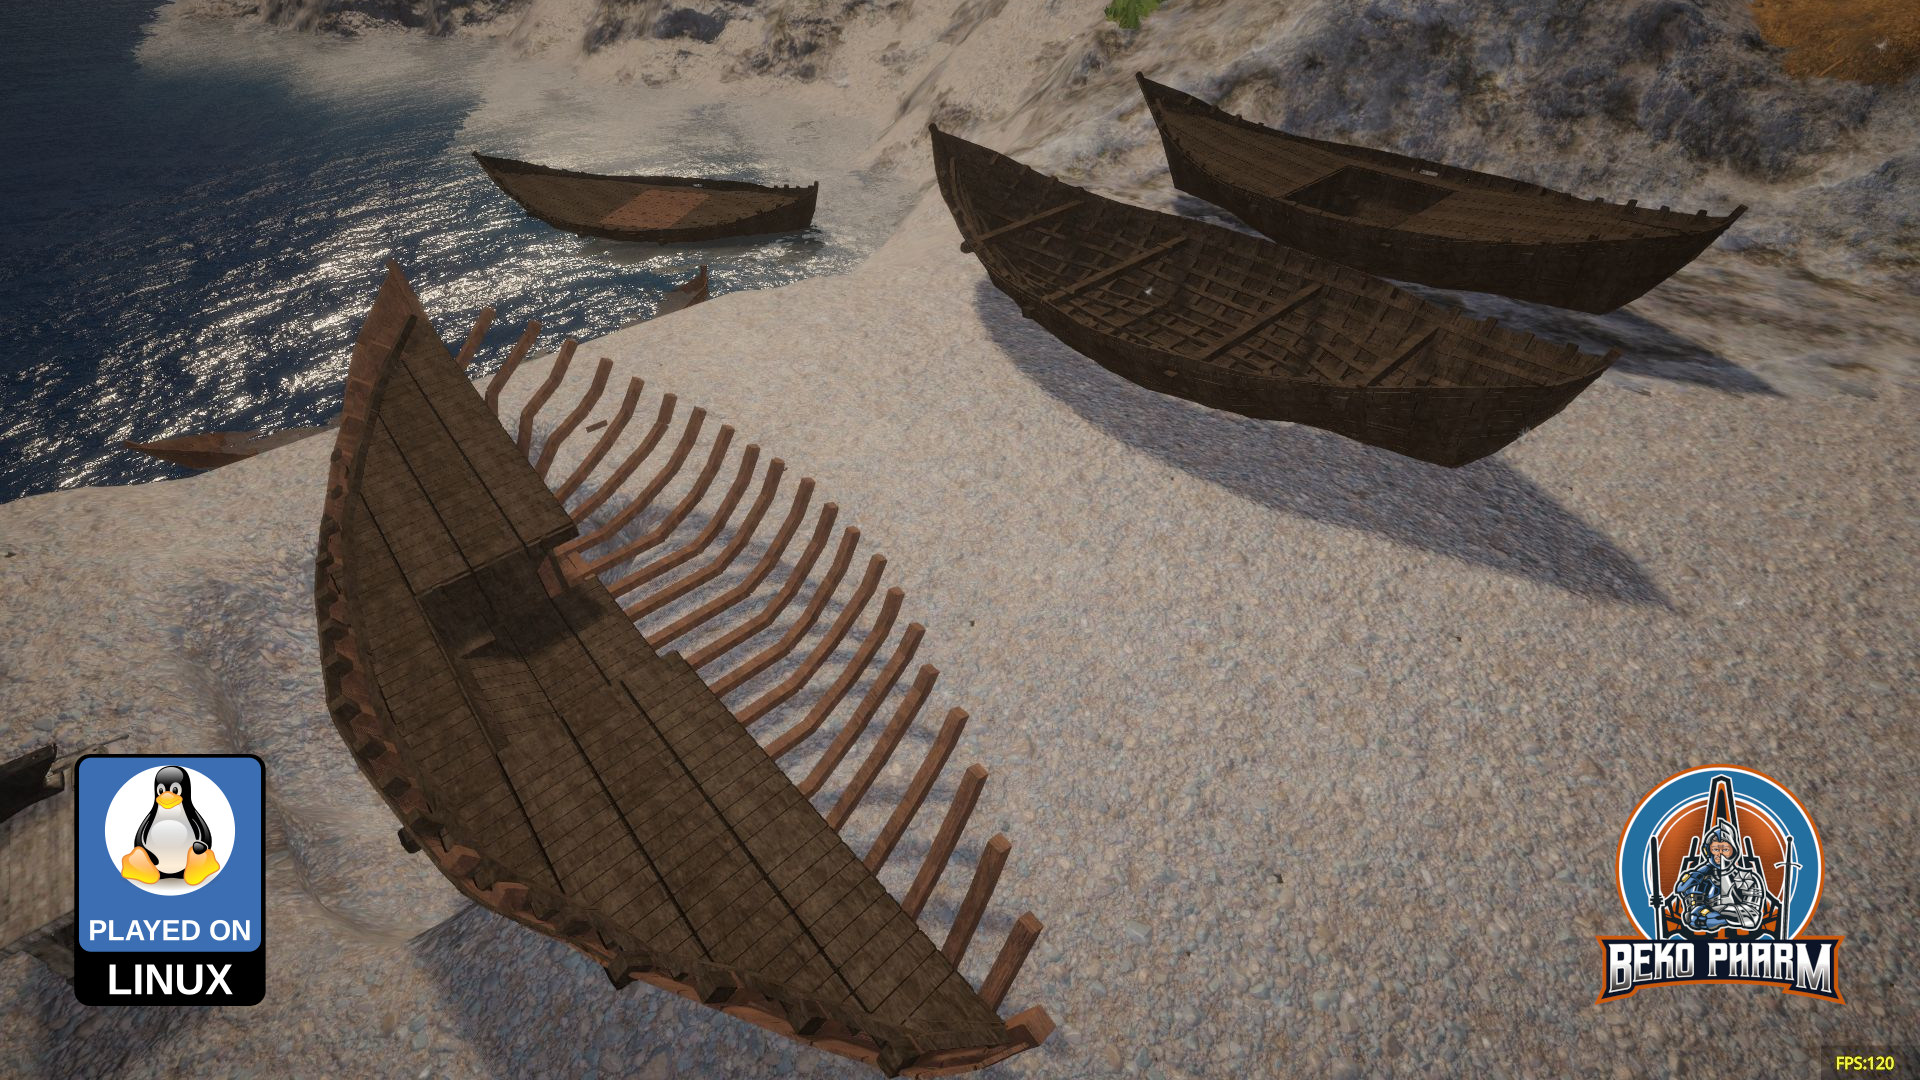
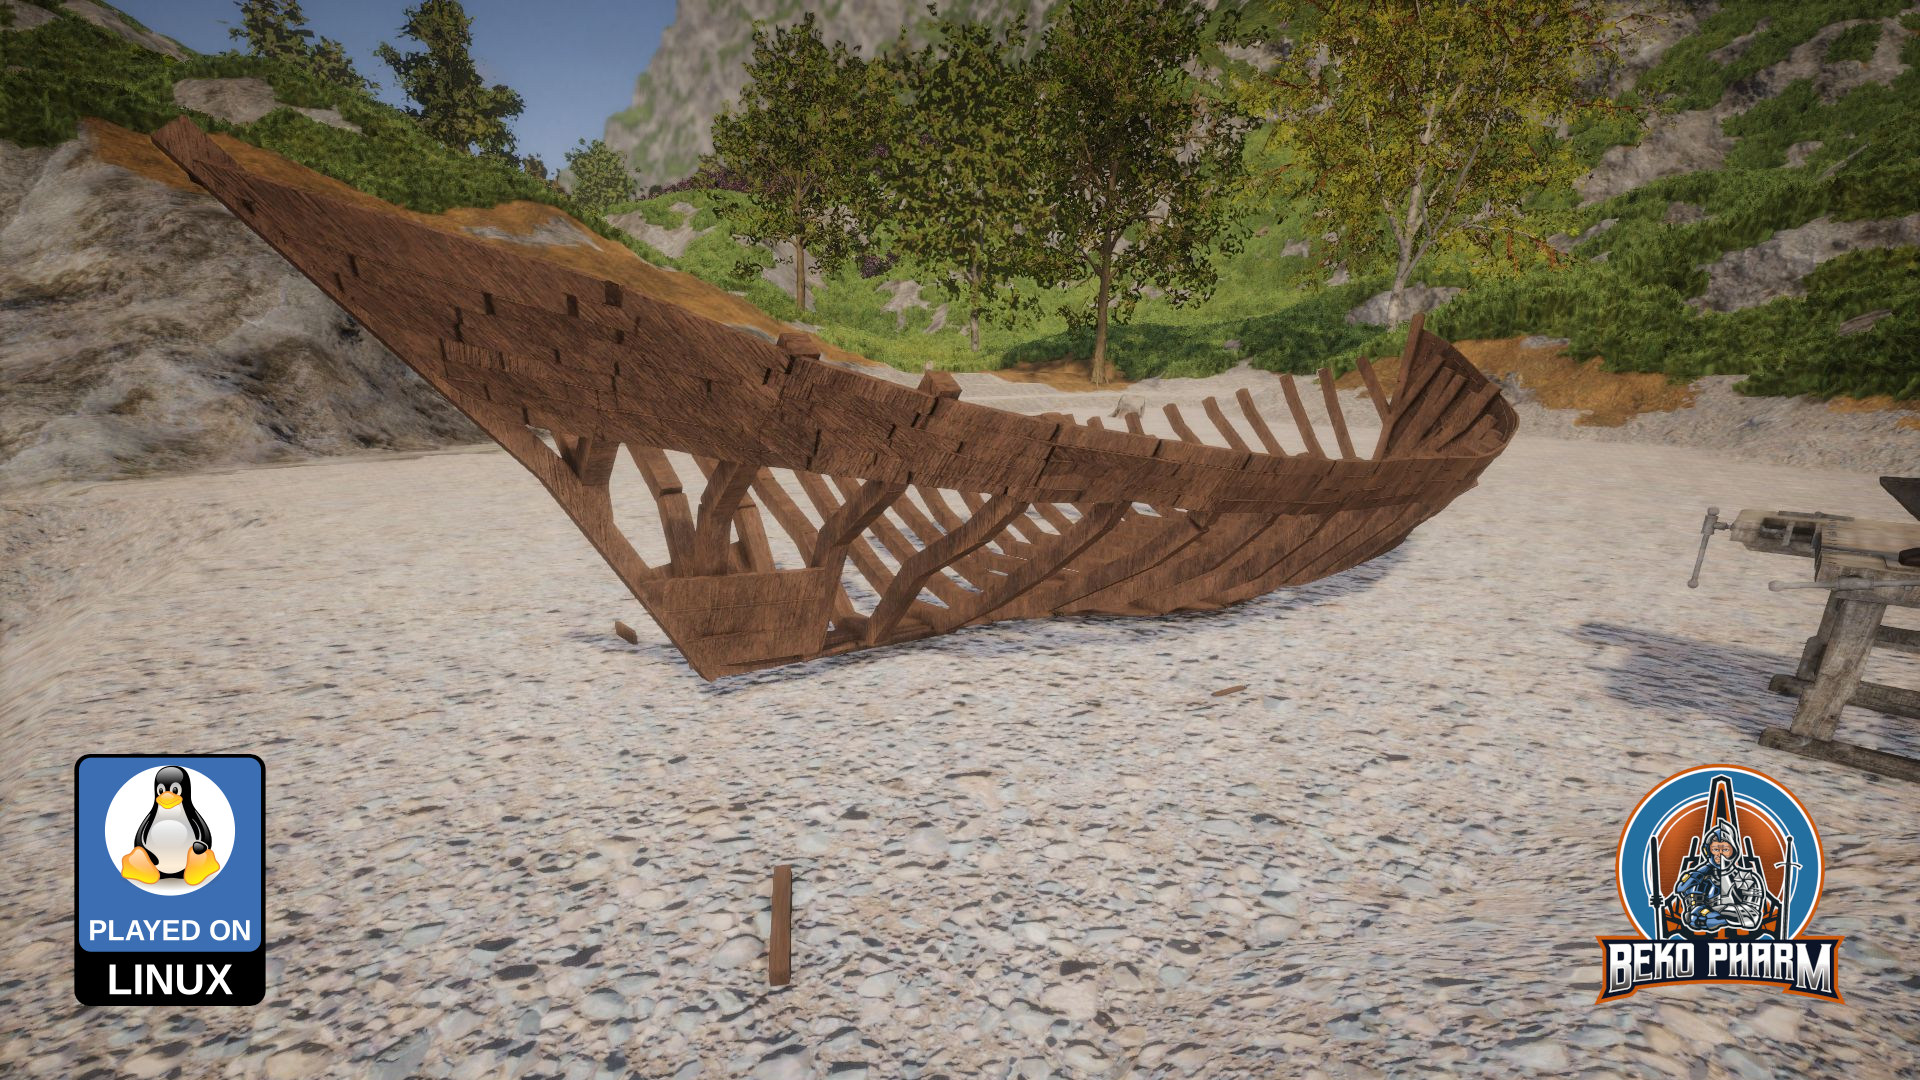
Working on a #cog loosely based on NZ-43 (14C). It’s approximately 12m long 🙂
First time I’m trying my luck with a vessel and not a building. The curving is difficult to realise in #RisingWorld tho.
It started life in the old Java version of the game because the new Unity version has no posters yet. I had to segment the plan of the cog (carved in a very bad resolution from a PDF) into several in-game posters that had to be aligned in-game again to get the proper measurements.
After that I moved the blueprint of the frame over to the new version and started putting planks on it. A cumbersome process during which I learned a lot. I’ll probably make another and more improved hull based on the gathered know how.
I also fell straight into another “not yet implemented” trap. RisingWorld has a flip command to mirror an object and I kinda assumed this would work with blueprints too. It does not. And I was really not looking forward to put plank on both sides of the frame.
Luckily most of the leg work to read the binary blueprints was done by @paulevs before who released https://github.com/paulevsGitch/BlueLib under the MIT license. It has been a while that I touched Java but I could come up with some code of my own that would flip the planks only (I used rounded cubes for the planks exclusively) making use of this lib and the very first try at it looked promising already.

Here is the source I came up with in case you wonder:
package blueprint.flip.maybe;

import java.io.File;
import java.io.IOException;
import java.util.ArrayList;

import paulevs.bluelib.blueprint.Blueprint;
import paulevs.bluelib.blueprint.BlueprintIO;
import paulevs.bluelib.blueprint.element.BlueprintElement;
import paulevs.bluelib.blueprint.element.BlueprintElementType;

public class App {
    public static BlueprintElement cloneBlueprintElement(BlueprintElement el) {
        BlueprintElement element = new BlueprintElement(el.type);
        element.setPosition(el.posX, el.posY, el.posZ);
        element.setSize(el.sizeX, el.sizeY, el.sizeZ);
        element.rgba = el.rgba;
        element.setRotation(el.rotX, el.rotY, el.rotZ, el.rotW);
        element.setSurfaceOffset(el.surfaceOffsetX, el.surfaceOffsetY, el.surfaceOffsetZ);
        element.texture = el.texture;
        return element;
    }

    public static Blueprint readBlueprint(String pathname) {
        File file = new File(pathname);
        Blueprint blueprint = null;
        try {
            blueprint = BlueprintIO.read(file);
        }
        catch (IOException exception) {
            exception.printStackTrace();
        }

        return blueprint;
    }

    public static void main(String[] args) {
        final Blueprint blueprint = App.readBlueprint("/path/to/Blueprint-flip-maybe/cog_base_split_1670726695.blueprint");
        System.out.println("Opened " + blueprint.name);
        System.out.println("Blueprint has " + blueprint.elements.size() + " elements");

        ArrayList<BlueprintElement> elements = new ArrayList<BlueprintElement>();

        blueprint.elements.forEach(element -> {
            if(element.type == BlueprintElementType.ROUNDED_BLOCK) {
                System.out.println("T: " + BlueprintElementType.getElementName(element.type));
                System.out.println("pX: " + element.posX + "pY: " + element.posY + "pZ: " + element.posZ + " rX: " + element.rotX + "rY: " + element.rotY + "rZ: " + element.rotZ);
                BlueprintElement el = App.cloneBlueprintElement(element);
                el.posX = el.posX * -1;
                el.rotY = el.rotY * -1;
                el.rotZ = el.rotZ * -1;
                System.out.println("pX: " + el.posX + "pY: " + el.posY + "pZ: " + el.posZ + " rX: " + el.rotX + "rY: " + el.rotY + "rZ: " + el.rotZ);
                elements.add(el);
            }
        });

        elements.forEach(element -> {
            blueprint.elements.add(element);
        });

        blueprint.name += "_flipped_X";

        File outputFile = new File("/path/to/Blueprint-flip-maybe/" + blueprint.name + ".blueprint");
        try {
            BlueprintIO.write(blueprint, outputFile);
        }
        catch (IOException exception) {
            exception.printStackTrace();
        }
    }
}
I’m kinda happy with the result. This Lib also allows me to change the texture of the elements so I don’t have to worry how the used texture during the construction may look in the end.
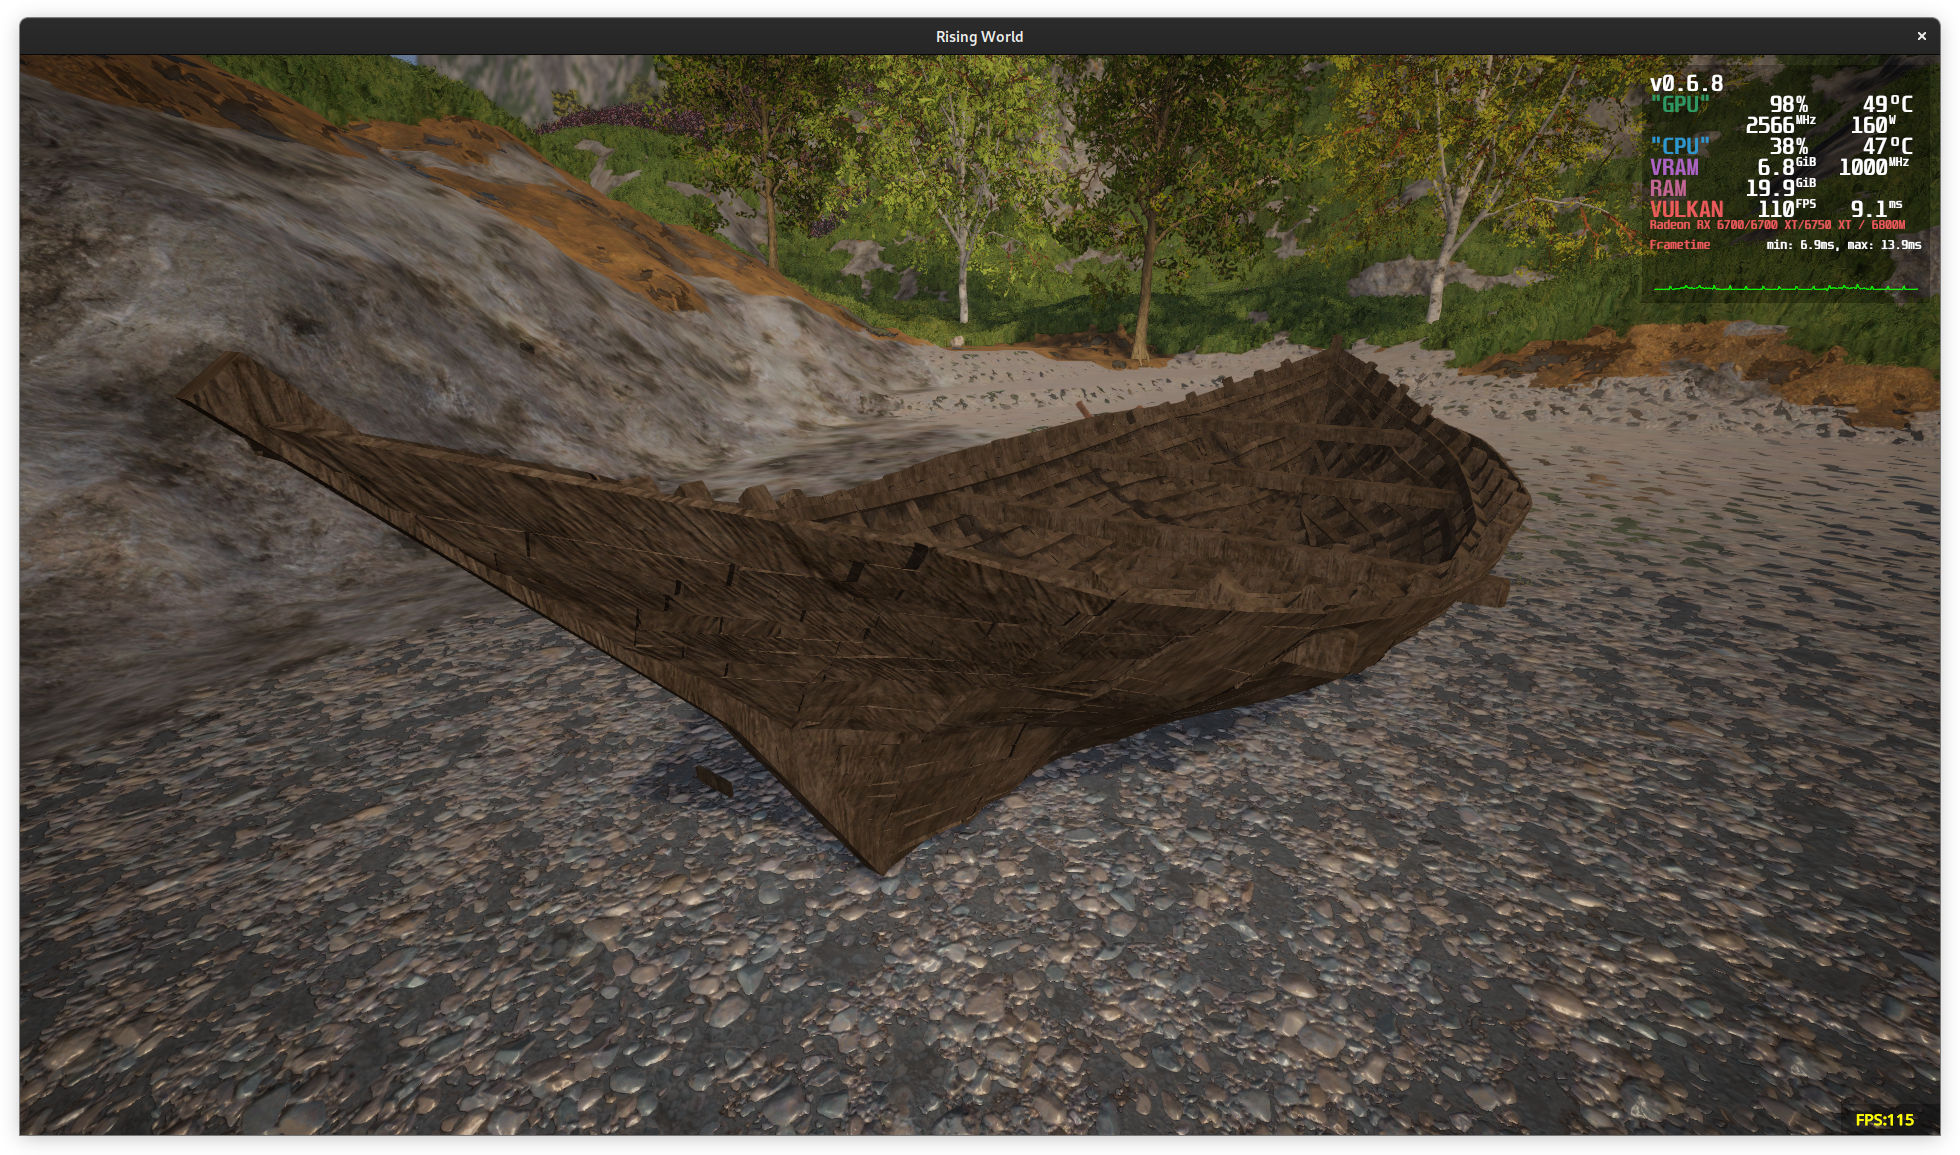
Now onwards to improve the curves. I really wish for a bend mode where the beginning would snap on to an existing object and the opposite plane could be moved around individually.