SpaceBourne 2 by DBK GamesDBK Games (SpaceBourne 2)
The official website of indie game studio DBK Games, the developer of SpaceBourne series and Mesel.

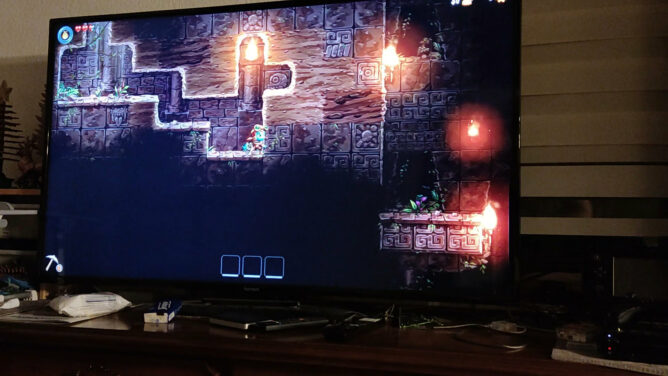
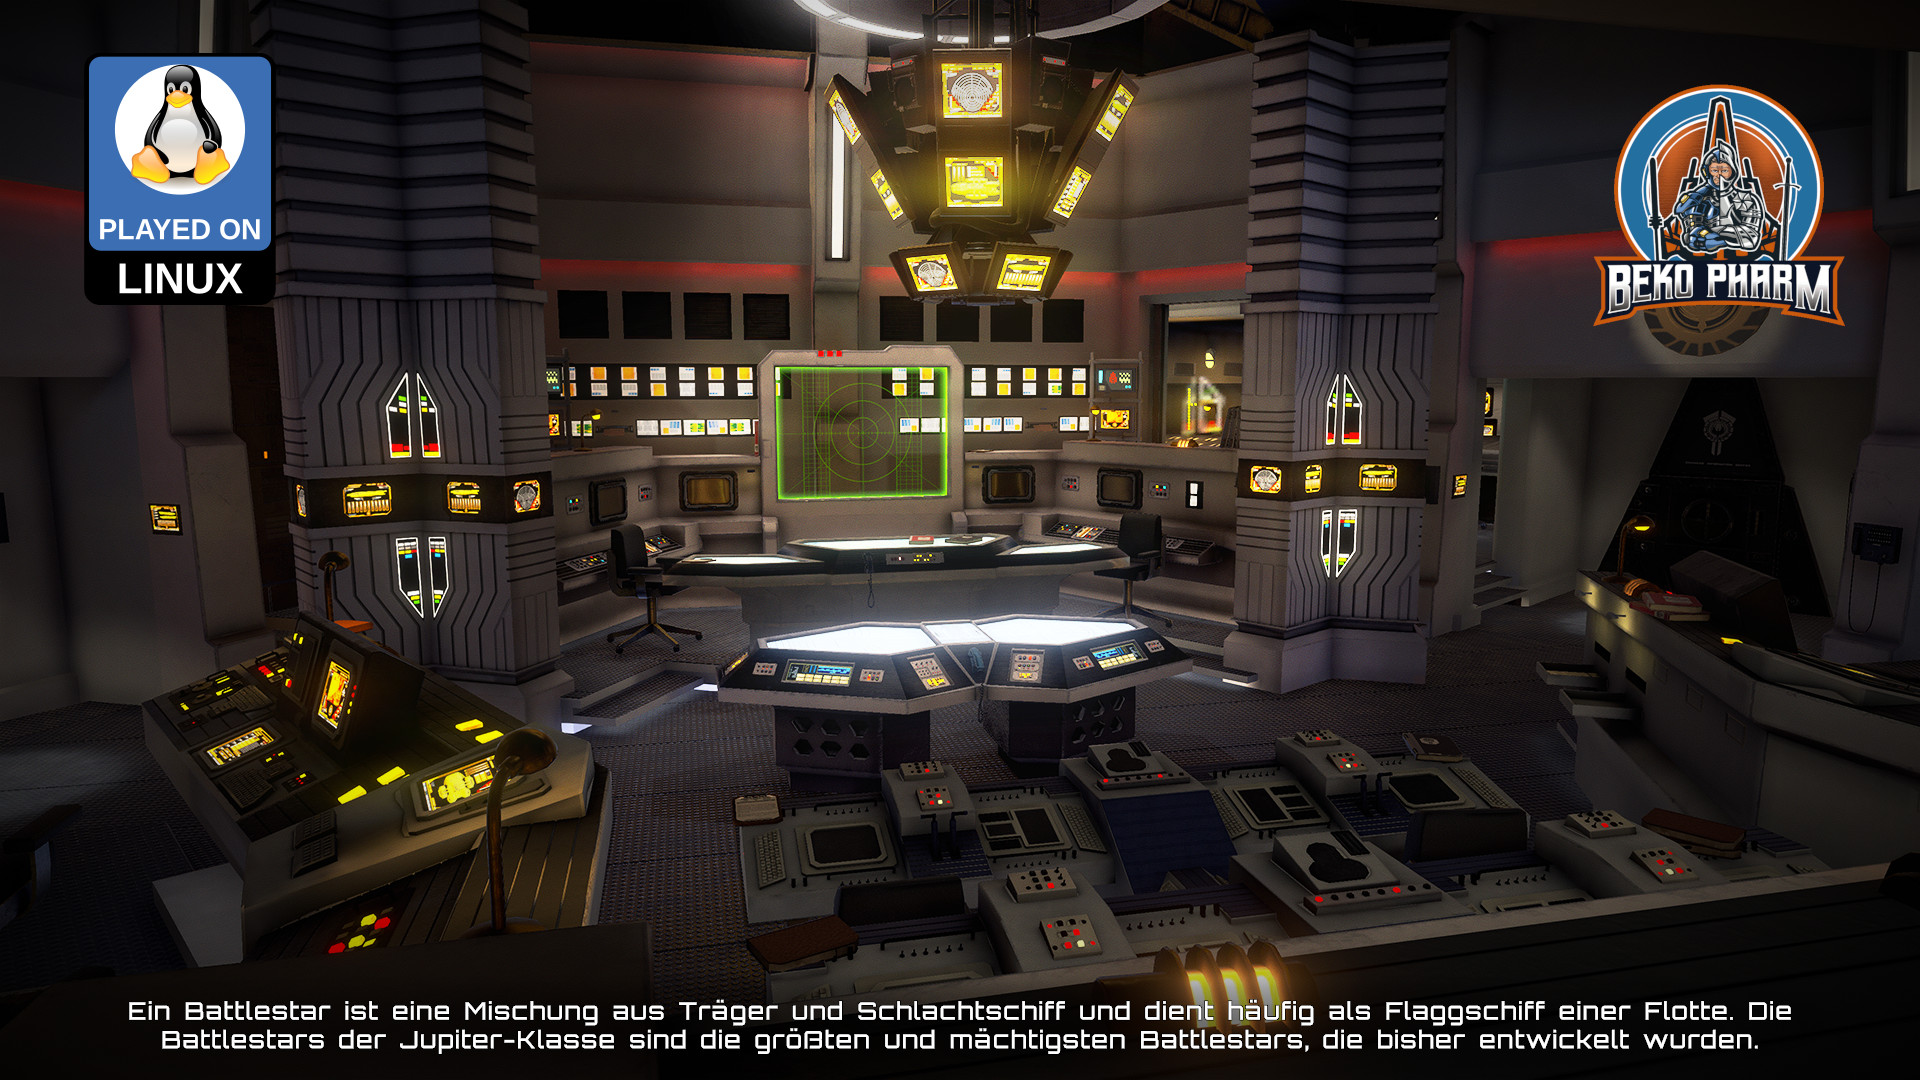
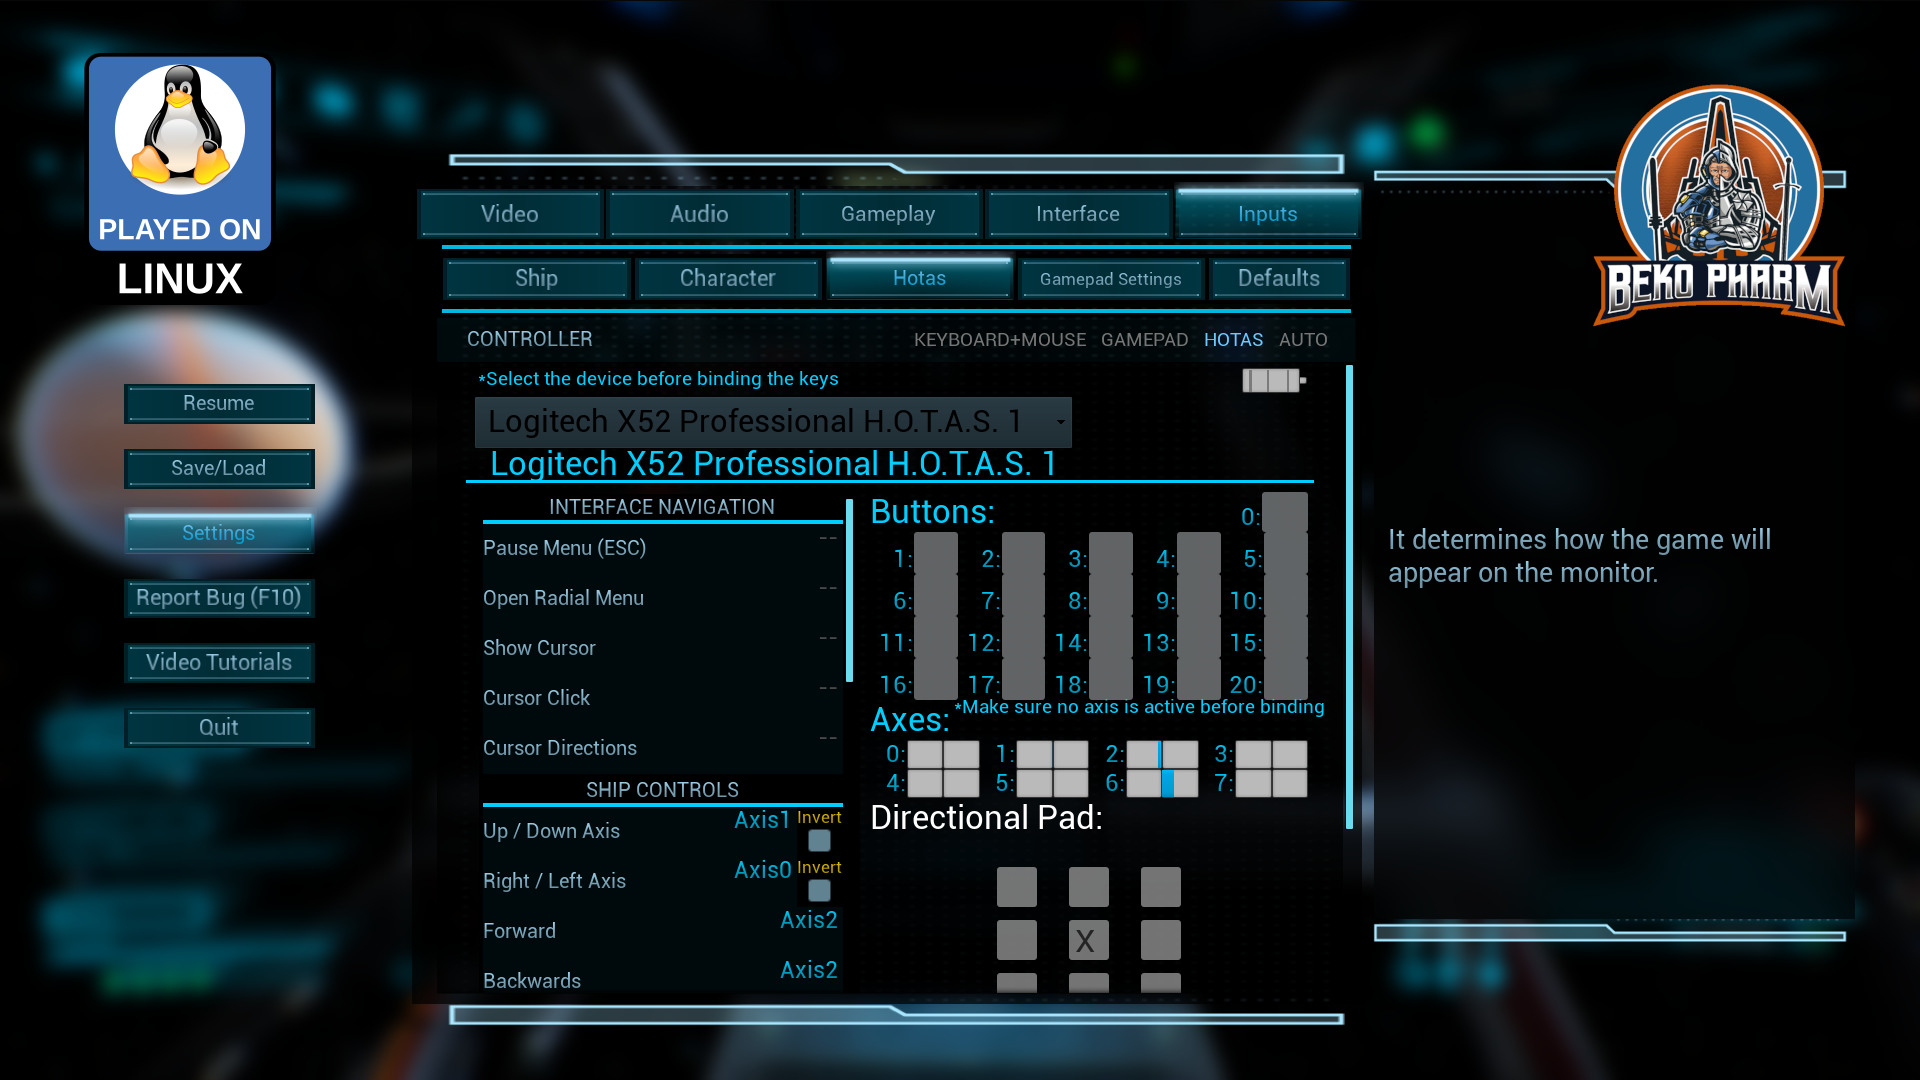
So this was recommended to me by Patola and while I usually do not buy into an early access game I made an exception. I’ve only seen one hour of the game so far but this promises a lot of fun. It’s still very rough, that I can tell – and often inputs do not register or register double. Nonetheless I felt right at home and after a lot of fiddling with the inputs I was happy enough to give it a spin with my X52 Pro (that was indeed detected just fine after the initial tutorial).

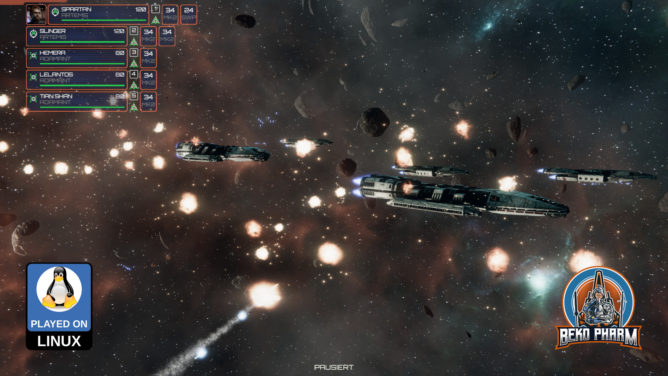
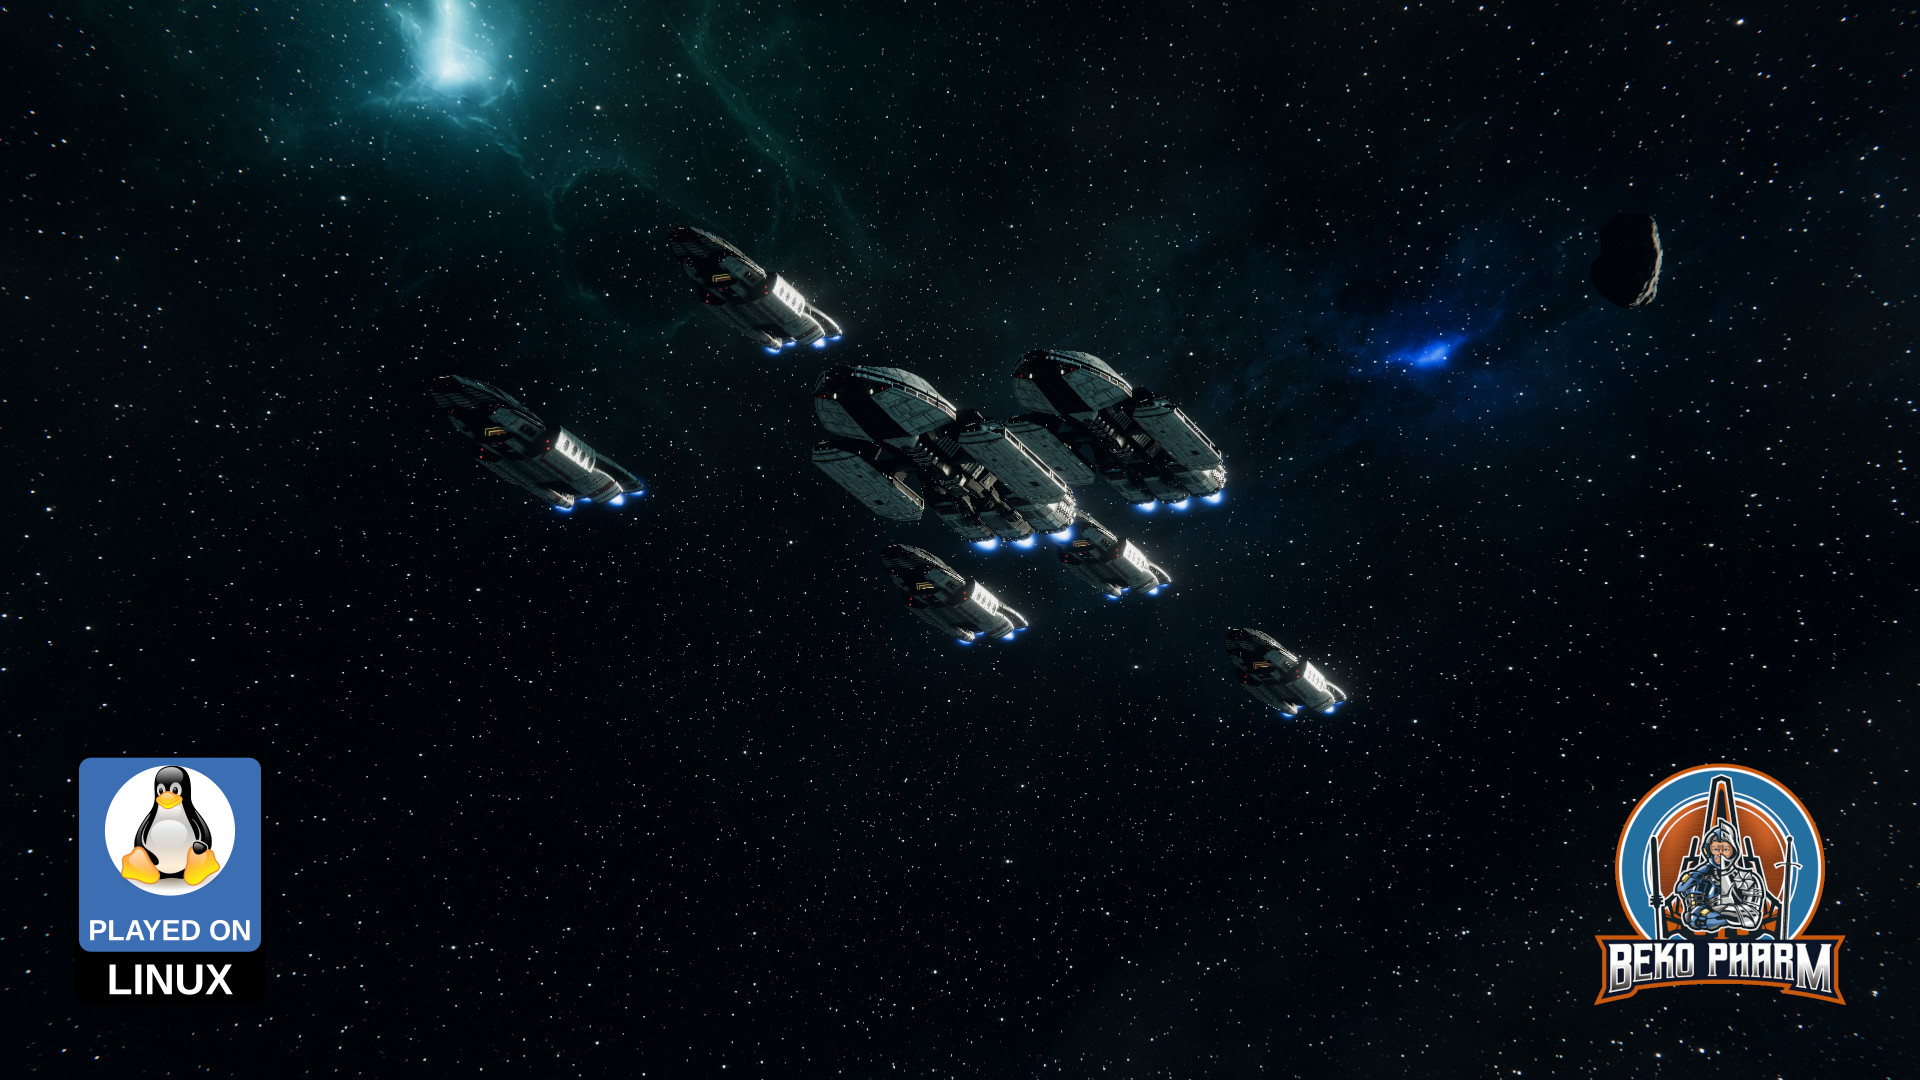
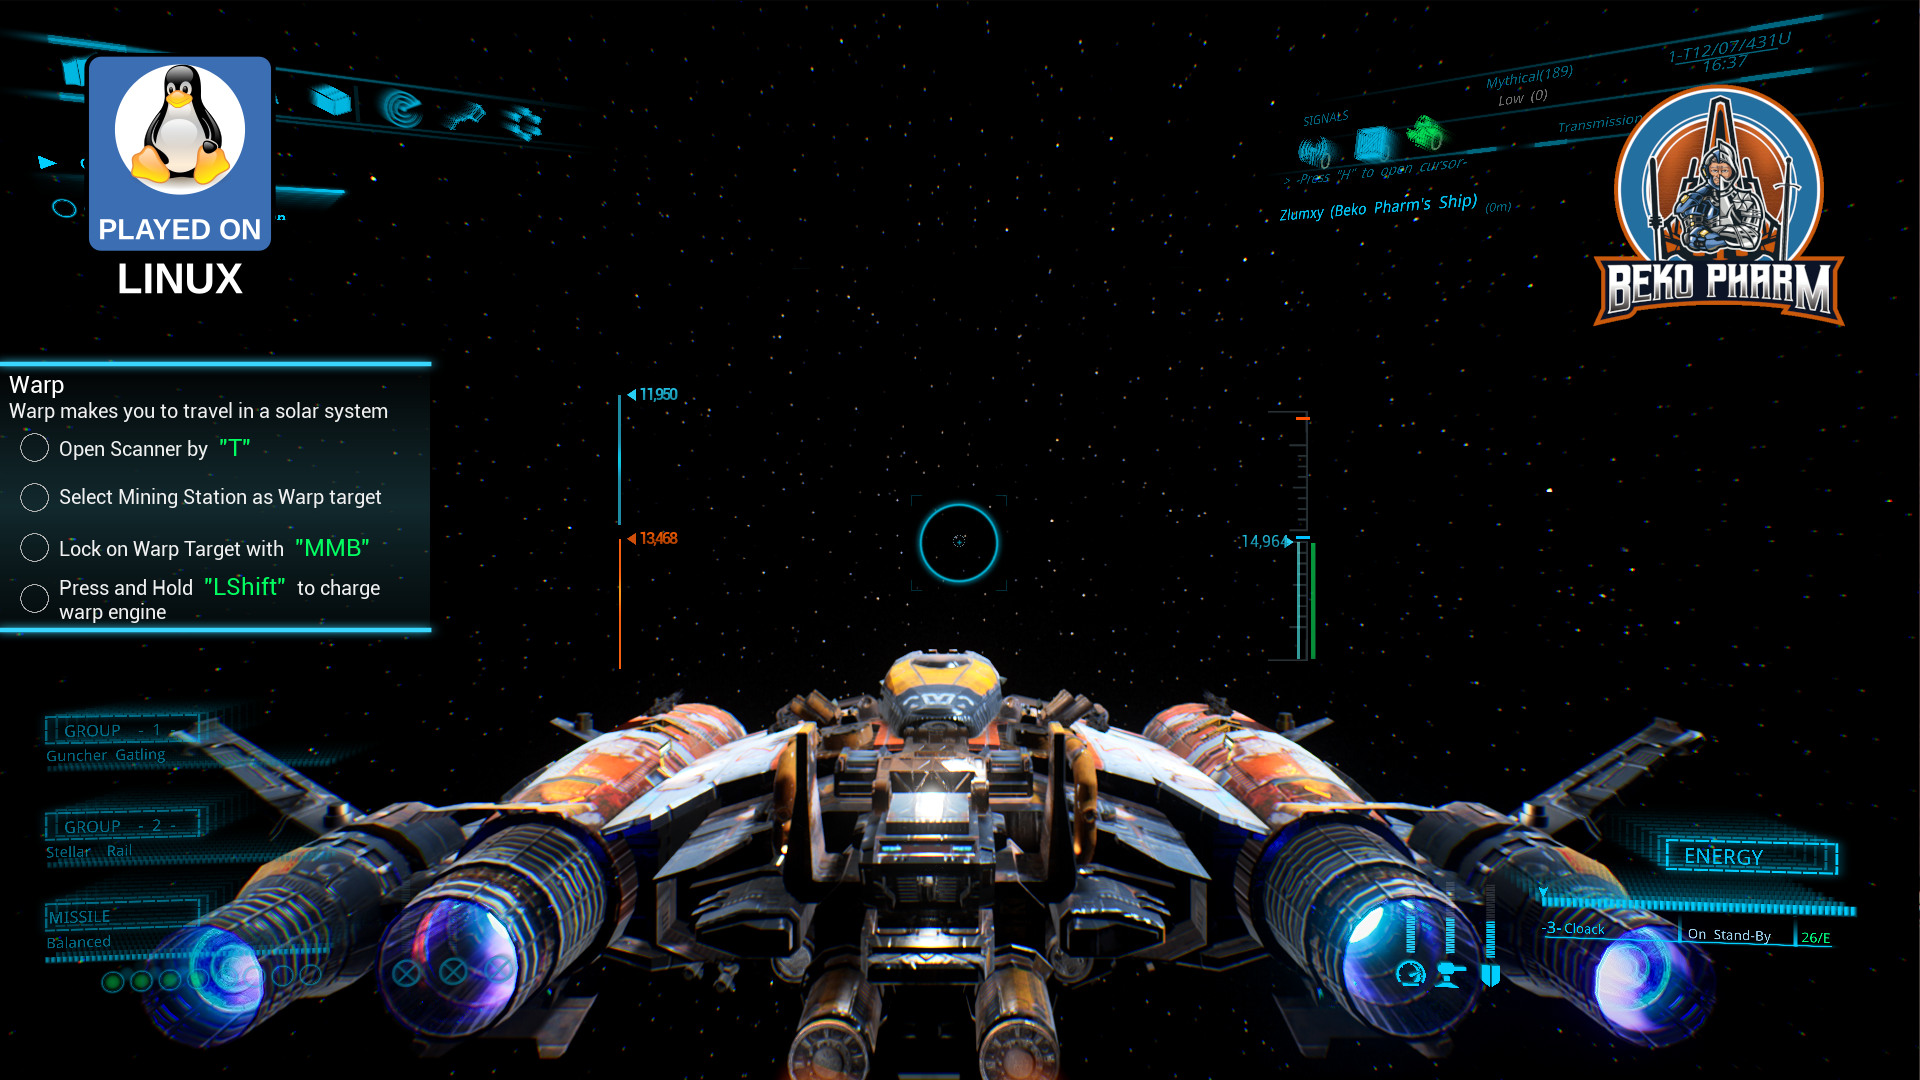
So after learning the basic ship navigation and shooting up some drones during the first quest I got ordered to investigate some asteroids.

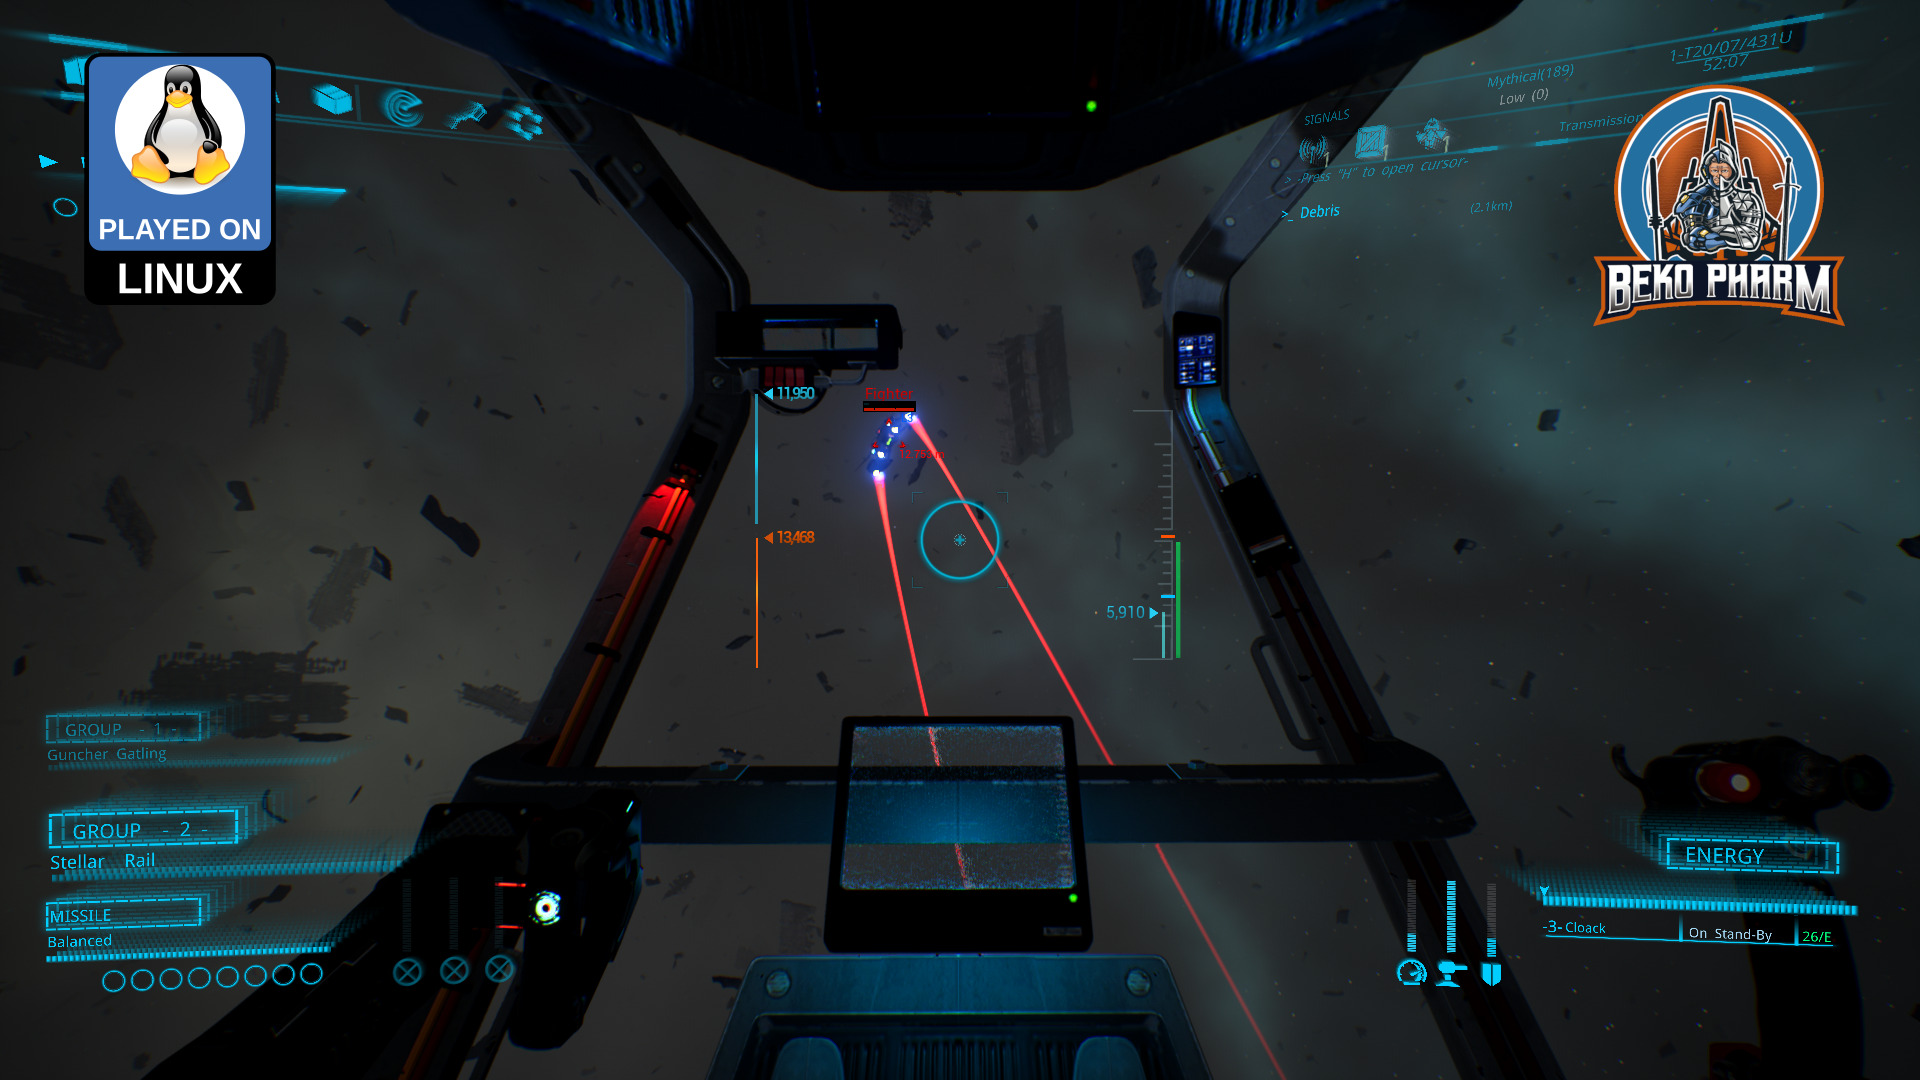
There were of course some pirates hanging around and the shoot-out did take more time than I’d like to admit. For some reasons I could not for my life get any target lock so all the shooting had to be done with the good old Mk 1 eyeball without having an idea about reach (or even arcs?) of the weapons. Probably a bug. Or user error. The jury is still out on that.

Next was a surprise. After parking the ship in stealth I was ordered to exit and do a little space walk to clear a hidden platform of hostiles. Space diving was not on the things I expected 🤯

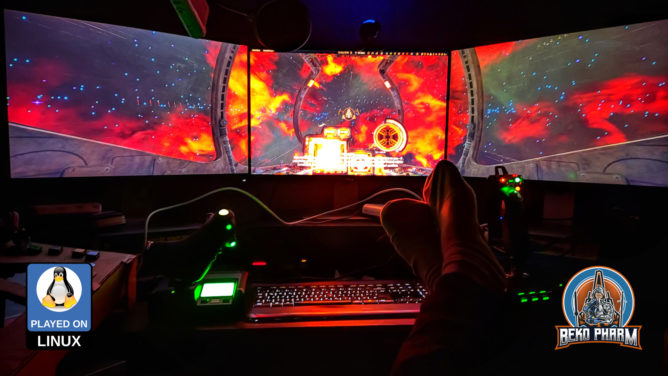
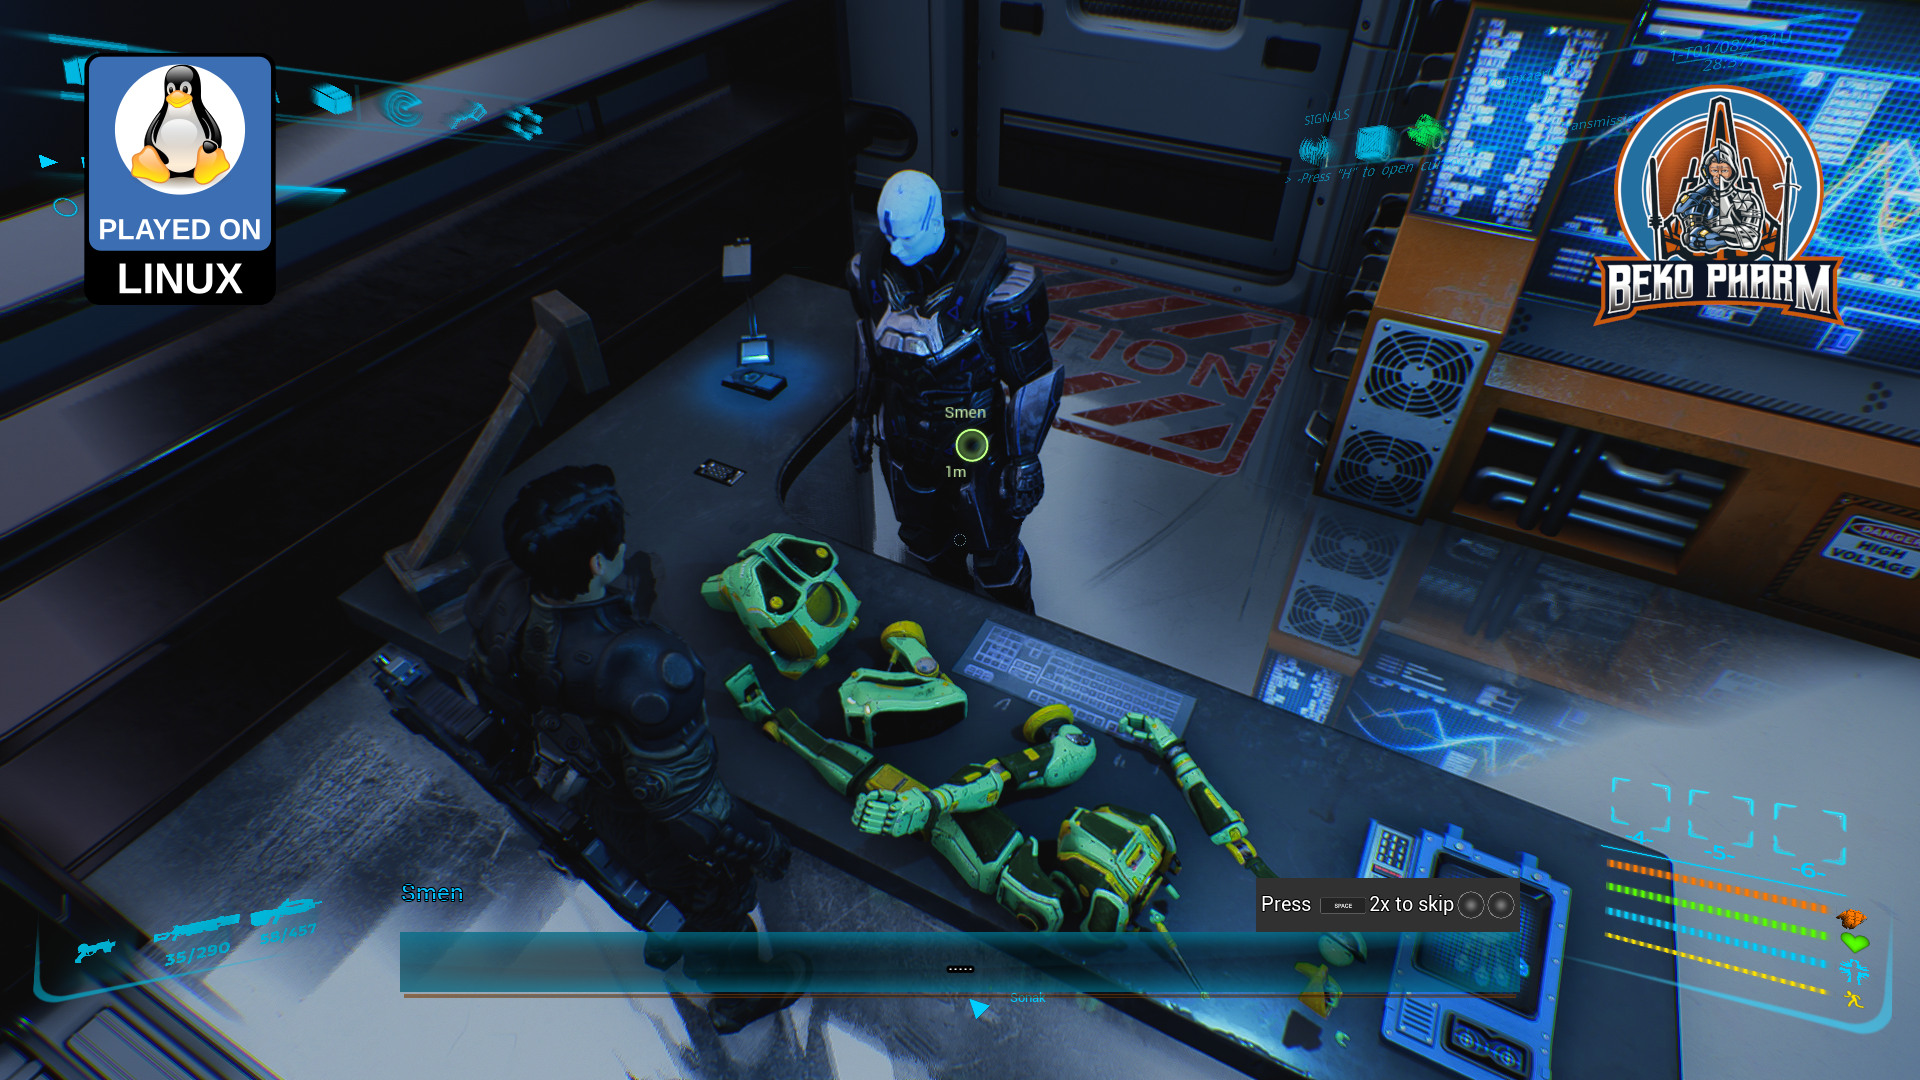
Anyway, after some more shooting, and some more explosions, I was back with the contractor and the reward was for reasons yet unknown a freakin robot head. That kicks off a quest to reassemble that poor thing. For some reasons this unfolded into an epic space battle where two different fractions slugged it out in the middle of an old battlefield with me, the contractor helping with the parts and the robot head in the middle – also somehow attacked by scavengers as a 4th faction. What a chaos!

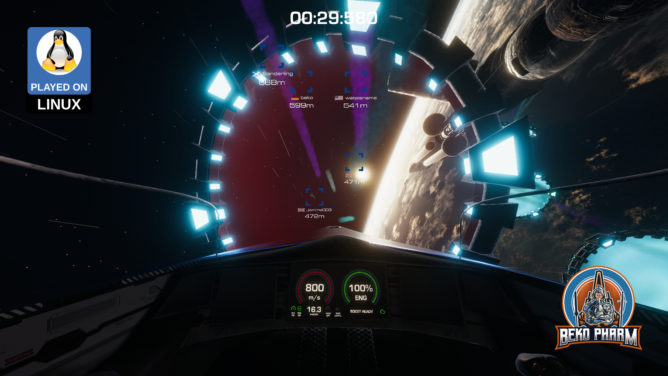
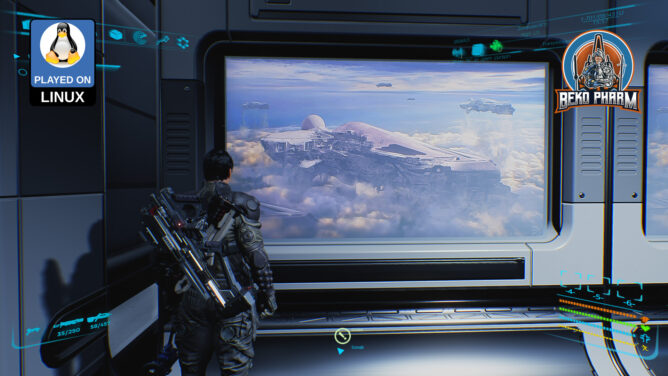
After surviving this I got recommended to someone else to get the robot assembled again. The person that would be able to do this resides on a station in another system though, which means travelling through a… stargate. Awesome! After filing a flight plan and requesting passage I had to line up my entry and found myself in another system – surrounded by illuminated advertisement of all things, of course.

An in-system jump later I docked at a station and found the contact that would help me with the robot. For a price, of course.

This was where I decided to stop for today. So much stuff happened during the first 60 minutes of this and judging by the in-game menus there is a lot more to come. There are skill trees, load-outs, factions and many systems to explore. Yes, it’s not as beautiful as StarCitizens but it’s perfectly playable already and I’m getting Wing Commander vibes from that and this feels rather good.

I didn’t use my Steam Link for some time and was kinda surprised by the new UI in Big Picture Mode. And also very unhappy because it was a stutter feast with buffer artefacts all over the place. Once I could get a game running it was butter though so something was up with the streaming mode of the UI. I’ve no really an idea what’s going on there but this was always a problematic thing with my AMD GPU under Gnome using Wayland when it comes to streaming and remote play. I ticked off the basics and disabled the blocklist for unknown GPUs, made sure that AMD hardware acceleration was enabled for the host in the Big Picture setting and even tried to launch it with the old big picture mode but no dice:

steam pipewire -pipewire-dmabuf -oldbigpicture

After reading around a lot on the bugtracker at https://github.com/ValveSoftware I eventually learned that the hardware acceleration for remote play is usually done with VAAPI and that there is debug information in ~/.local/share/Steam/logs/streaming_log.txt and sure enough here it was:

ffmpeg verbose: libva: VA-API version 1.16.0
ffmpeg verbose: libva: User environment variable requested driver 'radeonsi'
ffmpeg verbose: libva: Trying to open /usr/lib/dri/radeonsi_drv_video.so
ffmpeg verbose: libva: Found init function __vaDriverInit_1_16
ffmpeg verbose: libva: va_openDriver() returns 0
ffmpeg verbose: Initialised VAAPI connection: version 1.16
ffmpeg verbose: VAAPI driver: Mesa Gallium driver 22.3.5 for AMD Radeon RX 6700 XT (navi22, LLVM 15.0.7, DRM 3.49, 6.1.11-200.fc37.x86_64).
ffmpeg verbose: Driver not found in known nonstandard list, using standard behaviour.
ffmpeg verbose: Input surface format is nv12.
ffmpeg verbose: Compatible profile VAProfileH264Main (6) is not supported by driver.
ffmpeg error: No usable encoding profile found.

So the profile was missing and a check with vainfo confirmed this:

vainfo --device /dev/dri/renderD128 --display drm
Trying display: drm
libva info: VA-API version 1.16.0
libva info: Trying to open /usr/lib64/dri/radeonsi_drv_video.so
libva info: Found init function __vaDriverInit_1_16
libva info: va_openDriver() returns 0
vainfo: VA-API version: 1.16 (libva 2.16.0)
vainfo: Driver version: Mesa Gallium driver 22.3.5 for AMD Radeon RX 6700 XT (navi22, LLVM 15.0.7, DRM 3.49, 6.1.11-200.fc37.x86_64)
vainfo: Supported profile and entrypoints
      VAProfileMPEG2Simple            :	VAEntrypointVLD
      VAProfileMPEG2Main              :	VAEntrypointVLD
      VAProfileJPEGBaseline           :	VAEntrypointVLD
      VAProfileVP9Profile0            :	VAEntrypointVLD
      VAProfileVP9Profile2            :	VAEntrypointVLD
      VAProfileAV1Profile0            :	VAEntrypointVLD
      VAProfileNone                   :	VAEntrypointVideoProc

This was the moment when my brain did pull off one of it’s tricks and remembered me about the story about Fedora _disabling_ hardware acceleration for H264 due to proprietary concerns some months ago and yes I did recently upgrade to Fedora 37 🤯

Thankfully the community stepped in already and fixed mesa drivers are only one dnf install away on rpmfusion, so there is no need to recompile this with h264 support (and some others) manually. There is a caveat though because the swap command would happily delete the needed 32bit versions for Steam and only install the 64bit version of the swapped package. Keeping this in mind the required commands are basically this (and if this breaks your system I do not want to hear about it – use your brain!):

dnf install https://download1.rpmfusion.org/free/fedora/rpmfusion-free-release-$(rpm -E %fedora).noarch.rpm
dnf update
dnf swap mesa-va-drivers mesa-va-drivers-freeworld
dnf install mesa-va-drivers-freeworld.i686

And sure enough vainfo now has a way more complete list – including the previous missing VAProfileH264Main profile:

libva info: VA-API version 1.16.0
libva info: Trying to open /usr/lib64/dri/radeonsi_drv_video.so
libva info: Found init function __vaDriverInit_1_16
libva info: va_openDriver() returns 0
vainfo: VA-API version: 1.16 (libva 2.16.0)
vainfo: Driver version: Mesa Gallium driver 22.3.5 for AMD Radeon RX 6700 XT (navi22, LLVM 15.0.7, DRM 3.49, 6.1.11-200.fc37.x86_64)
vainfo: Supported profile and entrypoints
      VAProfileMPEG2Simple            :	VAEntrypointVLD
      VAProfileMPEG2Main              :	VAEntrypointVLD
      VAProfileVC1Simple              :	VAEntrypointVLD
      VAProfileVC1Main                :	VAEntrypointVLD
      VAProfileVC1Advanced            :	VAEntrypointVLD
      VAProfileH264ConstrainedBaseline:	VAEntrypointVLD
      VAProfileH264ConstrainedBaseline:	VAEntrypointEncSlice
      VAProfileH264Main               :	VAEntrypointVLD
      VAProfileH264Main               :	VAEntrypointEncSlice
      VAProfileH264High               :	VAEntrypointVLD
      VAProfileH264High               :	VAEntrypointEncSlice
      VAProfileHEVCMain               :	VAEntrypointVLD
      VAProfileHEVCMain               :	VAEntrypointEncSlice
      VAProfileHEVCMain10             :	VAEntrypointVLD
      VAProfileHEVCMain10             :	VAEntrypointEncSlice
      VAProfileJPEGBaseline           :	VAEntrypointVLD
      VAProfileVP9Profile0            :	VAEntrypointVLD
      VAProfileVP9Profile2            :	VAEntrypointVLD
      VAProfileAV1Profile0            :	VAEntrypointVLD
      VAProfileNone                   :	VAEntrypointVideoProc

And sure enough the Steam Link started working again. Somewhat. Now I have issues that some games don’t get captured or loose focus eventually but that I’ll debug another day 😩

Video: Starting Steamworld Dig 2 and showing system overview

Linux Gaming in 2023 is easy. Remote Play… not so much.

I usually play on Linux PC. I switched to Proton because I was eager to see some upcoming changes, like support, on the public_beta branch. And while this works[1] I was once more flabbergasted how complicated it is to set my desired display resolution of 5760×1200. I’m using a multihead setup with several displays and as usual the game engine would not let me _simply_ set that. Even in windowed mode (I mean I get that this won’t work with fullscreen).

There are several ways to work around this, especially with Proton, but I was looking for the prefs file I know from Linux. I found it in the end in the file compatdata/1781750/pfx/user.reg (that’s like the Windows registry but as plain file read by Wine) where the values are stored as dword under [Software\\StarGoat\\FlyDangerous]. In hex.

"Screenmanager Resolution Height_h2627697771"=dword:000004b0
"Screenmanager Resolution Width_h182942802"=dword:00001680
"Screenmanager Resolution Use Native_h1405027254"=dword:00000000

So 0780 and 04b0 are in the end 5760 and 1200. And sure enough, on the next game start I get _my_ desired resolution:

Sadly when I change settings in the game this gets overwritten again – so keep a backup around and drop it in again. This may even be added to a script – let’s see how long until this gets on my nerves and I automate that.

For the interested: This is how the same thing looks on the native version in the file ~/.config/unity3d/StarGoat/FlyDangerous/prefs

<pref name="Screenmanager Resolution Height" type="int">1200</pref>
<pref name="Screenmanager Resolution Width" type="int">5760</pref>
<pref name="Screenmanager Resolution Use Native" type="int">0</pref>

Why games|engines in 2023 still seem to have ideas about screen layouts is frankly beyond me.

Update: really eases the pain here as well. See also https://SimPit.dev/games/fly-dangerous/ how to use that with Steam.

[1] Headtracker quick test recordings: https://www.youtube.com/watch?v=13L0GlQyf_Q / https://tube.tchncs.de/w/fTYSUc9fTBmnTLHp2fpW4n

Scribbles to run a X52Pro as two virtual gamepads via moltengamepad

Put this in ~/.config/moltengamepad/gendevices/x52-pro.cfg

[events="superset" vendor="06a3" product="0762" driver="hid-generic"]

# 06a3:0762
# Options file is license as WTFPL http://www.wtfpl.net/
 
name = "x52_pro_controller"
devname = "x52_"
exclusive = "false"
change_permissions = "false"
flatten = "false"
rumble = "false"
split=2
1.device_type = "gamepad"
2.device_type = "gamepad"
 
# btn_east = "cross", "The cross (X) button"
 
# Event mappings
 
# 1.key(288) = "cross", "Primary fire button"
1.btn_trigger = "left_trigger", "Gun Button Step 1"
# 1.key(302) = "right_trigger", "Gun Button Step 2"
1.btn_trigger_happy15 = "bbb", "Gun Button Step 2"
 
1.btn_thumb2 = "a", "A button"
1.btn_top = "b", "B button"
1.btn_top2 = "x", "C button"
1.btn_thumb = "y", "Safety fire button (Fire 2)"
1.btn_pinkie = "guide"
1.btn_base2 = "button_16"
 
1.abs_x = "left_x", "Left stick X axis"
1.abs_y = "left_y", "Left stick Y axis"
1.abs_rz = "right_x", "Right stick X axis (Z axis)"
1.abs_z = "right_y", "Right stick Y axis (Throttle axis)"
1.abs_hat0x = "leftright", "HAT POV up"
1.abs_hat0y = "updown", "HAT POV right"
1.btn_trigger_happy4 = "right_thumb", "POV2 up"
1.btn_trigger_happy5 = "right_shoulder", "POV2 right"
1.btn_trigger_happy6 = "left_thumb", "POV2 down"
1.btn_trigger_happy7 = "left_shoulder", "POV2 left"
 
2.btn_trigger_happy3 = "left_trigger", "Scrollwheel click"
2.btn_dead = "right_trigger", "Mouse button (click)"
# 2.btn_trigger_happy15 = "x", "I button"
 
2.btn_base = "a", "D button"
# 2.btn_base2 = "b", "E button"
 
2.key(719) = "left_shoulder", "Function button"
2.key(722) = "left_thumb", "Function page up"
2.key(723) = "left_thumb", "Function page down"
2.key(726) = "right_shoulder", "MFD select button"
2.key(724) = "right_thumb", "MFD select button up"
2.key(725) = "right_thumb", "MFD select button down"
 
2.abs(004) = "left_x", "Left stick X axis"
2.abs(003) = "left_y", "Left stick Y axis"
2.abs(040) = "right_x", "Mouse X"
2.abs(041) = "right_y", "Mouse Y"
2.btn_trigger_happy8 = "up", "Throttle POV up"
2.btn_trigger_happy9 = "right", "Throttle POV right"
2.btn_trigger_happy10 = "down", "Throttle POV down"
2.btn_trigger_happy11 = "left", "Throttle POV left"
2.btn_trigger_happy17 = "start_stop", "Start/Stop"
2.btn_trigger_happy18 = "back", "Reset"
 
# Aliases
 
# 1.btn_trigger = "primary"
alias primary a
alias secondary b
alias third x
alias fourth y
 
alias start start_stop
alias select back
alias mode guide
 
alias thumbl left_thumb
alias thumbr right_thumb
 
# right shoulder
alias tr right_shoulder
# right trigger
alias tr2 right_trigger
# left shoulder
alias tl left_shoulder
# left trigger
alias tl2 left_trigger
 

Run this with moltengamepad --num-gamepads 2 --mimic-xpad and press button on the joystick _first_ and on the throttle _second_ so they get assigned in the correct order.

This should result in two gamepads _and_ the X52Pro so even really braindead games that do only support gamepadS should be able to read this at least in any way.

AntiMicroX showing X52 Hotas mapped to two virtual gamepads

If the game does support only one gamepad consider binding joystick _buttons_ to keyboard presses (e.g. with AntiMicroX instead).

Deliver Us The Moon by KeokeN InteractiveKeokeN Interactive (Deliver Us the Moon)
Deliver Us The Moon is a Sci-Fi thriller set in an apocalyptic near future where Earth's natural resources are depleted. In an effort to solve the energy crisis, global powers created the World Space Agency and secured a promising new source of energy on the moon.

Played Deliver Us The Moon on Linux PC. What a ride. Took me 6h 21m to complete and I only left the keyboard twice briefly. The story had me hooked from the very beginning 🤓

Got it on GoG, installed it with Lutris and played it without a hitch or single crash [of the game *cough].

Can recommend. Thrilling, casual puzzles, some sneaking around and very thick atmosphere (without much oxygen at times).

Some weeks ago I started making a ship for based on NZ-43 (14C) and while I was happy with the basic result it helped me mostly to get an understanding how such ships were made.

I never cared much about ships before and had absolutely no idea about this topic at all. During my research to close that gap, which consisted mostly of reading into Flevobericht, 331 (ISBN 9036910862) and following the awesome actual model builds by @silverman834 at https://modelshipworld.com/topic/25300-a-small-cog-by-silverman834-scale-120-c-1410-finished/ did I decide to reapply the lessons learned and go for the famous so called “Bremen Cog” ship.

This is a very specific ship type that was widely used from the 12th century on for trade via the sea. It was between 15 to 25 meters long, had one square sail and was crewed by approximate 12 people that worked in shifts. Unlike other sailing ships it was very reliant on wind direction but it’s flat bottom permitted it to be beached without taking damage so it could be unloaded everywhere e.g. during low tide. The aftercastle on it’s stern deck makes for a very distinct impression and can be recognized from many period depictions of ships. Several full sized replica have been built to this date.

The “Bremen Cog” is the best preserved example of this ship type. It’s wreck from ~1380 was discovered in the Weser in 1962. It took almost 40 years until it could be presented to the public. It’s my understanding that the conservation techniques applied had to be developed first. It’s on display in the German Maritime Museum and the cog apparently played a huge role in the founding of the museum itself: https://www.dsm.museum/en/exhibition/exhibitions/bremen-cog

The museum is located in 27568 Bremerhaven / Germany (and closed during the wintertime). No idea when I’ll get the chance to visit this but the museum does also foster a YouTube channel and one of the most recent videos up on their channel is a drone flight around and through the Bremen Cog made by Dennis Vogt so make sure to check this out: https://www.youtube.com/watch?v=KjYigiyF014

So why did I take this effort on me to recreate this famous ship type once more in a game? Curiosity and hyper focus I guess. I can tell you it was cumbersome because the game does not support bend objects so everything is basically a block. It does also not feature tools for e.g. Bézier curves or something. I spent quite some hours trying to get the hull and proportions right and while the superstructures are kinda opinionated I’m really happy with the end result. I also saved a lot on the ropes and while I know in theory how this should work and look it’s just _too much work_ to get this right in the game. So I only went with the most important running ropes. I hope any navigators reading this can forgive me 😉

The final result of the Bremen Cog under sails

I also prepared a variant without a sail and maybe I’ll even create a version with a reefed sail and with another version of the bow someday. I don’t know yet for I feel very exhausted from this little side project for now.

The final result of the Bremen Cog without sails

It’s also very sparse on final details because I can imagine that the blueprints for this ship will see a lot of reuse on various servers of the game so it should be really easy to individualise each placement with different colours or textures or cargo.

Speaking of: The blueprints for Rising World (Unity) can be downloaded from here:

You’re free to share and adapt this work as indicated by the CC-BY-SA 4.0 license. Please do inform me if you make use of this simply because that would make me very happy. It’s not required though.

Working on a loosely based on NZ-43 (14C). It’s approximately 12m long 🙂

First time I’m trying my luck with a vessel and not a building. The curving is difficult to realise in tho.

It started life in the old Java version of the game because the new Unity version has no posters yet. I had to segment the plan of the cog (carved in a very bad resolution from a PDF) into several in-game posters that had to be aligned in-game again to get the proper measurements.

After that I moved the blueprint of the frame over to the new version and started putting planks on it. A cumbersome process during which I learned a lot. I’ll probably make another and more improved hull based on the gathered know how.

I also fell straight into another “not yet implemented” trap. RisingWorld has a flip command to mirror an object and I kinda assumed this would work with blueprints too. It does not. And I was really not looking forward to put plank on both sides of the frame.

Luckily most of the leg work to read the binary blueprints was done by @paulevs before who released https://github.com/paulevsGitch/BlueLib under the MIT license. It has been a while that I touched Java but I could come up with some code of my own that would flip the planks only (I used rounded cubes for the planks exclusively) making use of this lib and the very first try at it looked promising already.

Here is the source I came up with in case you wonder:

package blueprint.flip.maybe;

import java.io.File;
import java.io.IOException;
import java.util.ArrayList;

import paulevs.bluelib.blueprint.Blueprint;
import paulevs.bluelib.blueprint.BlueprintIO;
import paulevs.bluelib.blueprint.element.BlueprintElement;
import paulevs.bluelib.blueprint.element.BlueprintElementType;

public class App {
    public static BlueprintElement cloneBlueprintElement(BlueprintElement el) {
        BlueprintElement element = new BlueprintElement(el.type);
        element.setPosition(el.posX, el.posY, el.posZ);
        element.setSize(el.sizeX, el.sizeY, el.sizeZ);
        element.rgba = el.rgba;
        element.setRotation(el.rotX, el.rotY, el.rotZ, el.rotW);
        element.setSurfaceOffset(el.surfaceOffsetX, el.surfaceOffsetY, el.surfaceOffsetZ);
        element.texture = el.texture;
        return element;
    }

    public static Blueprint readBlueprint(String pathname) {
        File file = new File(pathname);
        Blueprint blueprint = null;
        try {
            blueprint = BlueprintIO.read(file);
        }
        catch (IOException exception) {
            exception.printStackTrace();
        }

        return blueprint;
    }

    public static void main(String[] args) {
        final Blueprint blueprint = App.readBlueprint("/path/to/Blueprint-flip-maybe/cog_base_split_1670726695.blueprint");
        System.out.println("Opened " + blueprint.name);
        System.out.println("Blueprint has " + blueprint.elements.size() + " elements");

        ArrayList<BlueprintElement> elements = new ArrayList<BlueprintElement>();

        blueprint.elements.forEach(element -> {
            if(element.type == BlueprintElementType.ROUNDED_BLOCK) {
                System.out.println("T: " + BlueprintElementType.getElementName(element.type));
                System.out.println("pX: " + element.posX + "pY: " + element.posY + "pZ: " + element.posZ + " rX: " + element.rotX + "rY: " + element.rotY + "rZ: " + element.rotZ);
                BlueprintElement el = App.cloneBlueprintElement(element);
                el.posX = el.posX * -1;
                el.rotY = el.rotY * -1;
                el.rotZ = el.rotZ * -1;
                System.out.println("pX: " + el.posX + "pY: " + el.posY + "pZ: " + el.posZ + " rX: " + el.rotX + "rY: " + el.rotY + "rZ: " + el.rotZ);
                elements.add(el);
            }
        });

        elements.forEach(element -> {
            blueprint.elements.add(element);
        });

        blueprint.name += "_flipped_X";

        File outputFile = new File("/path/to/Blueprint-flip-maybe/" + blueprint.name + ".blueprint");
        try {
            BlueprintIO.write(blueprint, outputFile);
        }
        catch (IOException exception) {
            exception.printStackTrace();
        }
    }
}

I’m kinda happy with the result. This Lib also allows me to change the texture of the elements so I don’t have to worry how the used texture during the construction may look in the end.

Now onwards to improve the curves. I really wish for a bend mode where the beginning would snap on to an existing object and the opposite plane could be moved around individually.

With (Unity) improving a lot lately we’re feature wise almost on par with the old Java version again. Due to my hobbies I’m playing on the server https://medievalrealms.co.uk/ where I usually construct buildings based on specific periods according to my understanding of timber-framed constructions. Which may not be the best to rely on but hey, it’s a game after all.

One of the features still missing is an ingame map. We do have the compass already though and with debug enabled we even get an exact position on the current map. And the new maps are huge! And since we’re building here in multiplayer it’s no wonder that this is a dire missed feature to get an idea where the others are and what they are building, because it’s not fun navigating with X,Y,Z alone to visit other players (and keep note of where the own spot is located).

So I was intrigued to see that the player @Bamse did what gamers tend to do when a feature is missing. They start some sort of helper app (or wiki or whatever). This resulted in a Cloud map project at https://qgiscloud.com/Bamse/MapMedievalRealms/ where players from the same server may add POIs and do the leg work of surveying the “new” world.

The only drawback (haha. sorry.) is: It’s a PITA to do the surveying because stopping every few meters to note down a bunch of coordinates takes hours! Someone had to do this though, because “my” isle – a piece of rock I randomly stumbled over after the latest server reset – was still missing! And while I clocked roughly ~700h on this game already I was not going to do that. I’m a programmer – which equals to lazy in my opinion. So I started scripting and after a few minutes came up with the following still crude solution:

echo "" > move.log
while true; do
	gnome-screenshot -w -f /tmp/snapshot.png && convert /tmp/snapshot.png -crop 165x30+905+975 /tmp/snapshot-cropped.tiff && tesseract /tmp/snapshot-cropped.tiff - -l eng --psm 13 quiet | awk 'match($0, /([[:digit:]]+[.][[:digit:]])+.([[:digit:]]+[.][[:digit:]]+).([[:digit:]]+[.][[:digit:]]+)/) { print substr($0, RSTART, RLENGTH)}' | awk '{ printf "%0.0f,%0.0f,%0.0f\n", $1, $2, $3}' >> move.log 
	sleep 2
done

This surely can be improved a lot but… minimum viable product. We’re still talking about a game. Here is what it does:

* Take a screenshot of the active window (Rising World while playing)

* Save it to /tmp (that’s in my RAM disk)

* Crop out the coordinates and convert it to tiff using `imagemagick`

* Run `tesseract` for OCR detection

* Pipe the result to awk and use a RegEx to identify three numbers

* Reformat the 3 numbers (remove the precision) and dump it in as csv-like log

* Sleep for 2 seconds and repeat until terminated

And in case you wonder why I used gnome-screenshot: I’m on and the usual suspects written for X do simply not work. I did recompile gnome-screenshots tho to disable the annoying flashing though so it’s silent now.

Why the awk program? Well, tesseract is good but the raw data looked something like this in the end and the RegEx cleans that up somewhat:

serene ep)
9295.2 95.4 2828.0 |
9295.2 95.4 2828.0 |
9296.4 95.4 2828.5 |
nn
9303.1 95.4 2838.5 |
9295.0 98.4 2857.65
9289.1 98.7 2868.1 (7
9296.5 96.7 2849.0 |»
9301.1 95.4 2835.5 |
9301.1 95.4 2835.5 |
nn

So I put this to a test and jogged around “my” isle and here are the results:

One(!) data point was misread during the ~15 minutes run. Not too shabby! That could easily be fixed manually and who knows… mebbe I’ll improve on the script to check for implausible spikes like that at some point.

I demoed the script to other players on the same server and some already started investigating into solutions to adapt this script to Windows. Just don’t ask me how to do that – I really wouldn’t know 😛

Updated 10th Dec 2022: A solution to do the same on Windows PC appeared on https://wiki.calarasi.net/en/public/medievalrealms/ocr-coordinates

Bagged on GoG today and had a blast. Needed some fiddling to get my X52 Pro up and running since the game only supports _one_ Gamepad but that’s nothing that would stop my 😂

Video: Flight tutorial snippets from Rebel Galaxy Outlaw played on Linux PC

Update: I found _way later_ that there is a switch in the launcher to enable joystick support (which brings up my X52 just fiine). What a strange design decision.