The last update has been a while. I focused my attention to the MFDs (Multi-function display). This part didn’t get much attention yet and I was caught between the difficult choice to learn yet another fancy framework, like Raylib, that would do OpenGL ES 2.0 without X11 on the Raspberry – or just throw the might of my CoffeeLake at it and go with ReactJS since most of the data was already available via NodeRED anyway. Also… ARWES is just so cool 🤩

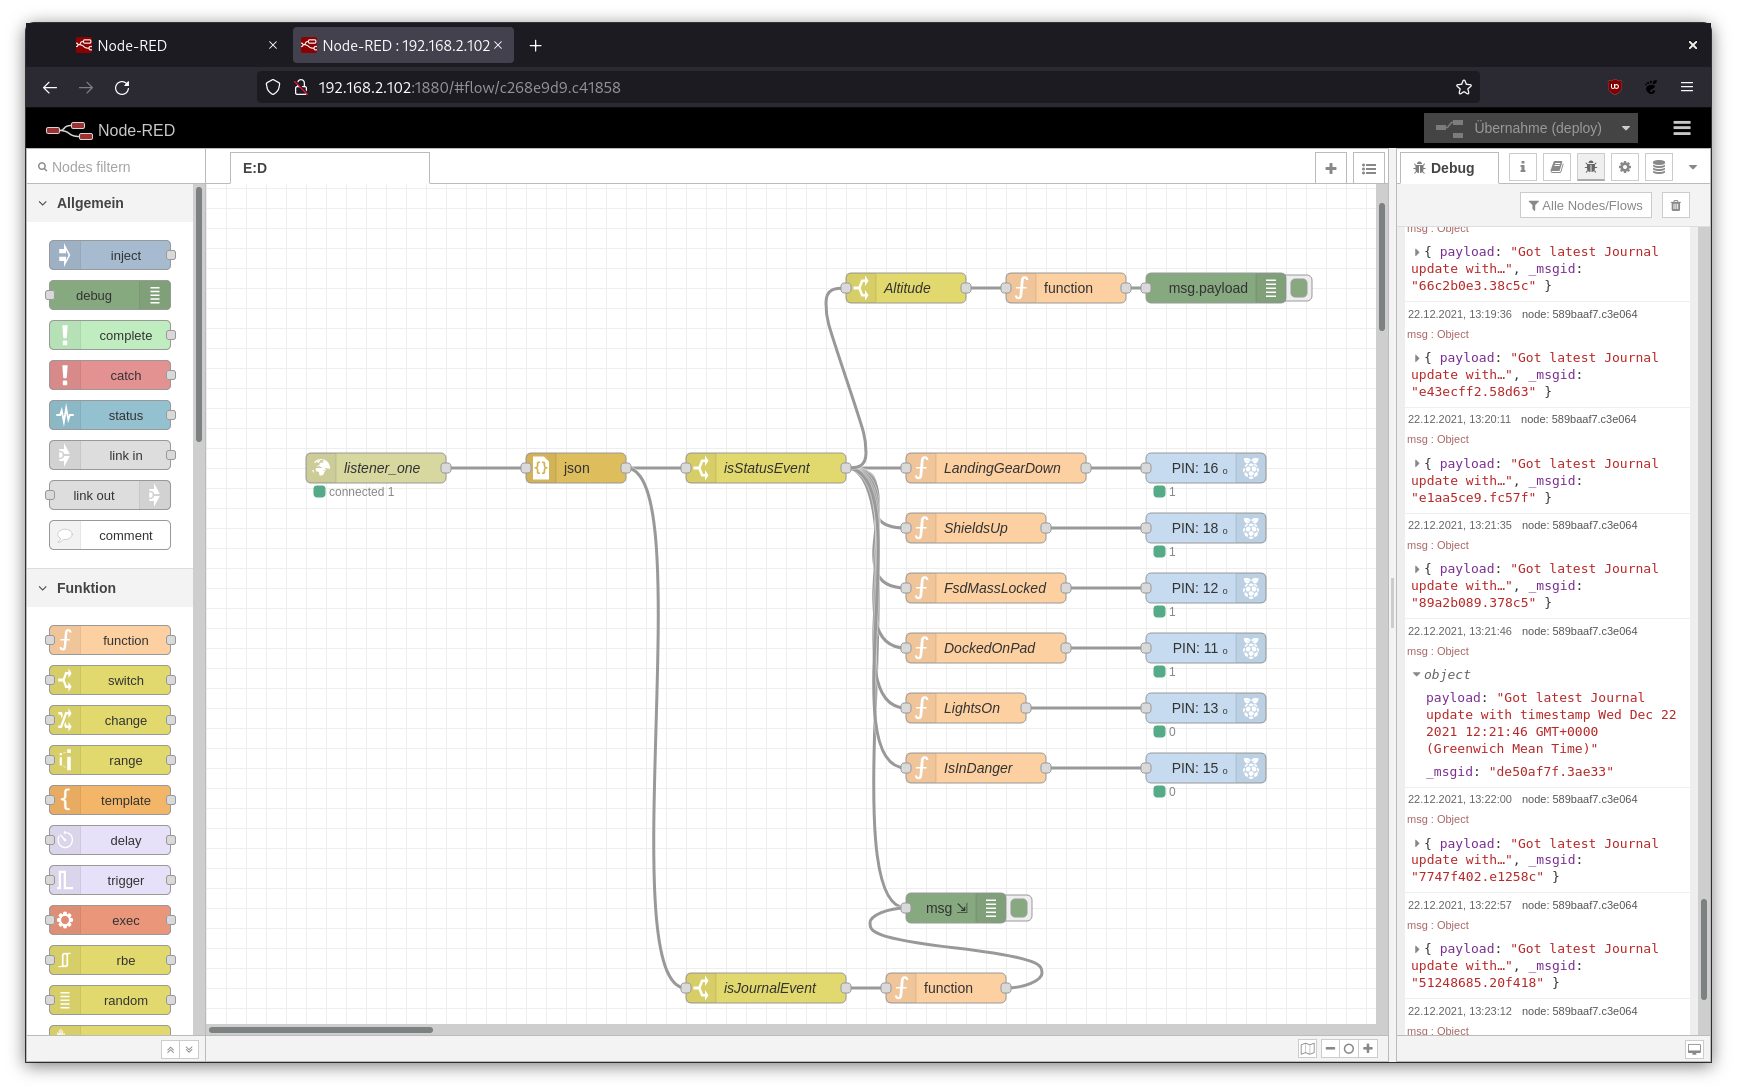
I went with ReactJS and ARWES again, simply because I have some experience in this by know thanks to my Streaming Overlay I wrote with it. Hobbling it up to NodeRED was just a matter of installing SocketIO to transport the messages. It’s all a very hacky mess but it gets the job done.

Video demonstration of my simulated cockpit made from cardboard on a budget mainly used to play Elite Dangerous in early 2022. This is work in progress.

While seeking through the available data I noticed that I don’t get velocity values from Elite. That’s not so important in space but _kinda_ interesting for me in planetary flight to satisfy the flight sim gamer in me as well. I noticed tho that I do get timestamped latitude, longitude and altitude values so shouldn’t it be possible to “simply” calculate this, right? Right?

This was when I dived into the rabbit hole of calculating velocity and heading on planetary objects using a spherical coordinate system and while I didn’t nail it exactly how Elite does it the result is close enough. The game provides the required data to go crazy here – most important the radius of the current object. In _theory_ I could start writing some primitive AFS (Auto Flight System) routines now, which I’m totally going to explore at some point in the future just because 🤓

Checking my maths – yes, altitude is added to the mix so velocity is mostly correct as long as no rapid course changes are made

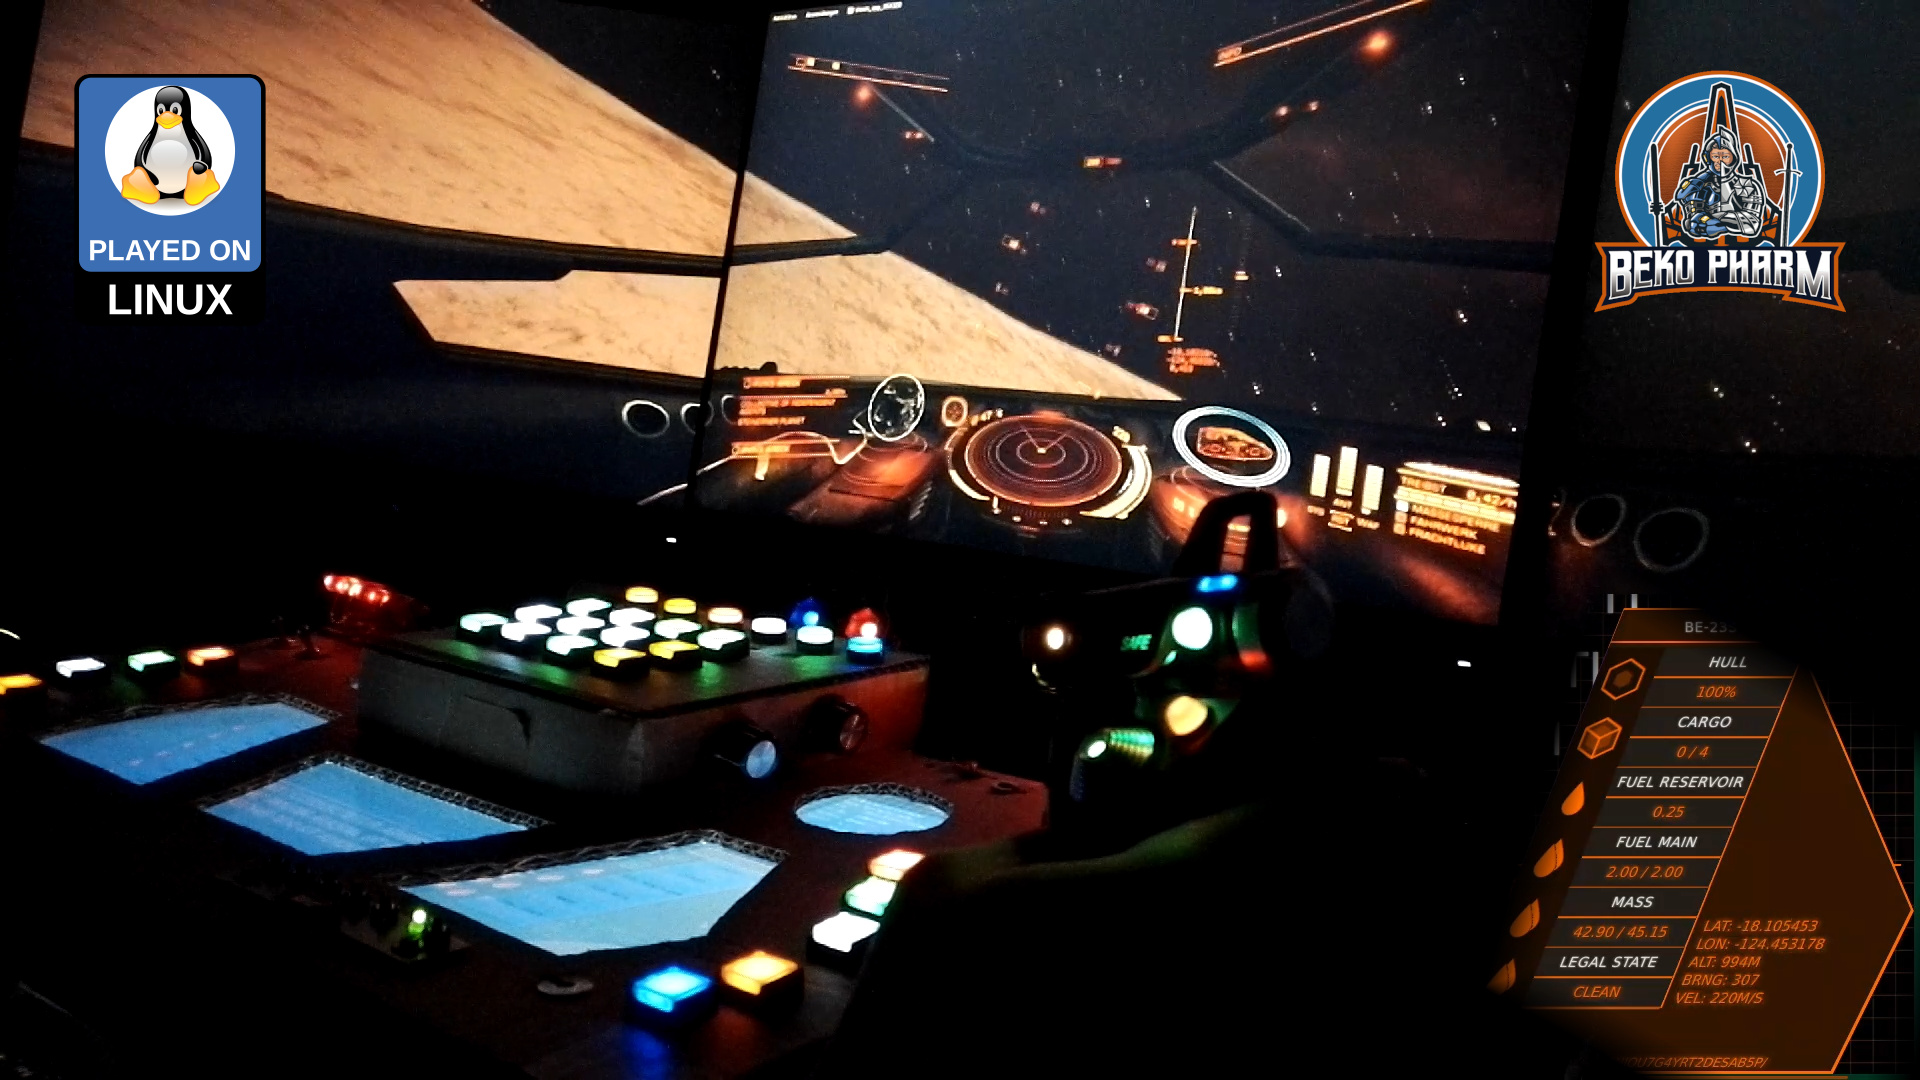
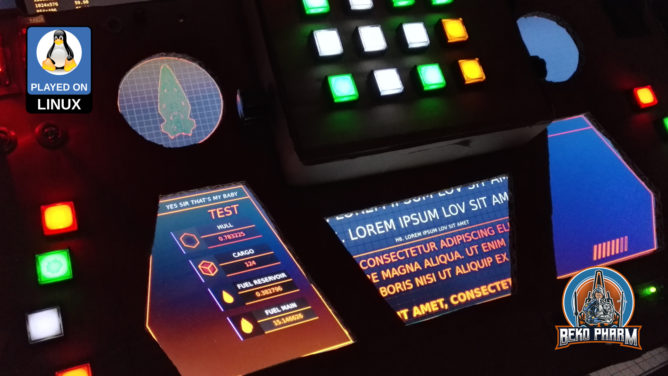
After spending way too much time with this and the Pythagorean theorem (Yes mum, a game made me do maths. MATHS! 🤯) I settled with some calculations and data for my current ship to the right and targeted ship data on the left. This is sort of tricky because many game events update different parts of the data so timestamps have to be kept in mind and a game specific parsing strategy is required. See the last part of the demonstration video to get an idea how this looks.

Improving situational awareness by putting the video feed of wingman / gunner on the central MFD.

Another point to tick off my list was getting the head tracking to work in Elite (again). Now this is very Linux PC specific so you may tune out on this paragraph. On Linux PC I’d usually compile Opentrack with the Wine Glue, patch in my appdata dir for Proton and hope that it’s still ABI compliant to Just work™. Alas recent Proton is sandboxed within pressure vessel and the usual approach of memory mapping is simply no longer working, if I got the gist of this right.

So my _current_ strategy is to download and drop the Windows build of Opentrack into the game folder and chain-load the EXE with the game where the Opentrack EXE would listen on UDP while my native Opentrack BIN would send via UDP. A task not made easy with Proton but it is possible. The following snippet may give you some pointers:

#!/bin/bash
export STEAM_COMPAT_DATA_PATH=/games/steam/steamapps/compatdata/359320
export STEAM_COMPAT_CLIENT_INSTALL_PATH="$HOME/.steam/steam"
python3 /games/steam/steamapps/common/Proton\ -\ Experimental/proton run opentrack.exe

Why running Opentrack twice? The native build performs a lot better with my webcam and every frame really count here. Reading data via UDP is not much of a burden for Proton. This also saves me the trouble of fiddling with Wine Glue, a painful compile process nobody should endure involving installation of many many additional 32bit libraries. Hilarious but it works.

This is the result of a live stream where I’m implementing my proof of concept of using a Neopixel string as status indicators for Elite Dangerous in my SimPit.

It was a mixed stream of GER/ENG (subtitles to follow) and consists of three parts: Reproducing the proof of concept, implementing the solution with a whopping amount of 17 LED indicators and finally a test run in the game at the end.

Jump to 36:00 for Neopixel action with Elite Dangerous: Odyssey

I made some progress on the status indicators and attached three Neopixels for testing. I’m controlling them via NodeRED where I’m faking the Status JSON file from Elite Dangerous so I can play with the flags a little bit.

Proof of concept demo video

I’m really happy with this, because with the same logic I can basically drive as many LED as I want as long as I provide enough power to have all LED going at the same time. This Proof of concept works just fine.

Some people asked me for details on how I used Node-RED to get some game status information of Elite Dangerous into my SimPit so here is a more cohesive write-up with a short demo video.

I was looking for a simple way to do this but all the programs I found online are closed source solutions that have to be bought and are – as usual – Windows only. Best it would get is Android support and requires a tablet with touch functions. Nothing of this I want! The idea is to use something system agnostic that can be adjusted easily, because I want to use this for different games and not depend on a single vendor, hoping support will last and the thing work with my setup.

This was when I remembered Node-RED from usage in home automation because this is basically the same. You get a zoo of hardware, that somehow all interacts with a dashboard. All the data is on the wire and can be accessed via a web-browser. Fun enough I wasn’t the first with this idea because when I started searching for “Node-RED for simpit usage” I stumbled over the YouTube channel of Jon Back (https://www.jonback.se/) who did exactly this before (and even also used cardboard for prototyping). Encouraging and big shout out for the pioneer work!

So after installing Node-RED on my Linux PC and on my Raspberry Pi I connected the two installations via Websockets. That’s basically just entering an IP. While using MQTT is probably a better solution this was the easiest one because it doesn’t need an additional service.

Why I installed it twice? Well Elite drops a lot of the current game status in various JSON files, like a timestamped Journal and a Status file that holds most of the ship data I’m interested in most. The file is updated on changes and it’s easy to watch for such a change on a local filesystem. I also intend to make the receiving side as dumb as possible so I don’t have to update the code too often. I’m still uncertain what I’ll use in the end – an Arduino is also in consideration. This way I can hopefully connect other games easily as well by keeping the resulting data structure more universal and let the sender to the hard work of hammering the data into shape.

Short explanation what’s going on: File Changes listens for changes in my ED folder where the JSON files are located. Switches check for the file name forward it to a file opener. This one reads the file (Journal line by line) and passes the data to a JSON parser. This one forwards the parsed JSON data to a function that creates the desired data structures. Finally it is send to the receiver.

Most of the magic for Elite Dangerous happens in the function that parses the Status.json file, which is explained in detail at https://elite-journal.readthedocs.io/en/latest/Status%20File

flags = msg.payload.Flags;
// https://elite-journal.readthedocs.io/en/latest/Status%20File/
[
    "DockedOnPad", 
    "LandedOnSurface", 
    "LandingGearDown",
    "ShieldsUp",
    "Supercruise",
    "FlightAssistOff",
    "HardpointsDeployed",
    "InWing",
    "LightsOn",
    "CargoScoopDeployed",
    "SilentRunning",
    "ScoopingFuel",
    "SrvHandbrake",
    "SrvusingTurretview",
    "SrvTurretRetracted",
    "SrvDriveAssist",
    "FsdMassLocked",
    "FsdCharging",
    "FsdCooldown",
    "LowFuel",
    "OverHeating",
    "HasLatLong",
    "IsInDanger",
    "BeingInterdicted",
    "InMainShip",
    "InFighter",
    "InSRV",
    "HudinAnalysismode",
    "NightVision",
    "AltitudefromAverageradius",
    "fsdJump",
    "srvHighBeam",
].forEach((value, key) => {
   msg.payload[value] = flags & 1;
   flags = flags >> 1;
});
return msg;

The receiving Node-RED process on the Raspberry Pi does something similar.

The received data is once more parsed as JSON and checked based on the event string what type of message it got. If a status event is found it’s forwarded as 0 or 1 to a GPIO where a LED will be enabled or disabled. See the short demo video of the Primary Buffer Panel in action:

Short demo of Node-RED in action with Elite Dangerous (on Linux PC)

This is a proof of concept so far so it uses only a tiny bit of the available information to drive some LED I have on my custom GPIO breakout board. I ordered an WS2811 LED strip that should arrive next week. This type is basically a long string of RGB LED that are individually addressable. This is done via one single data PIN that is forwarded from LED to LED so I don’t need many GPIOs and only have to keep an eye on the ampere. Basically endless status indicator (until one in the chain breaks for good but hey, it’s a toy and not a real spacecraft :P).

Will this work? No idea. The hardware is not yet here but I found various ways to drive a so called “neopixel” LED stripe so from my understanding it should just work 🙃