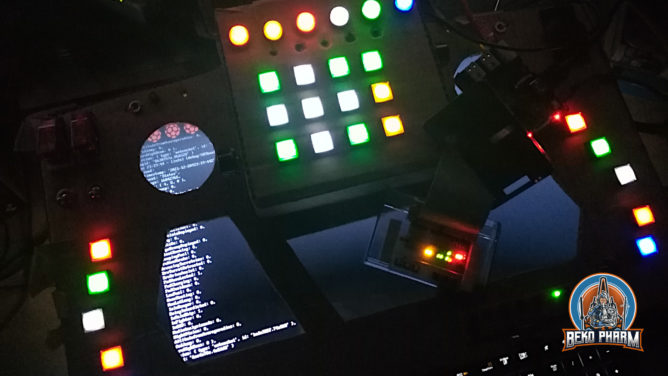
Some people asked me for details on how I used Node-RED to get some game status information of Elite Dangerous into my SimPit so here is a more cohesive write-up with a short demo video.
I was looking for a simple way to do this but all the programs I found online are closed source solutions that have to be bought and are – as usual – Windows only. Best it would get is Android support and requires a tablet with touch functions. Nothing of this I want! The idea is to use something system agnostic that can be adjusted easily, because I want to use this for different games and not depend on a single vendor, hoping support will last and the thing work with my setup.
This was when I remembered Node-RED from usage in home automation because this is basically the same. You get a zoo of hardware, that somehow all interacts with a dashboard. All the data is on the wire and can be accessed via a web-browser. Fun enough I wasn’t the first with this idea because when I started searching for “Node-RED for simpit usage” I stumbled over the YouTube channel of Jon Back (https://www.jonback.se/) who did exactly this before (and even also used cardboard for prototyping). Encouraging and big shout out for the pioneer work!
So after installing Node-RED on my Linux PC and on my Raspberry Pi I connected the two installations via Websockets. That’s basically just entering an IP. While using MQTT is probably a better solution this was the easiest one because it doesn’t need an additional service.
Why I installed it twice? Well Elite drops a lot of the current game status in various JSON files, like a timestamped Journal and a Status file that holds most of the ship data I’m interested in most. The file is updated on changes and it’s easy to watch for such a change on a local filesystem. I also intend to make the receiving side as dumb as possible so I don’t have to update the code too often. I’m still uncertain what I’ll use in the end – an Arduino is also in consideration. This way I can hopefully connect other games easily as well by keeping the resulting data structure more universal and let the sender to the hard work of hammering the data into shape.

Short explanation what’s going on: File Changes listens for changes in my ED folder where the JSON files are located. Switches check for the file name forward it to a file opener. This one reads the file (Journal line by line) and passes the data to a JSON parser. This one forwards the parsed JSON data to a function that creates the desired data structures. Finally it is send to the receiver.
Most of the magic for Elite Dangerous happens in the function that parses the Status.json file, which is explained in detail at https://elite-journal.readthedocs.io/en/latest/Status%20File
flags = msg.payload.Flags;
// https://elite-journal.readthedocs.io/en/latest/Status%20File/
[
    "DockedOnPad",
    "LandedOnSurface",
    "LandingGearDown",
    "ShieldsUp",
    "Supercruise",
    "FlightAssistOff",
    "HardpointsDeployed",
    "InWing",
    "LightsOn",
    "CargoScoopDeployed",
    "SilentRunning",
    "ScoopingFuel",
    "SrvHandbrake",
    "SrvusingTurretview",
    "SrvTurretRetracted",
    "SrvDriveAssist",
    "FsdMassLocked",
    "FsdCharging",
    "FsdCooldown",
    "LowFuel",
    "OverHeating",
    "HasLatLong",
    "IsInDanger",
    "BeingInterdicted",
    "InMainShip",
    "InFighter",
    "InSRV",
    "HudinAnalysismode",
    "NightVision",
    "AltitudefromAverageradius",
    "fsdJump",
    "srvHighBeam",
].forEach((value, key) => {
   msg.payload[value] = flags & 1;
   flags = flags >> 1;
});
return msg;
The receiving Node-RED process on the Raspberry Pi does something similar.
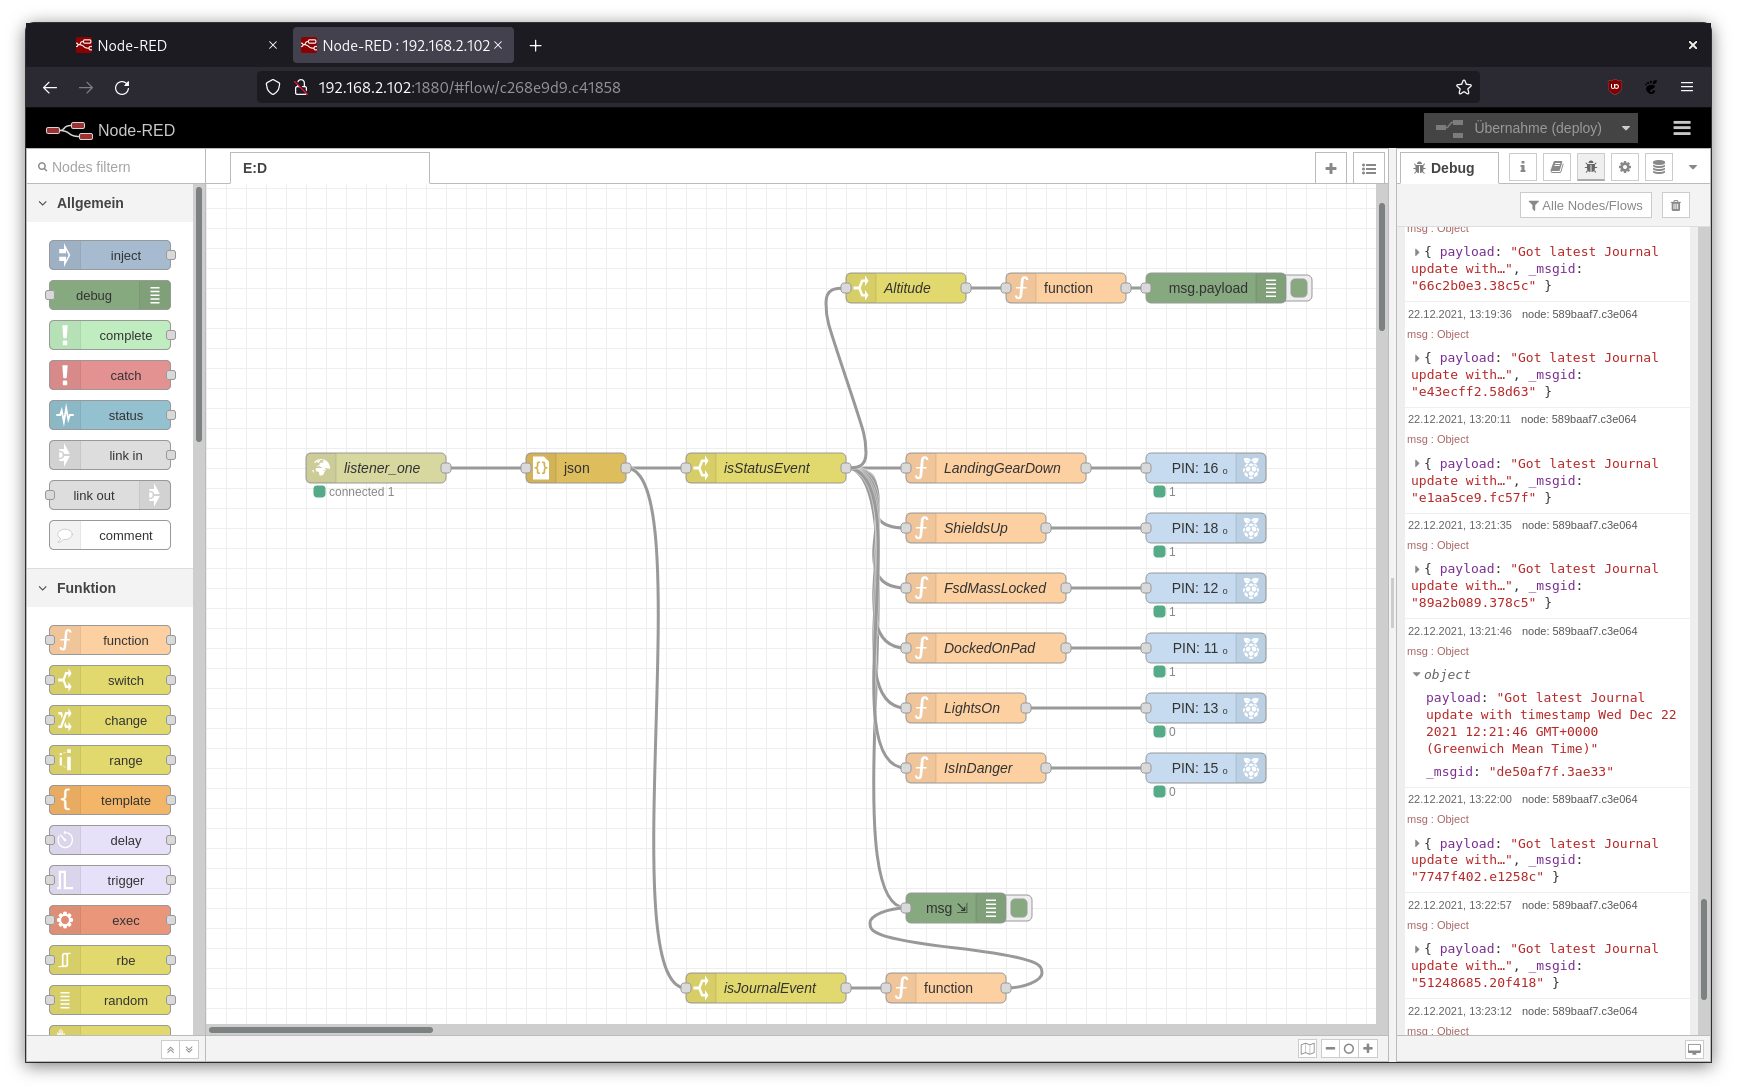
The received data is once more parsed as JSON and checked based on the event string what type of message it got. If a status event is found it’s forwarded as 0 or 1 to a GPIO where a LED will be enabled or disabled. See the short demo video of the Primary Buffer Panel in action:
This is a proof of concept so far so it uses only a tiny bit of the available information to drive some LED I have on my custom GPIO breakout board. I ordered an WS2811 LED strip that should arrive next week. This type is basically a long string of RGB LED that are individually addressable. This is done via one single data PIN that is forwarded from LED to LED so I don’t need many GPIOs and only have to keep an eye on the ampere. Basically endless status indicator (until one in the chain breaks for good but hey, it’s a toy and not a real spacecraft :P).
Will this work? No idea. The hardware is not yet here but I found various ways to drive a so called “neopixel” LED stripe so from my understanding it should just work 🙃

@bekopharmSweet! Love it. Nodered is awesome for this kind of tinkering.
This looks amazing.
This Article was mentioned on netz-rettung-recht.de