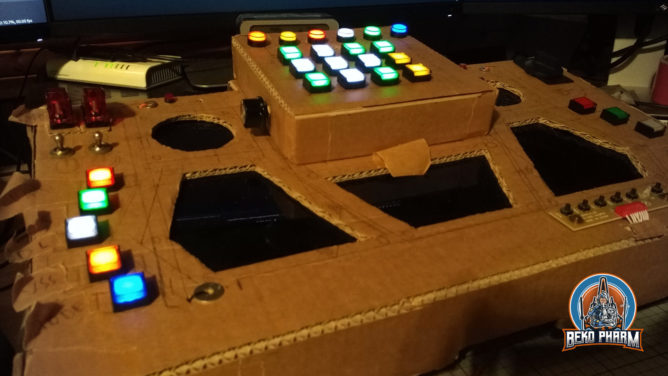
Didn’t have much time since the last update but I got plenty of new push buttons and switches connected. Shipment took weeks for some, which I don’t exactly mind since this is a low priority fun project, but I was still happy when everything finally arrived.
Made a grave mistake also when I jacked into the USB connector to get a read on how many mA I already need here and mixed up VCC and GND during the hot wiring. Good thing that the PCB I use has a fail-safe diode so it didn’t die on me. Phew, close one. I guess USB standards are good for something like this 😅 Anyway, I’m not even scratching the limits here yet so I’m good to go. I can also separate the powering of all LED from the controller any time by design and switch over to the 12V from the LCD panel and/or add a downstepper from that. The PSU for this I have under control. USB is limited and that has to be kept in mind.
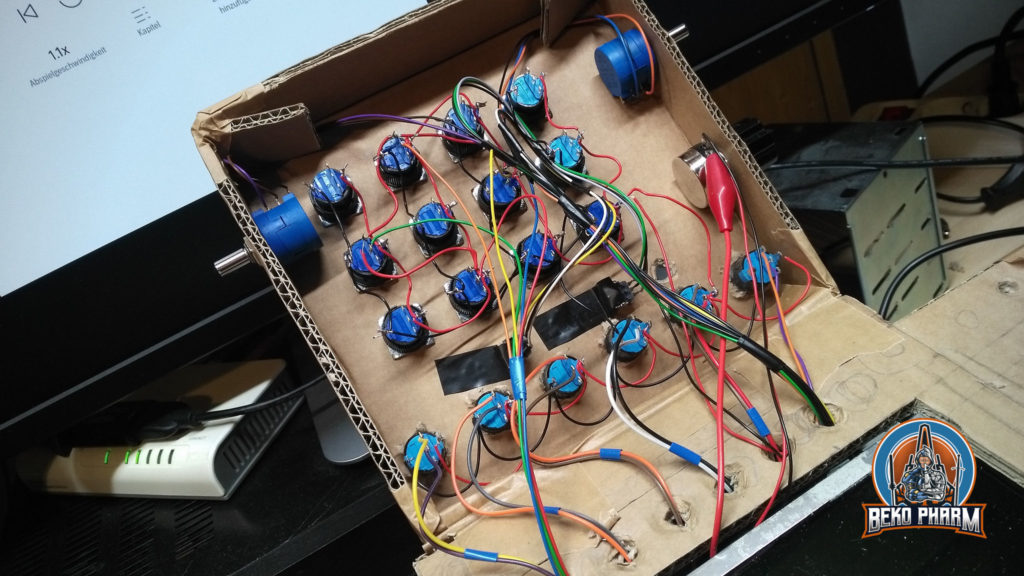
Spent most of the rest of the night wiring up a new cable tree for the potentiometers and connect most of the new LED. Got some switches with integrated LED and safety caps mostly for seeing if I like them. I do. So I added them. I’ll make them light up when OFF because I’m going to use them for fire and forget functions like launching a missile or activating self destruct at some point in the future.
Speaking of LED, I got myself a decent LED light bar hanging over my desk so I can finally _see_ the stuff I’m working on. For the first time I was able to identify + and – on the components without the use of a magnifying glass. That’s really a huge improvement.
My soldering skills also improved. I’m still fighting with a way too huge tip on the soldering iron, because it’s the best I have, with temperature all over the place, but I’m slowly getting the hang of it again. Burnt myself only once yesterday too 🤣
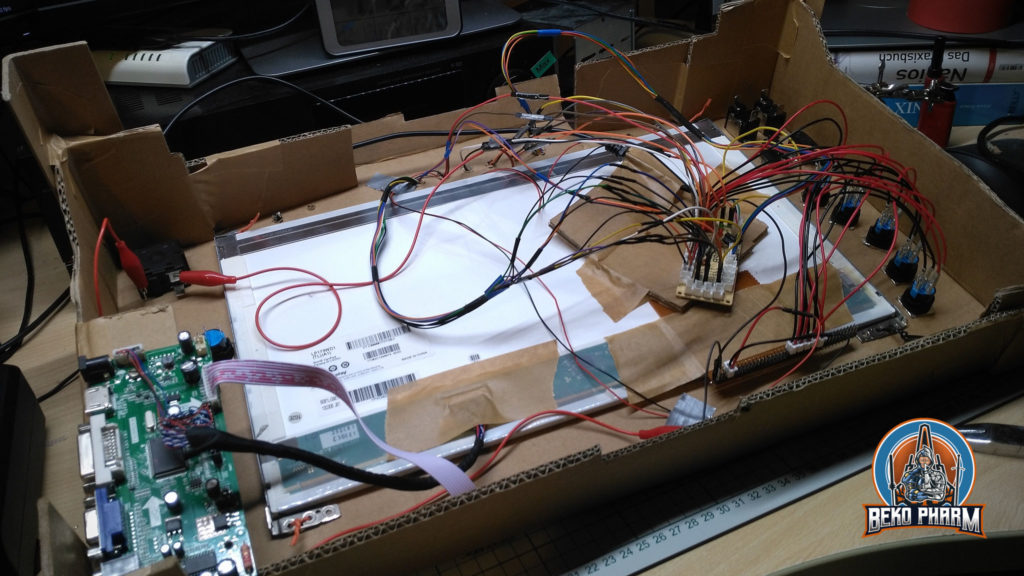
The cable job looks like made from a madman. Trying to keep components grouped by type because stuff is still changing position here and there. Worked out okay for me so far. It’s very tedious work to connect all the tiny wires on the fly and it’s getting really crowded in there.
I’m also totally out of options to connect further joystick buttons. The tiny PCB I used so far is saturated so it’s probably time to switch to an Arduino or similar where I can read many more inputs. This brings me to another topic. First of I need some sort of de-bounce logic because a lot of the push buttons are very flimsy and should not trigger multiple times when pushed once. This can be easily done in software but that takes up program space. A circuit for hardware de-bounce (or filtering) isn’t that complex but requires additional components and this is where I really don’t want free flying parts inside the Primary Buffer Panel any more so I guess it’s also time to start making some own PCBs (and try that Aisler manufacturer this time).
The Arduino has also another very good argument to offer: Controlling status LED. At the moment all buttons simply glow but they can not be individually addressed. What can be individually addressed tho is a WS2811 or WS2812 LED stripe. This is basically one long string of LED that forward a data wire so I can power the whole thing with my regular VCC for all the lights and control the data lane with an IC like the Arduino. I found an older type that does not come as SMD but with “real” round LED that can be put on a panel more easily. It’s also RGB 🙋 There is only one drawback: If one LED gives up it usually dooms all the others following from operating until it is replaced. The stripe comes with 50pcs tho so I’ll have plenty as backup. Best of it: This solution is dirty cheap and occupies only one of the valuable pins before I have to go for an additional multiplexer. Not that such an IC is expensive but it adds another part to the free flying mix that is already going on.
Oh yeah, and I could finally put my rotary encoder to use too.

[…] The Arduino has also another very good argument to offer: Controlling status LED. At the moment all buttons simply glow but they can not be individually addressed. What can be individually addressed tho is a WS2811 or WS2812 LED stripe. This is basically one long string of LED that forward a data wire so I can power the whole thing with my regular VCC for all the lights and control the data lane with an IC like the Arduino. I found an older type that does not come as SMD but with “real” round LED that can be put on a panel more easily. It’s also RGB � There is only one drawback: If one LED gives up it usually dooms all the others following from operating until it is replaced. The stripe comes with 50pcs tho so I’ll have plenty as backup. Best of it: This solution is dirty cheap and occupies only one of the valuable pins before I have to go for an additional multiplexer. Not that such an IC is expensive but it adds another part to the free flying mix that is already going on. […]